Use WAF to protect Web Application with Azure Front Door

When you run an application on the internet, it will be attacked. SQL injection attacks, cross-site scripting attacks, and every other attack in the OWASP top 10 and beyond will be launched against your website.
You must protect your application against these attacks, which you can do with Azure Web Application Firewall
and Azure Front Door.
To continue with this hands-on-labs, you need two web applications running in different regions and Azure Front Door, redirecting traffic to these web application. To provision web application and configure Azure Front Door, you can visit this article –
Once, you have Azure Front Door and Web Applications are ready, we will configure Azure Front Door to protect our web applications using Web Application Firewall.
Any web application could face cyber attack such as cross-site-scripting and SQL injection.
Web Application Firewall (WAF) can protect your web application against attacks. Let's create one for our Azure Front Door to protect our web application.
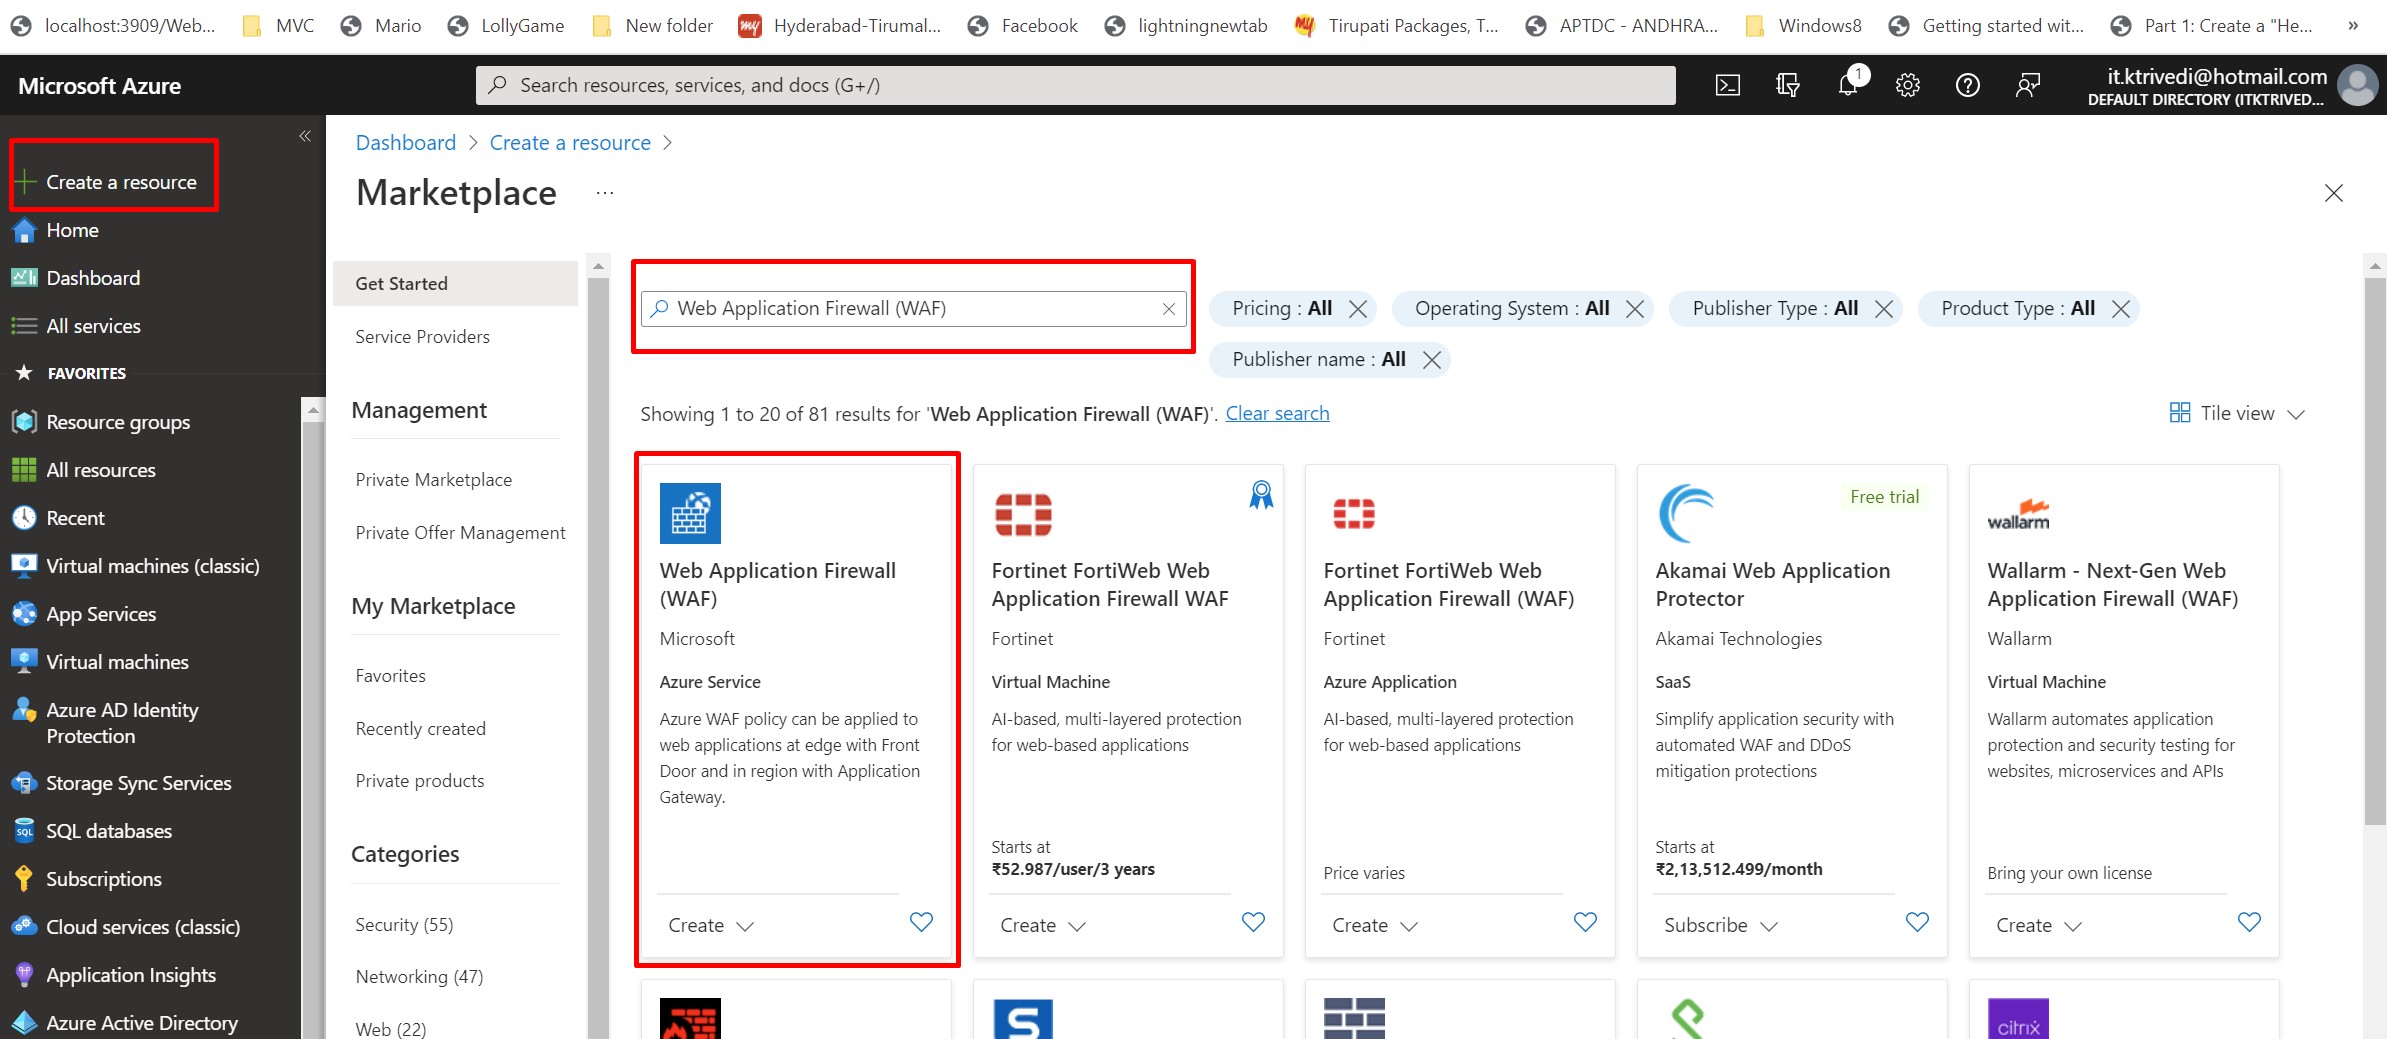
In the Azure Portal, Click on Create Resource and search for Web Application Firewall and click on Web Application Firewall.
Now. Here For the Policy For select Global WAF(Front Door). You can see, we have Local WAF option is available for Application Gateway.Select Front Door tier as premium. Create the new Resource
Group. Next, provide the Policy Name and select policy Mode as Prevention. This will block attacks, rather than just detect and log them.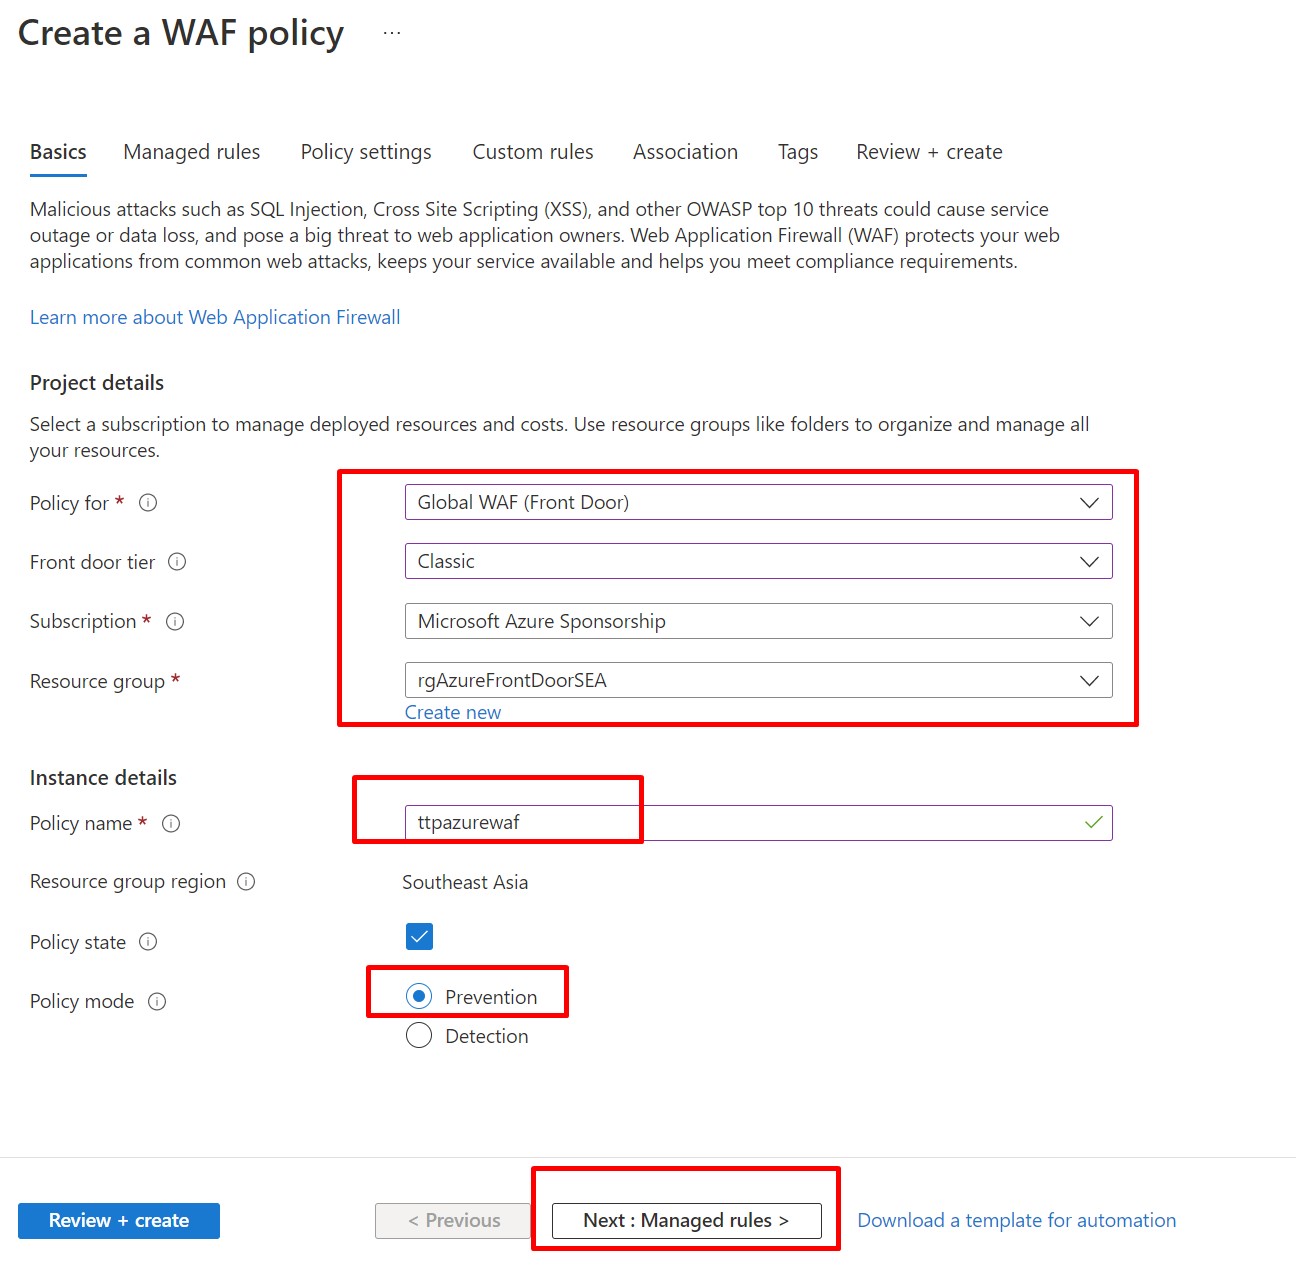
Next, click on Managed Rules. Review the rules that are enabled by default. You can enable more, but you don't have to. We are not going to modify anything for Policy setting.
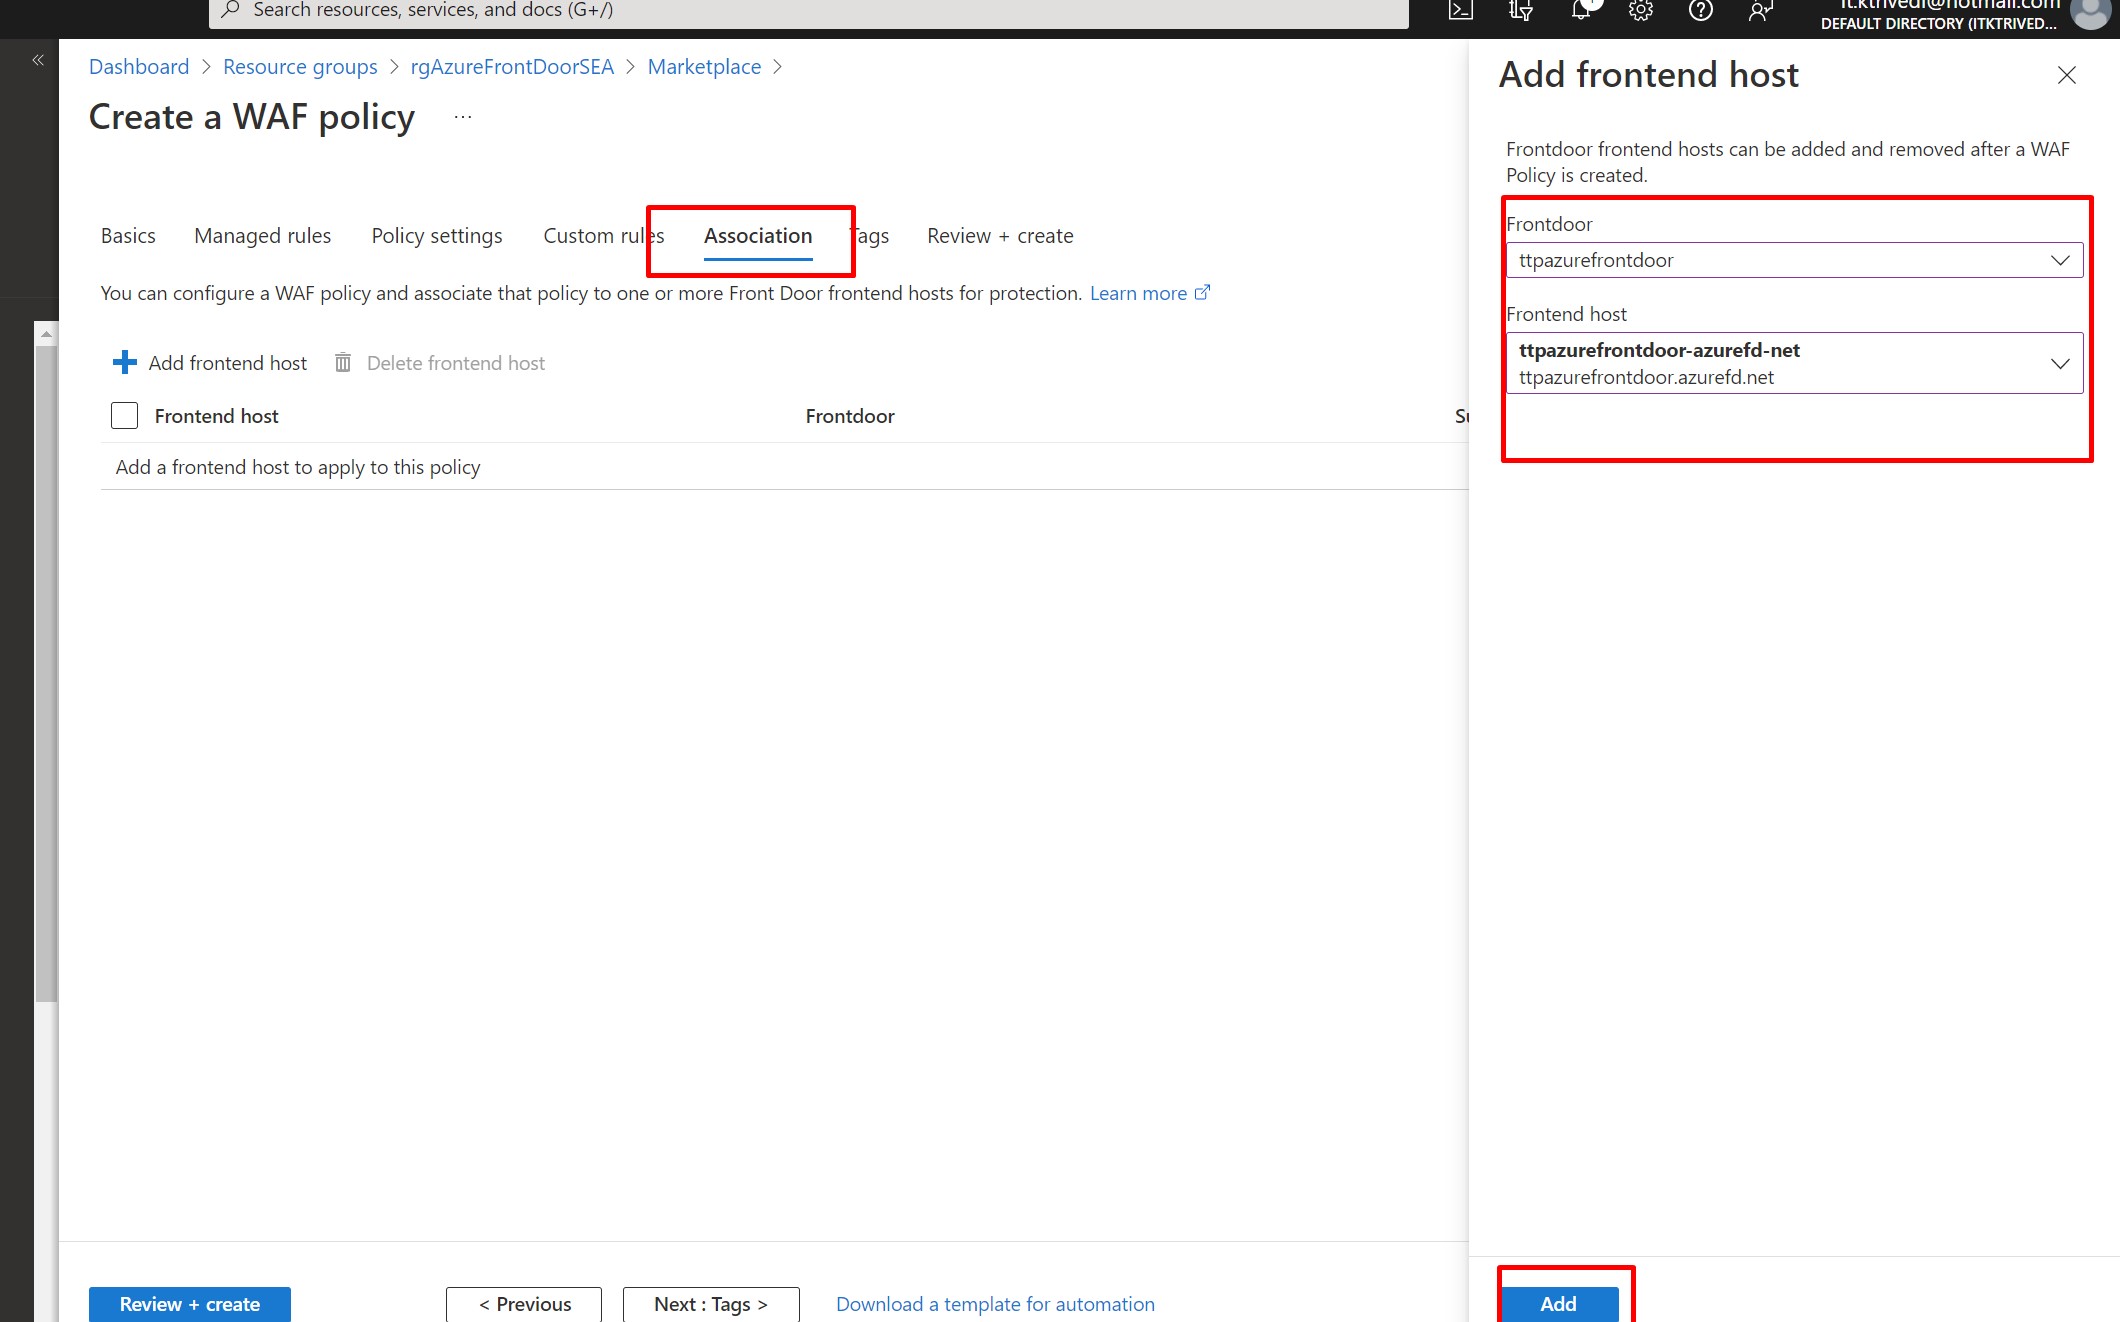
We can create custom rule, but we will skip it for now. Next go to Association and Add Frontend Host
Finally Click on Review + Create and Create. his will create the WAF and enable it for the Azure Front Door that we selected.
That's it! The web application is now protected by the Web Application Firewall.