Topics – Something More to the Azure Service Bus

Brushing Up The Basics With Azure Service Bus Queue
You can use Azure Service Bus Queues when you want to decouple your applications and have them become more scalable and available.
The applications send messages to an Azure Service Bus Queue and the messages just stay there until they are either deleted or get expired.
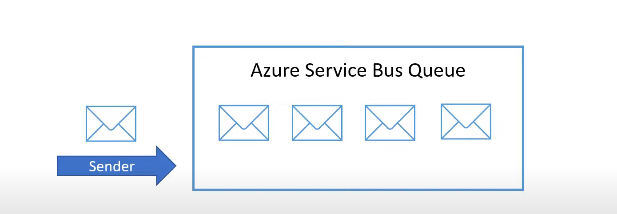
Similarly, receiving applications read and delete messages from the queue and process them in their own time. Let us see how this works.

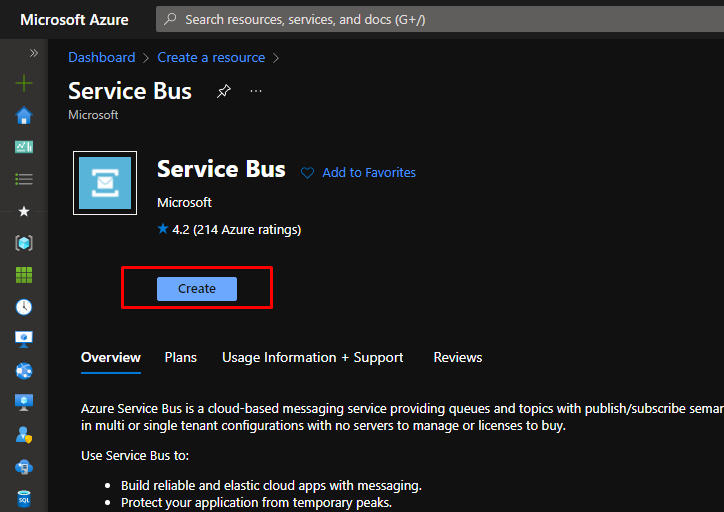
In the Azure Portal, search for Azure Service Bus. Creating this will create a new namespace in the service bus.
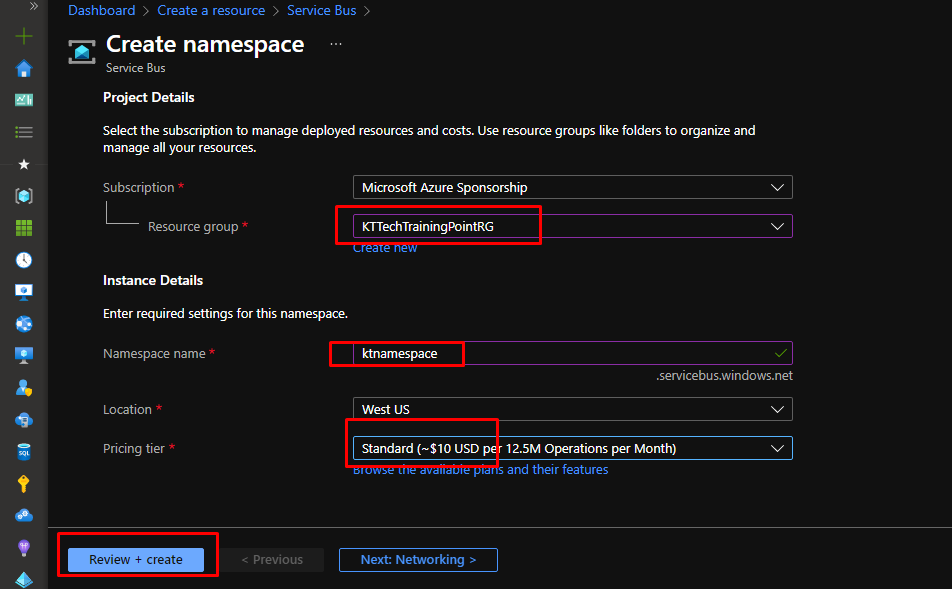
Put the namespace in a resource group. Give your namespace a name. For this demo, Standard pricing tier is good. Click Review + Create and then click create,
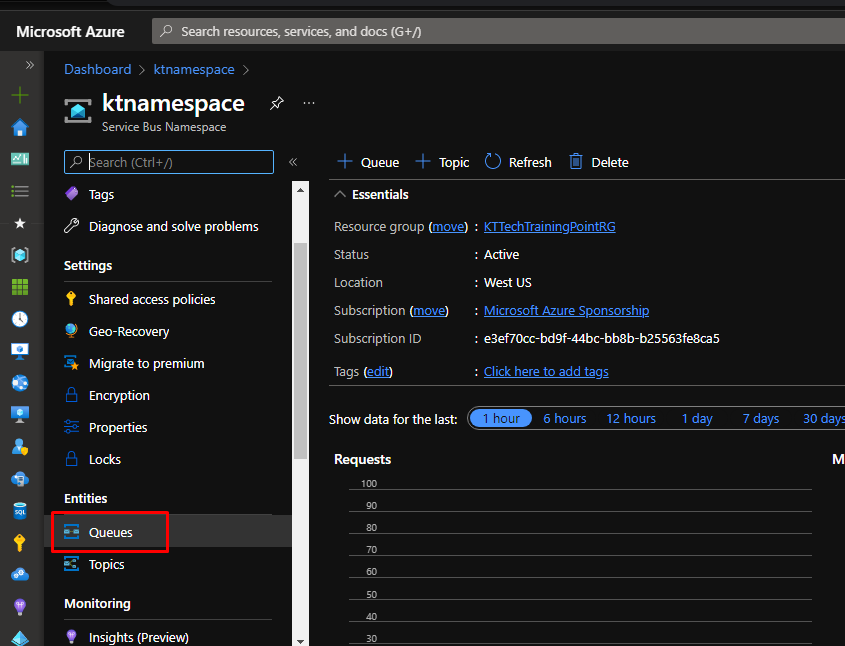
Once your namespace gets created, you will see that you can have queues and topics in it. Go to queues.
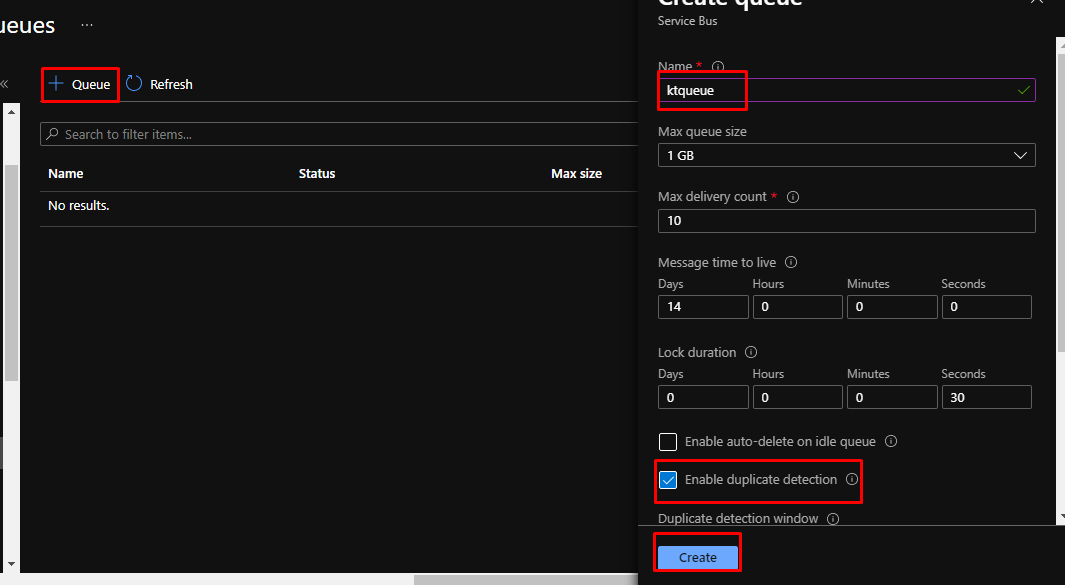
Since there won’t be any queue present in the namespace, create a new queue. Give it a name and enable duplicate detection. Click create.
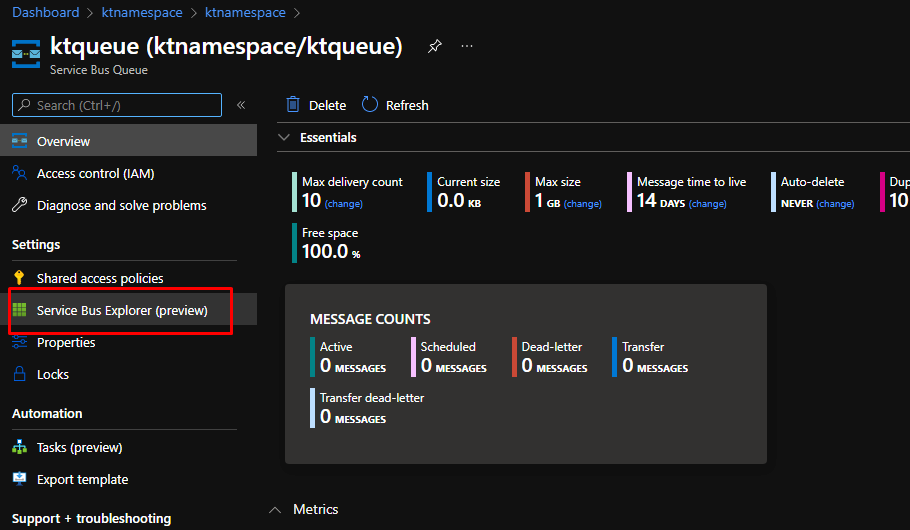
Once the queue gets created, to test the queue, go to the Service Bus Explorer.
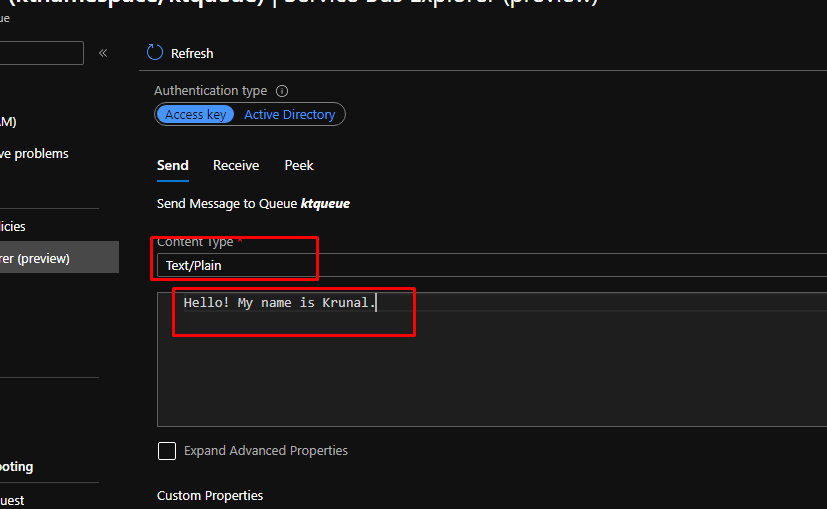
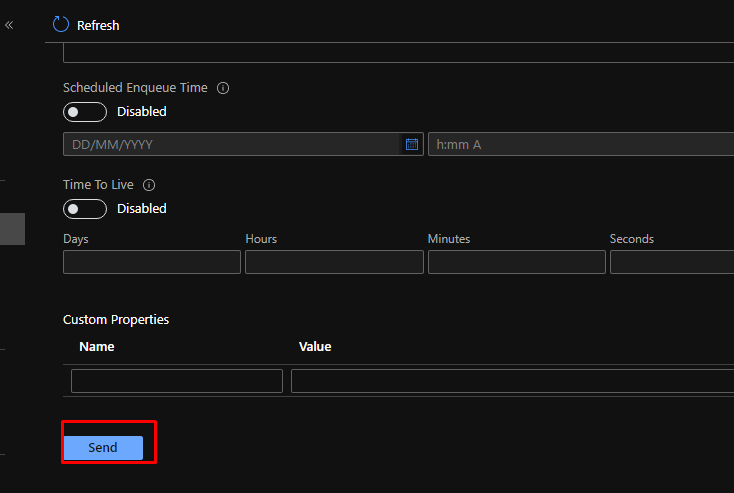
Choose the content type as plain text and type in a some text.
You can also enable advanced properties through which you can pass key-value arguments. Here, in the label, add greeting.
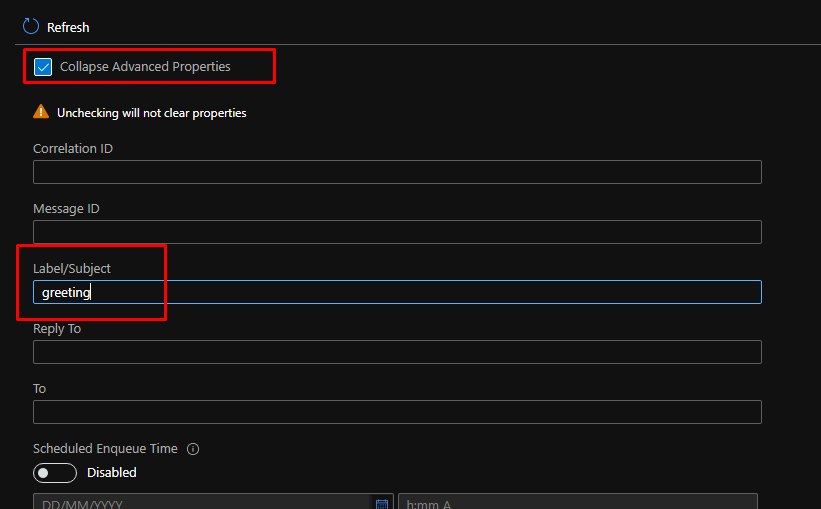
And finally click send to the send the message.
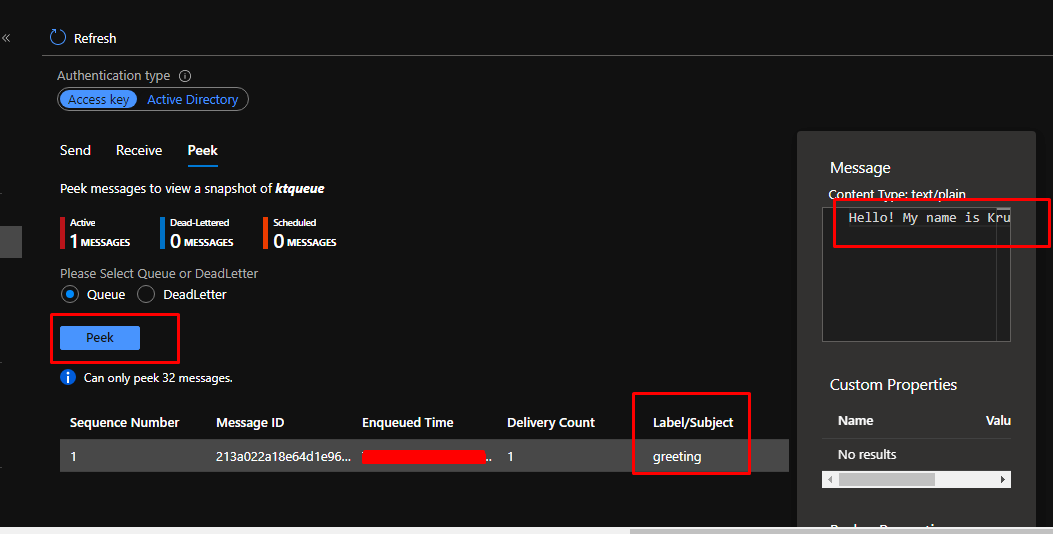
If you go to peek, you will see that the message is in the queue. It will stay there until it is deleted or gets expired.
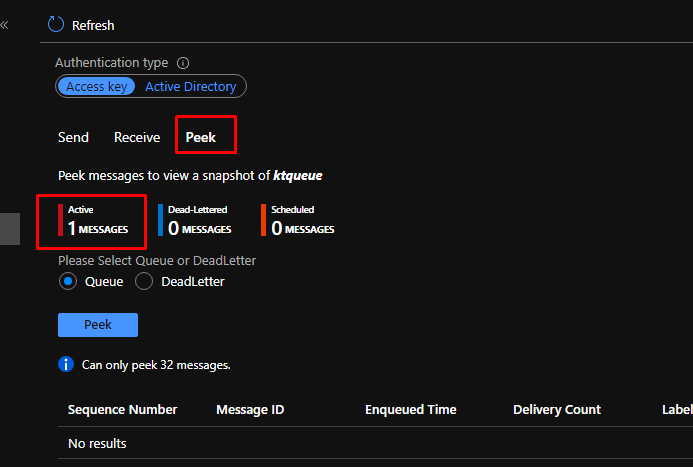
You can also peek the message. Note that peeking the message wouldn’t delete the message. Next, let us receive the message.
When you click on receive, you will see that it will prompt you that it is a destructive receive, meaning it will delete the message once received. Click Yes.
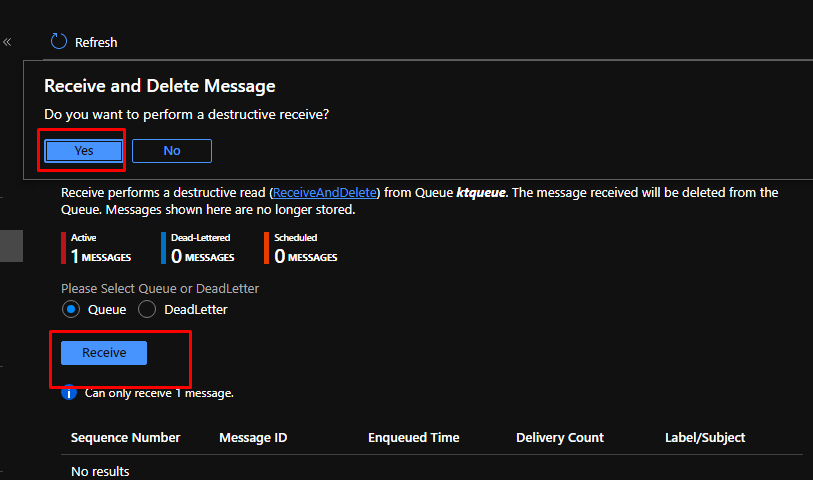
And that is it. Once you message is received, it will not be in the queue anymore.

Once again, you can use Azure Service Bus Queues when you want to decouple any part of your application and solution to make it more scalable as well as available.
Something More to the Azure Service Bus
In this article, we are adding to that by learning how to work with Azure Service Bus Topics.
Basically, you can use Azure Service Bus Topics to create a solution that uses publish and subscribe to decouple components.
Various applications such as mobile applications and APIs send messages to Azure Service Bus Topics with a varied number of subjects.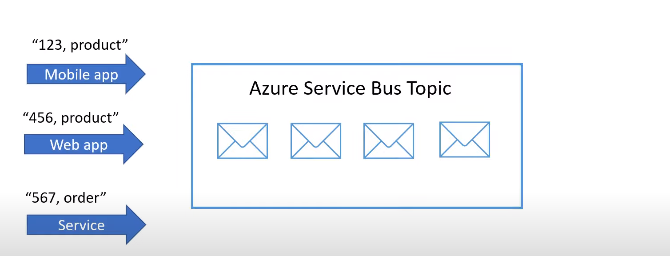
The backend applications then in turn subscribe to message topics and then are able to read and delete messages.
This entire process decouples the application components to eventually make them more available and scalable.
Now, let us go ahead and see the step by step demo.
Please note that I have already created a service bus namespace in the previous demo which I am going to use for this one as well.
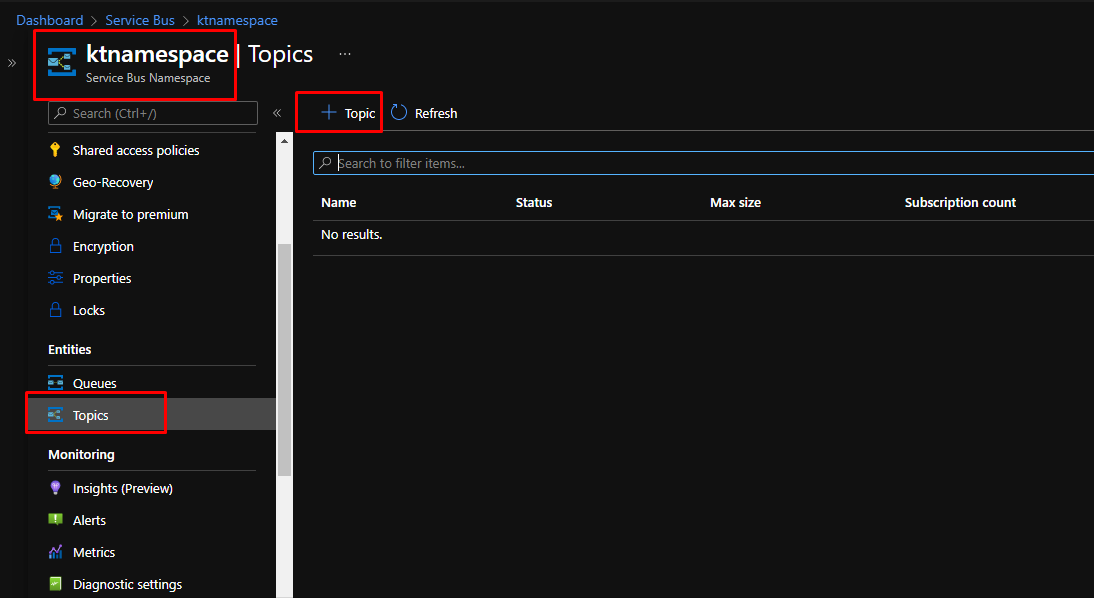
So, in my existing Service Bus Namespace, you can see that I don’t have any topics. So, I am going to create a new topic here.
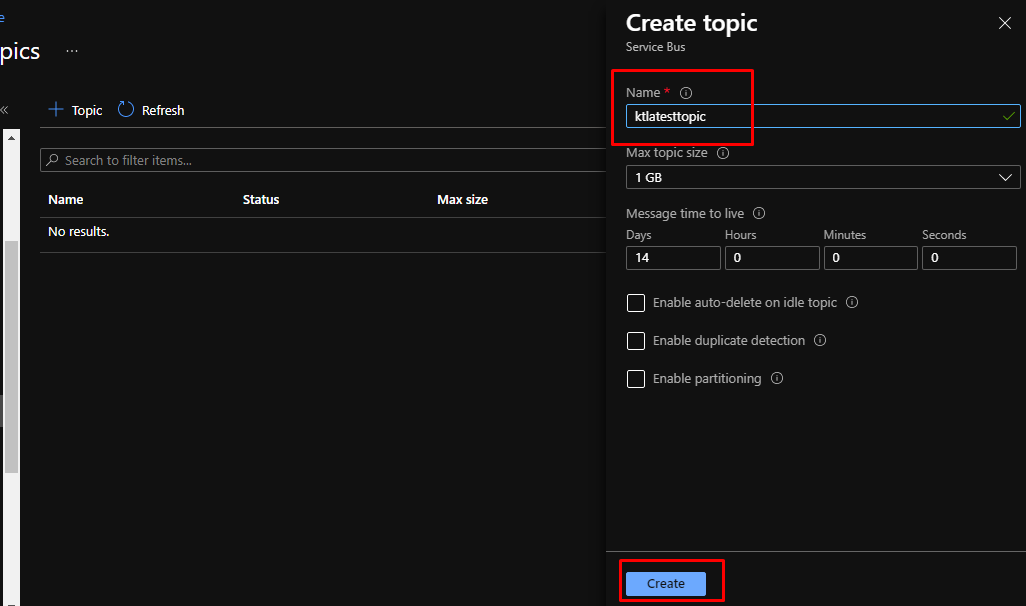
Give the topic a name and leave everything else as it is. Then click Create.
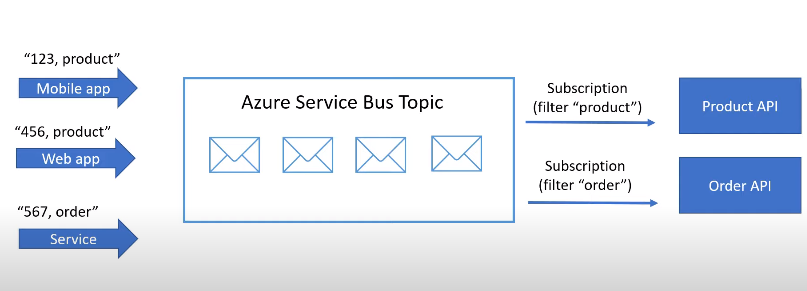
Once the topic gets created, go to it. A topic can have one or more subscriptions that receive messages which they eventually filter out. Right now, we don’t have any subscription. So, let’s go ahead and create some.

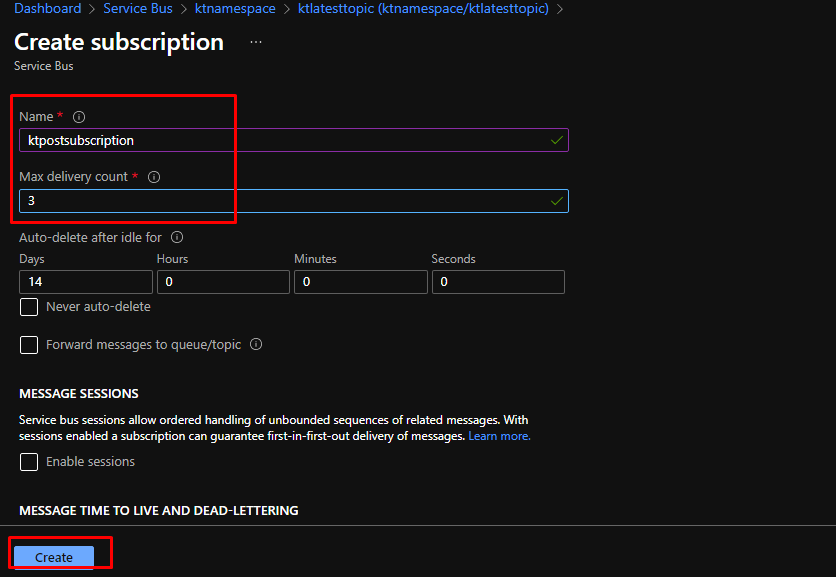
Go to subscriptions and create a new one.

Give the subscription a name. The delivery count here is the number of times a message can be read before it gets deleted. Click create.
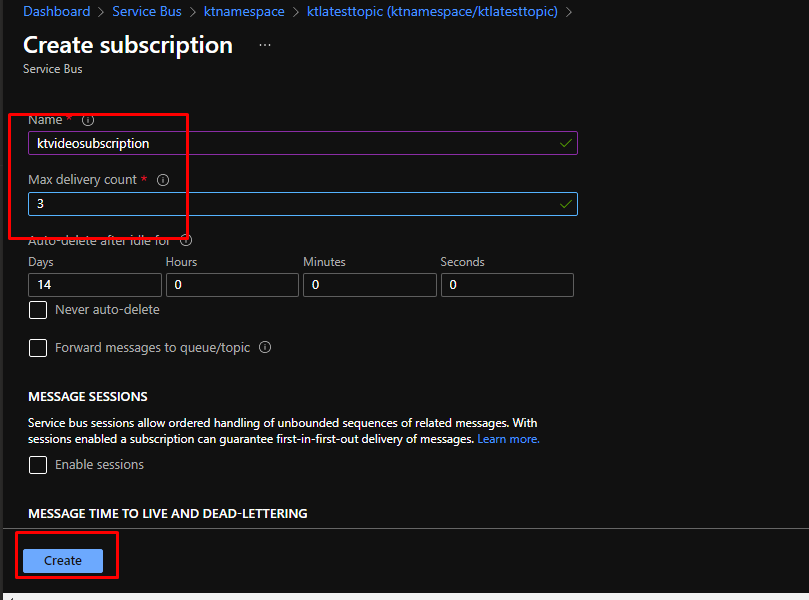
Create one subscription with a different name because this is going to receive a different kind of messages.
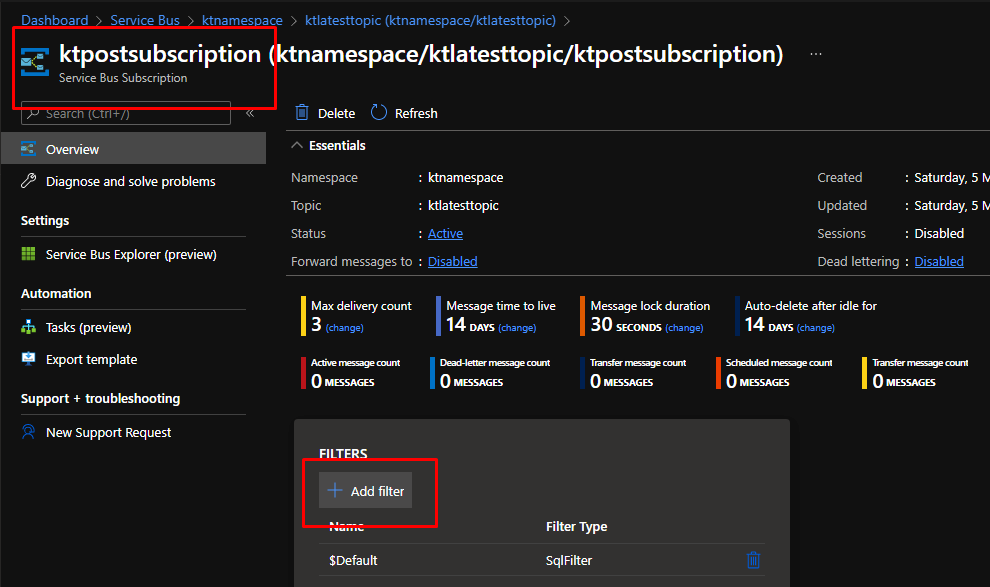
However, out subscriptions still don’t have filter using which they can filter out messages.
Each subscription has filters using which they determine which messages they are going to receive.
Let’s go ahead and create those.
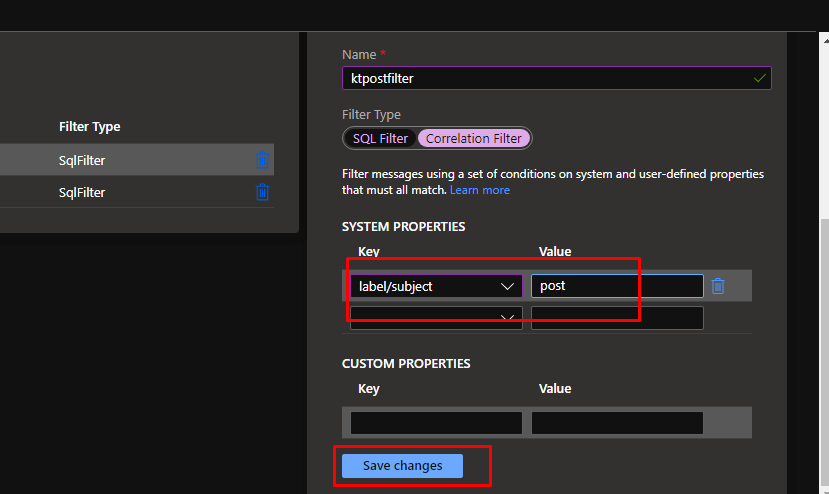
Go to the post subscription and create a new filter.
Give it a name. Now you can see that to filter out the messages, you can either use an SQL like language or you can use correlation filter where you filter out the messages based on properties like label.
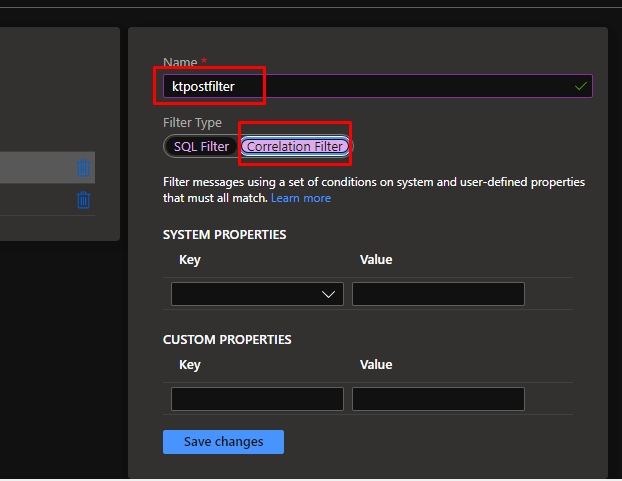
Add a system properties called label which will filter out on the value post. Save changes.
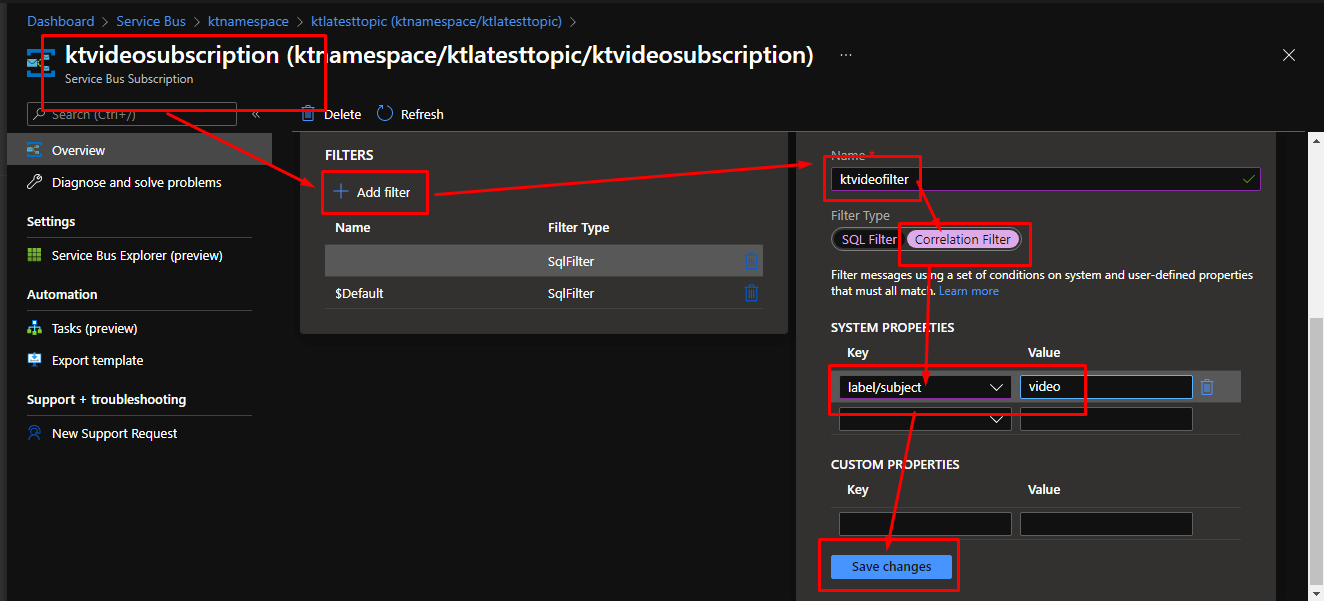
Similarly, create a filter in the second subscription as well.
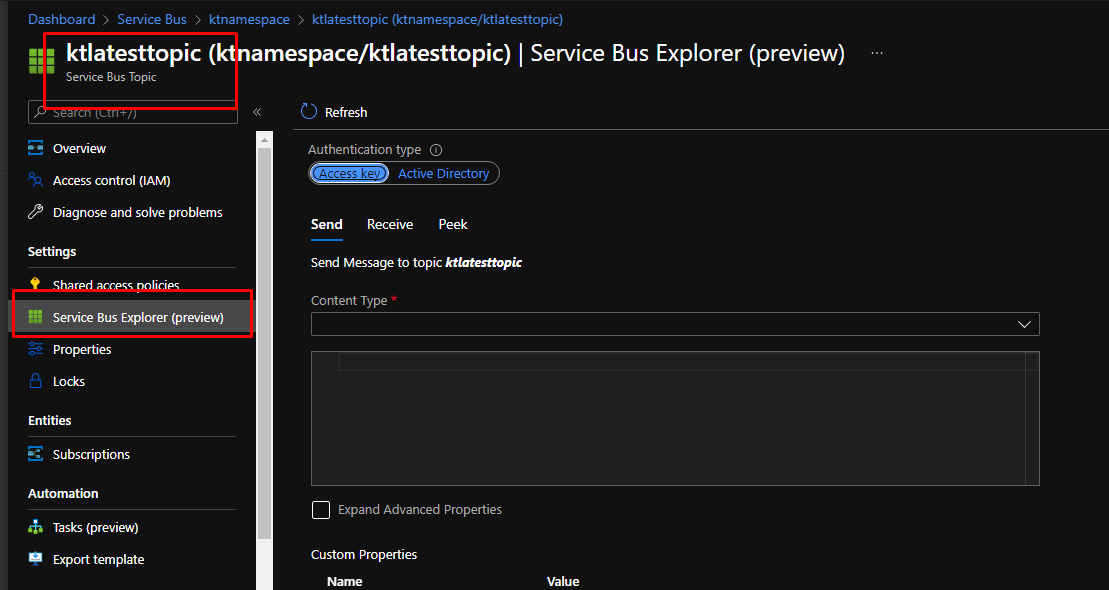
Now let us test this and see how it works. Go to the service bus topic and go to Service Bus Explorer.
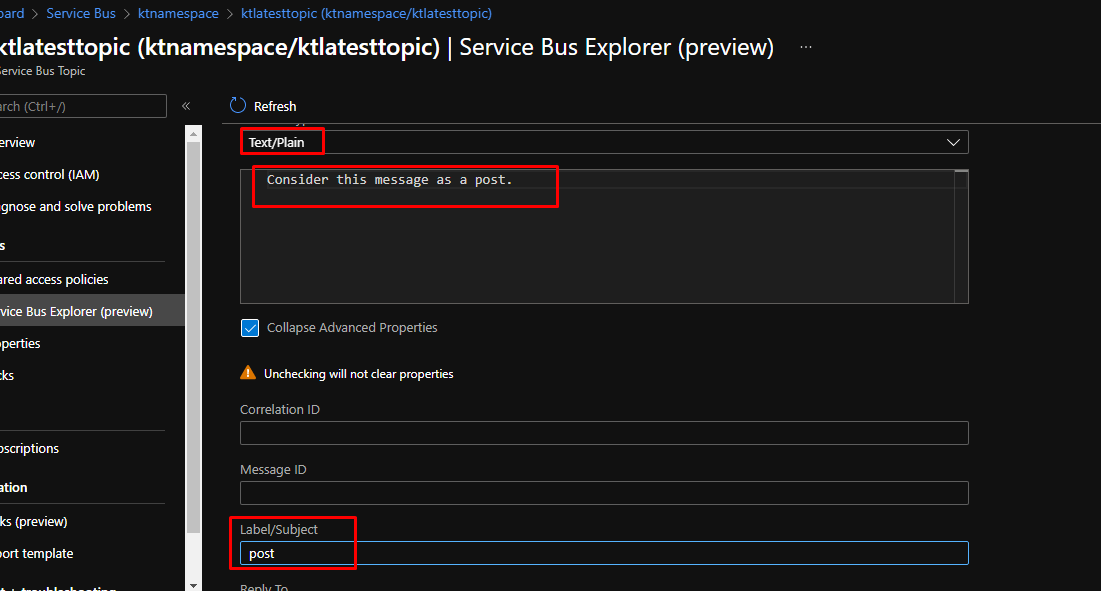
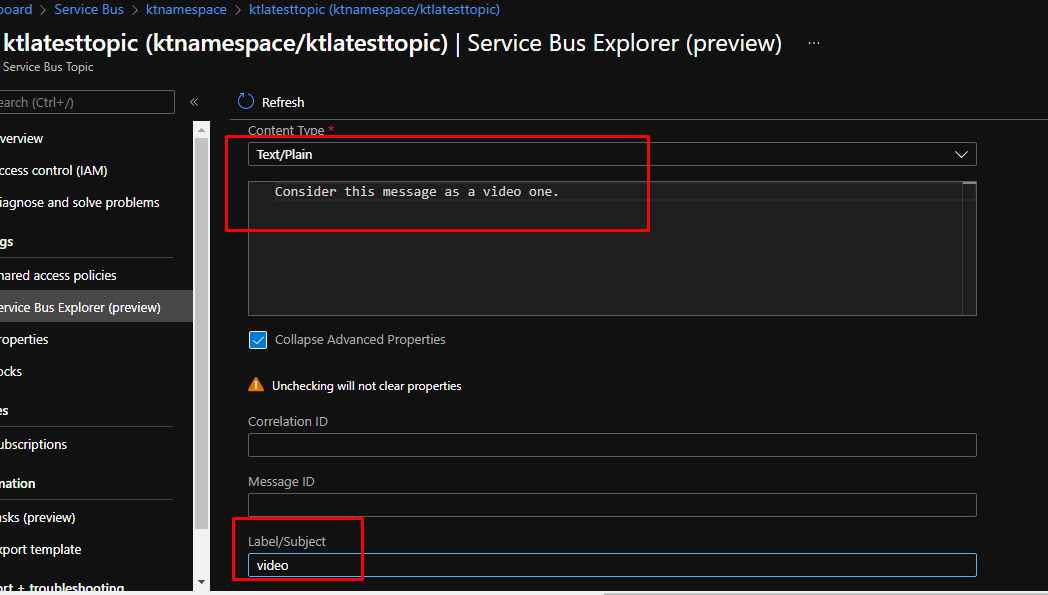
Add a plain text message and choose the label as post.

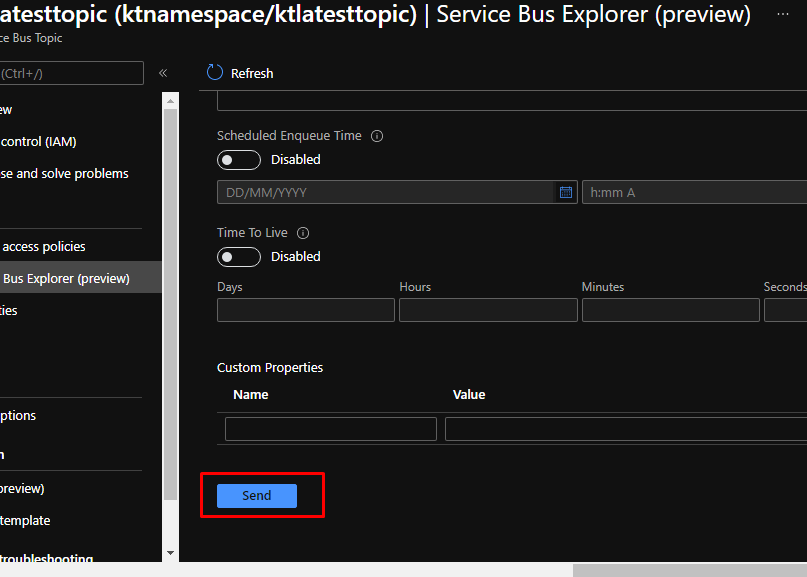
Leave everything else as it is and click send.
Similarly, send another message for the video label.
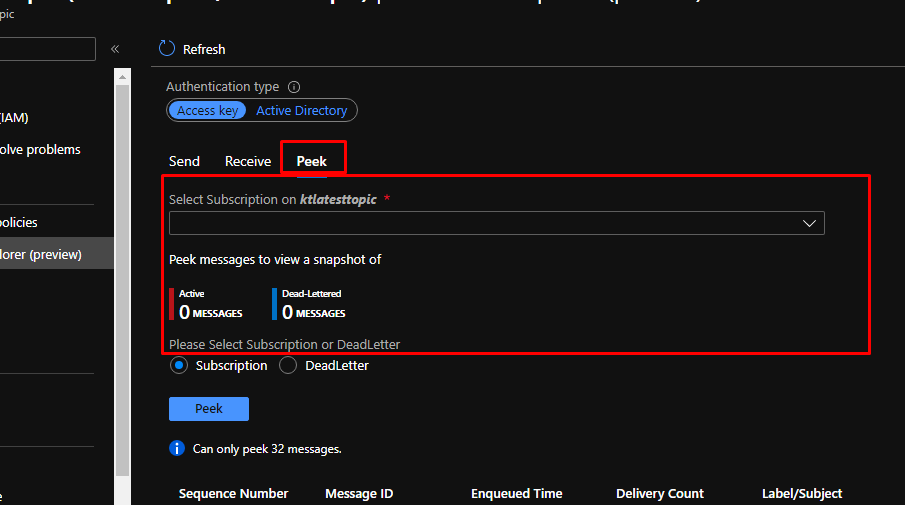
Understand that all the messages on the topic stay there until they are deleted or expired. You can also peek at them which then comes down to the topics.
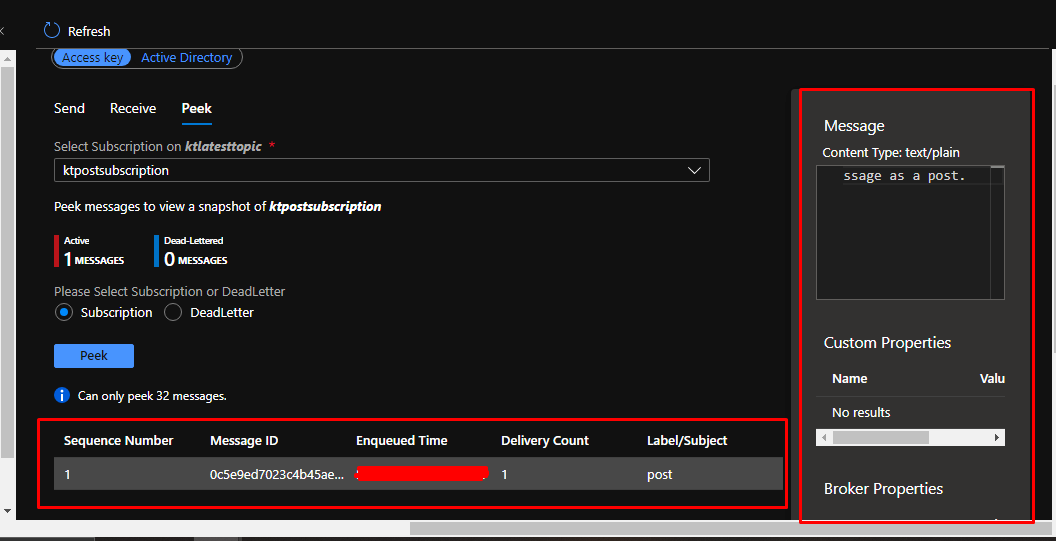
In the peek section as you can see, there will be 0 active messages shown. That is because we haven’t chosen any subscription yet.
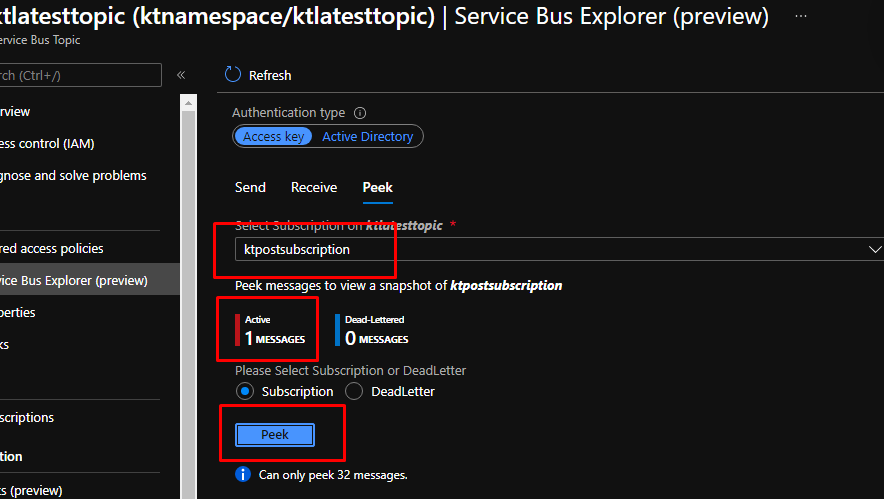
Choose the post subscription and you will see that there will be one message active. Click peek.
You will be able to peek at the message easily. Now, let us go ahead and receive a message.
Now go to receive and select the video subscription. Here you will see that there is 1 active message.
Now click receive. You will see that it will do receive and delete the message.

Now click receive. You will see that it will do receive and delete the message
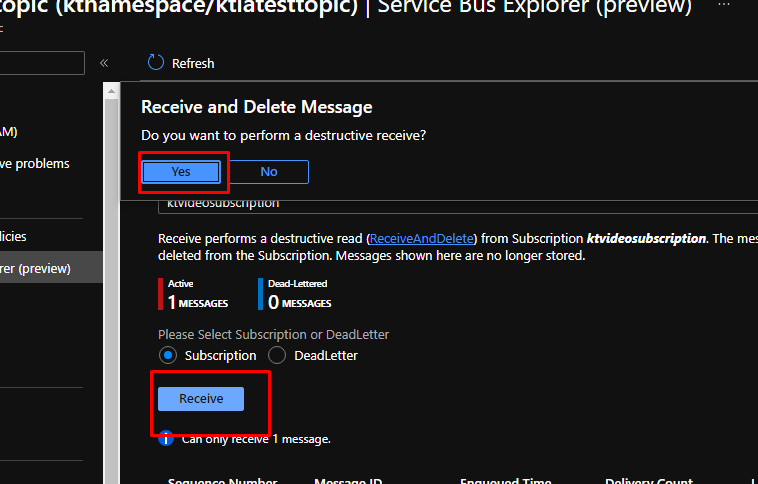
You will be able to see the message and then there will be no active message available.

That is it for this demo. Go ahead and try out this demo yourself!