The magic of Azure API Management right from VS Code

Usually, you work with Azure API Management through the Azure Portal.
But now there is a new Visual Studio Code extension where you can do all the magic.
The extension lets you do everything, straight from your development environment.
Alright, so, let’s dive right into the step by step demo.
Go to Visual Studio Code Extensions and search for Azure API Management. Install the extension.

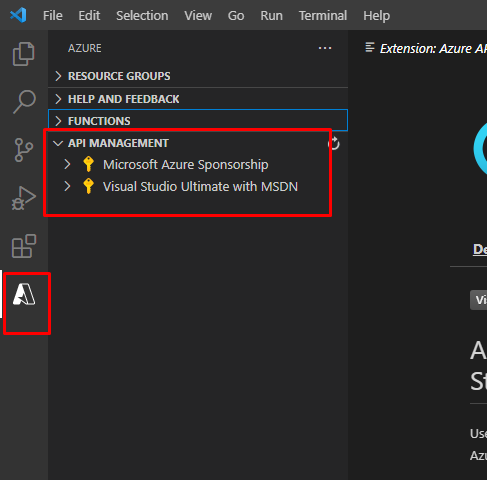
Once it gets installed, go to the extensions tab. You will find the API management extension there. Here you can see that I have Azure functions extension enabled as well. Also, once you install the extension, you need to sign in to Azure. I am already signed in here.
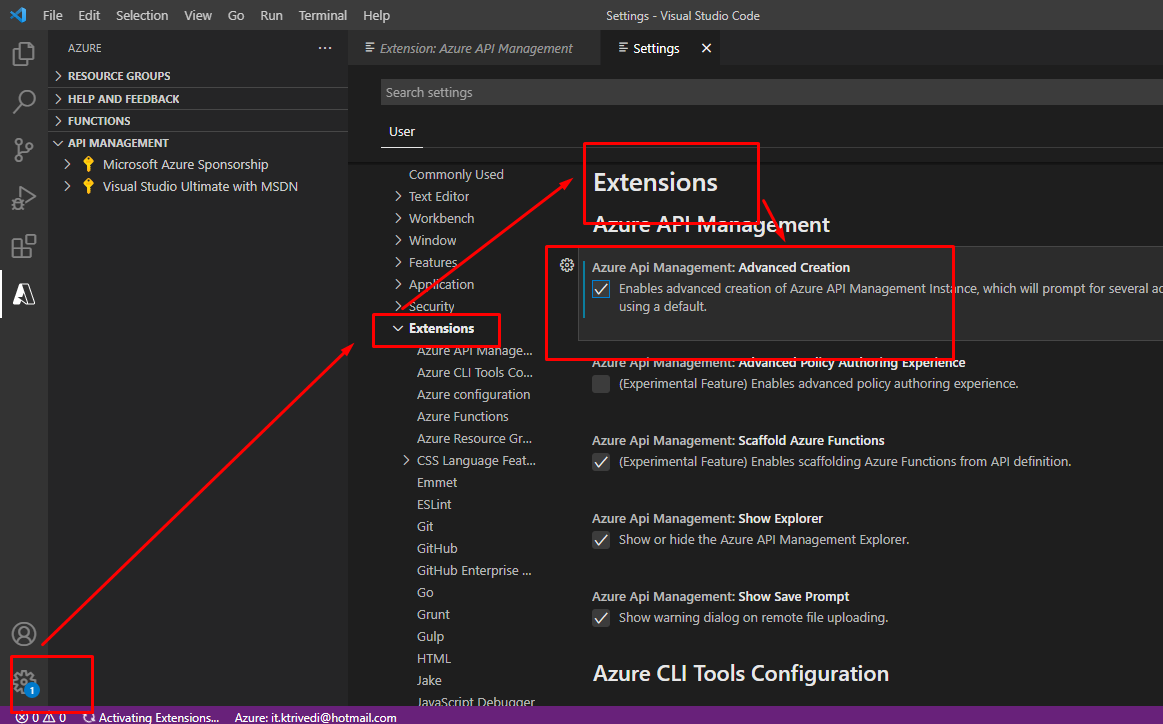
Now the thing is, by default, the extension will only ask for an instance name. However, we can customize the creation process even more.
Go to settings -> Extensions and enable the advanced creation option.
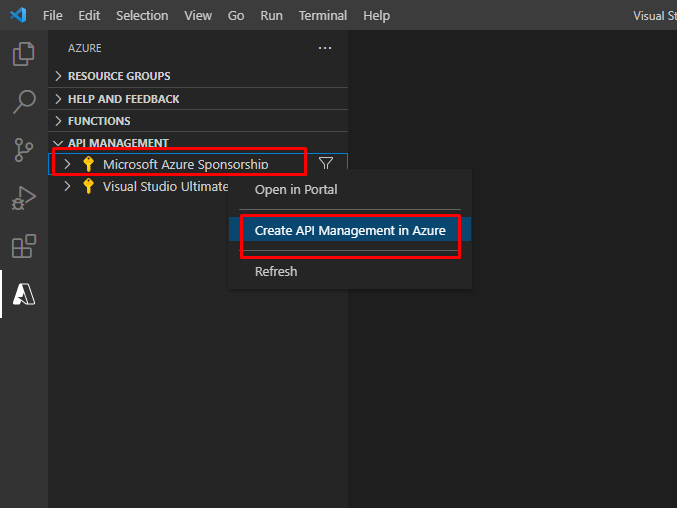
Back to the extensions tab, right click on your subscription name and click create API management in Azure.
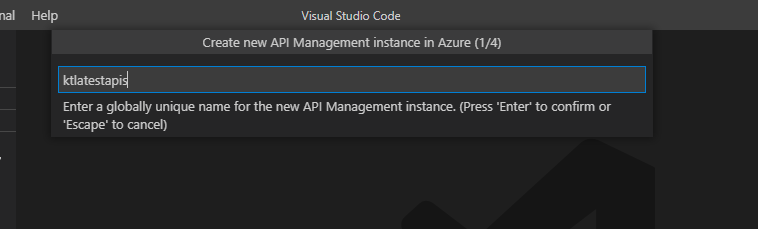
Give your instance a unique name.
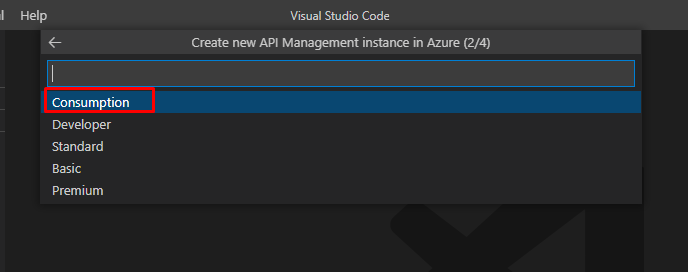
Choose a tier for your instance. Here we are going to choose Consumption plan which is serverless.
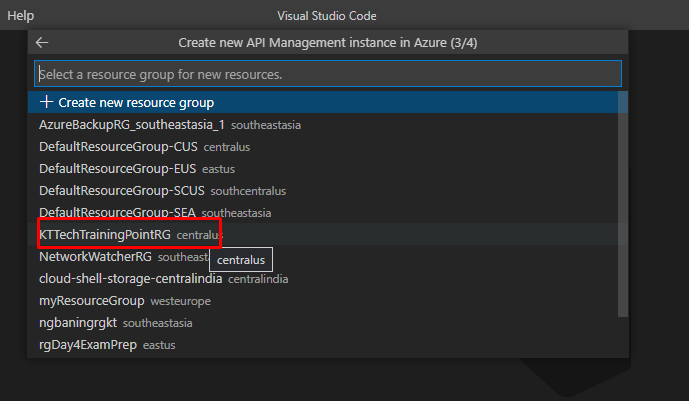
Next, choose a resource group or create a new one
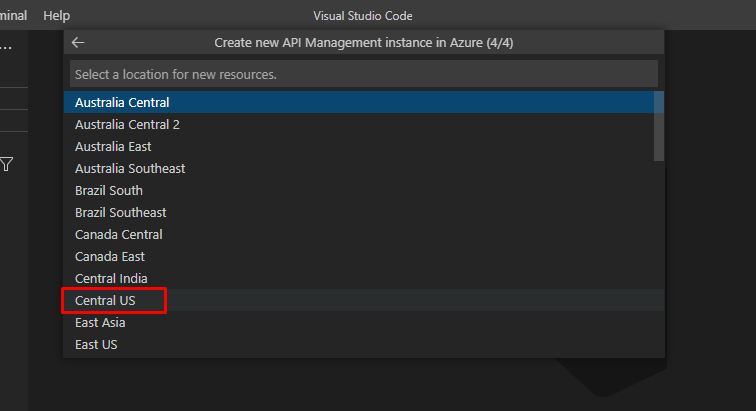
And finally choose a location for the same.
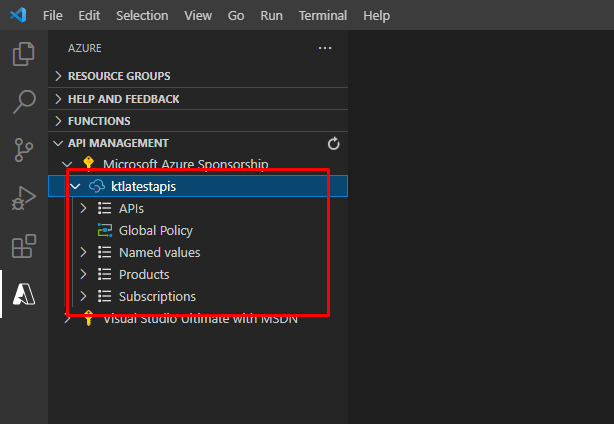
You will be able to see your API management instance which you can use to create API facades that your customers can use.
You should know that you have the full control of the API and also of how users are going to use it.
Everything is in your control, like how many calls are going to be made and so on and so forth.
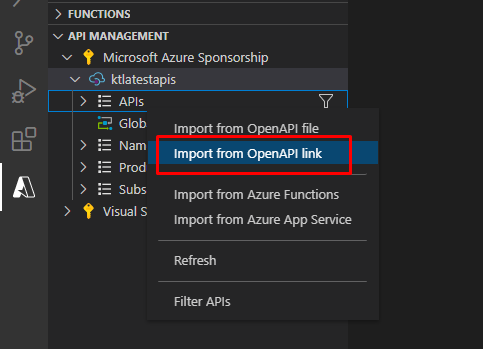
Let’s go ahead and import an API.
There are several ways you can import an API. From an OpenAPI file, from a link, Azure Functions or Azure App Services. Here we are going to import a sample from the OpenAPI link.
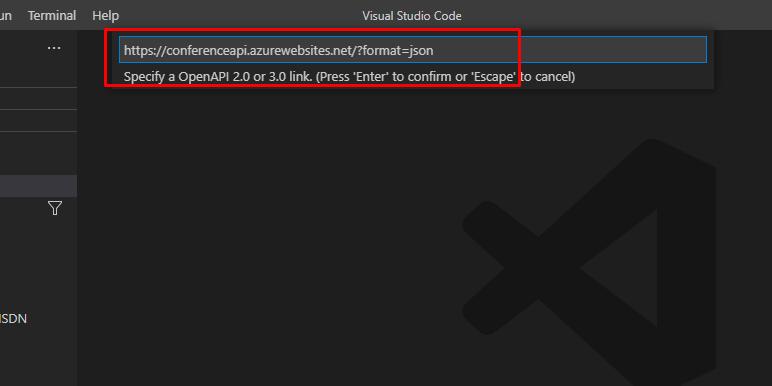
We are going to use this link to import the API. https://conferenceapi.azurewebsites.net/?format=json
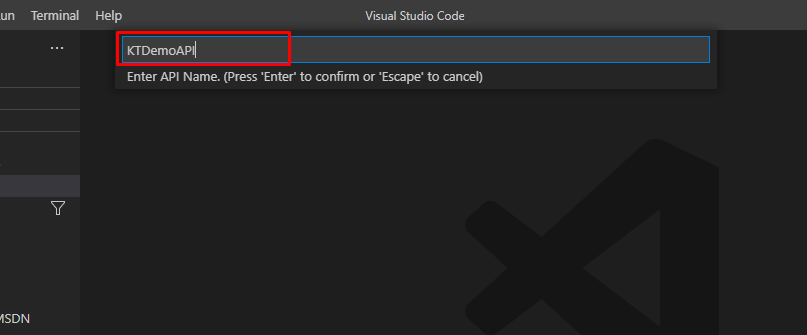
Give your façade a name.
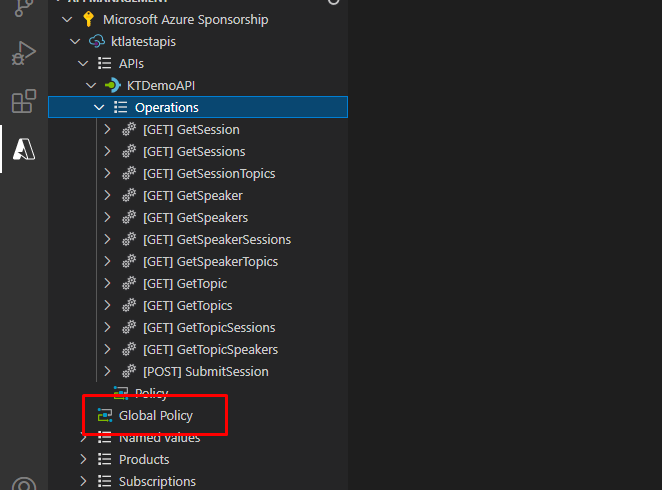
Once the API gets imported, you will be able to see the operations and the policies that fall under the API.
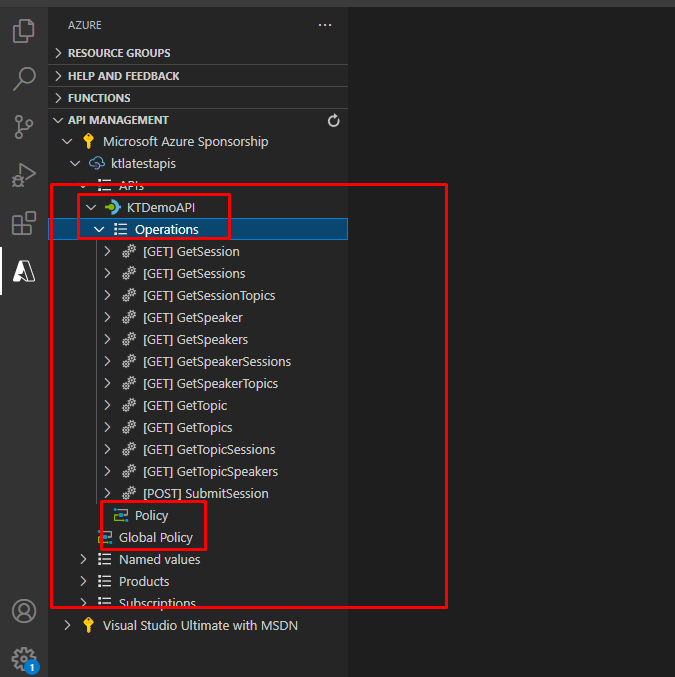
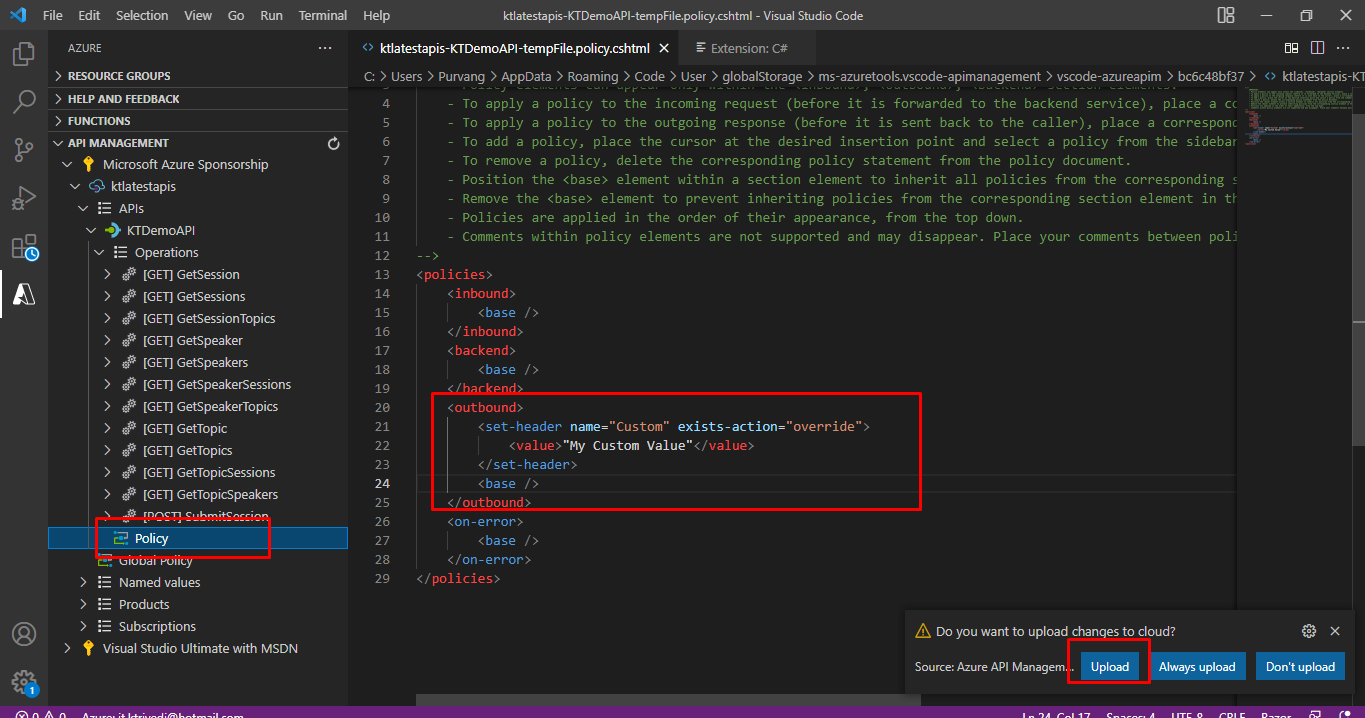
You will also find a global policy file that applies to all the APIs. In the individual policies, you can create advanced features that do things like restricting the usage at HTTP headers and so on and so forth.
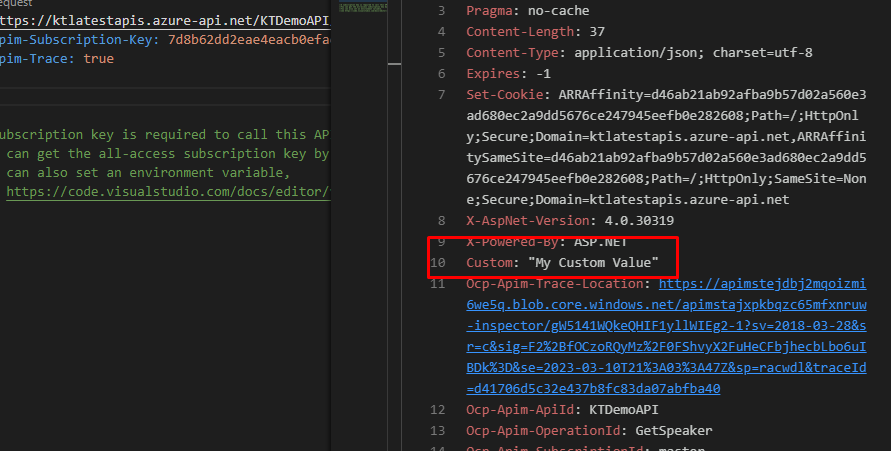
Go to policy and add a custom HTTP header to the API response. Save it and upload it to the cloud.
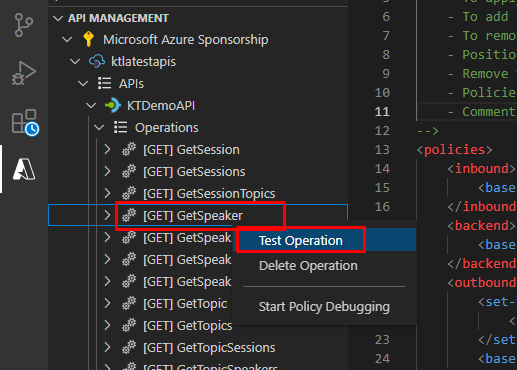
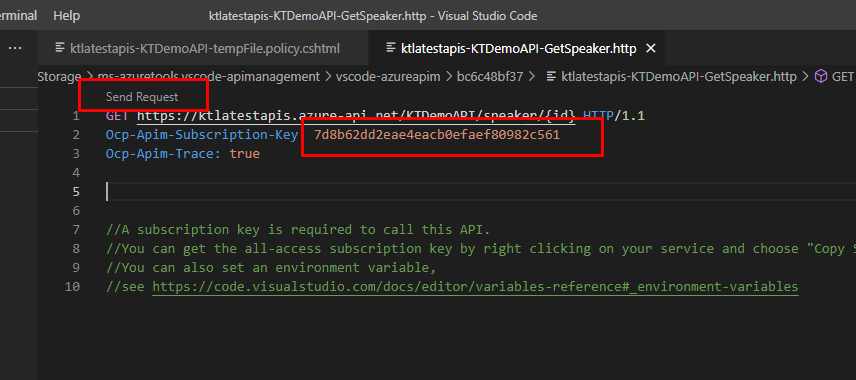
Now time to test it. Right click on any of the GET operation and click Test Operation.
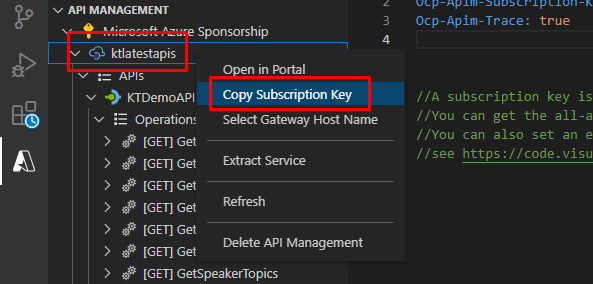
Right click on your instance name and click Copy Subscription Key.
Paste the subscription key here and click Send Request.
Here you will see that the custom header works perfectly the way we wanted it to.
That is it for this demo. Go check out this powerful VS Code extension and start using it in your day to day life while solving real world problems.