Securing your SQL Database using Azure Private Links

It is critical to protect all aspects of your application, including data communications.
This can be difficult because cloud services are frequently exposed to the public internet.
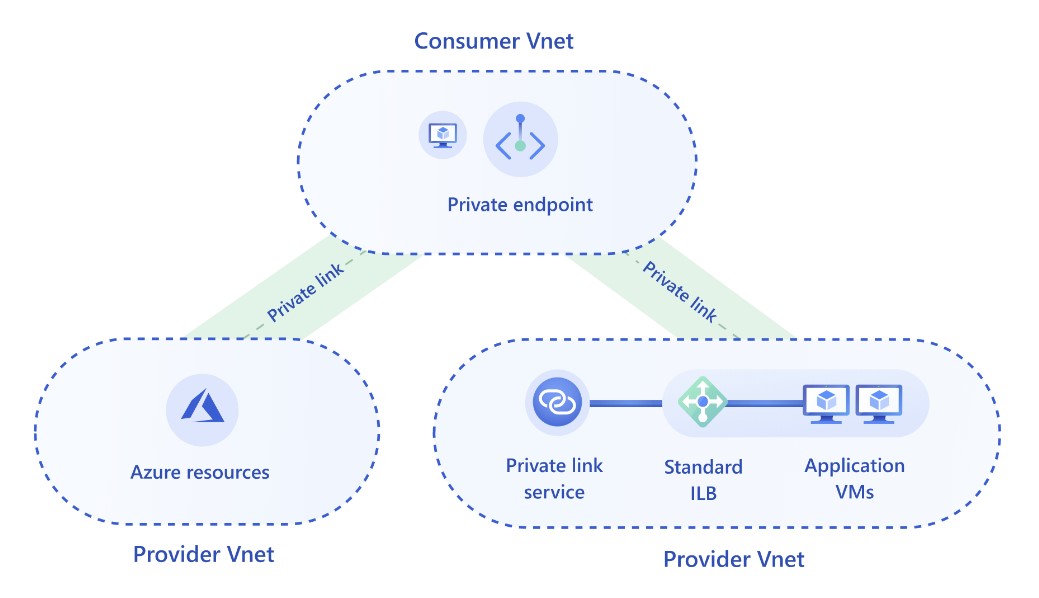
Azure Private Link (opens in a new window) can aid in the security of traffic between Azure services and other
applications. Azure Private Link can be used to secure Azure services as well as your own services that are
behind an Azure Load Balancer (opens new window). Consumers of Private Link-protected services can simply use the Private Link to communicate with the protected services directly over the Azure backbone rather than the public internet.
Now, let us see a step-by-step demo to connect SQL Database using Azure Private Link
In this demo, we will create a Private Endpoint for an Azure SQL Database. The VM that we are going to create can use that Private Endpoint to securely access the SQL Database.
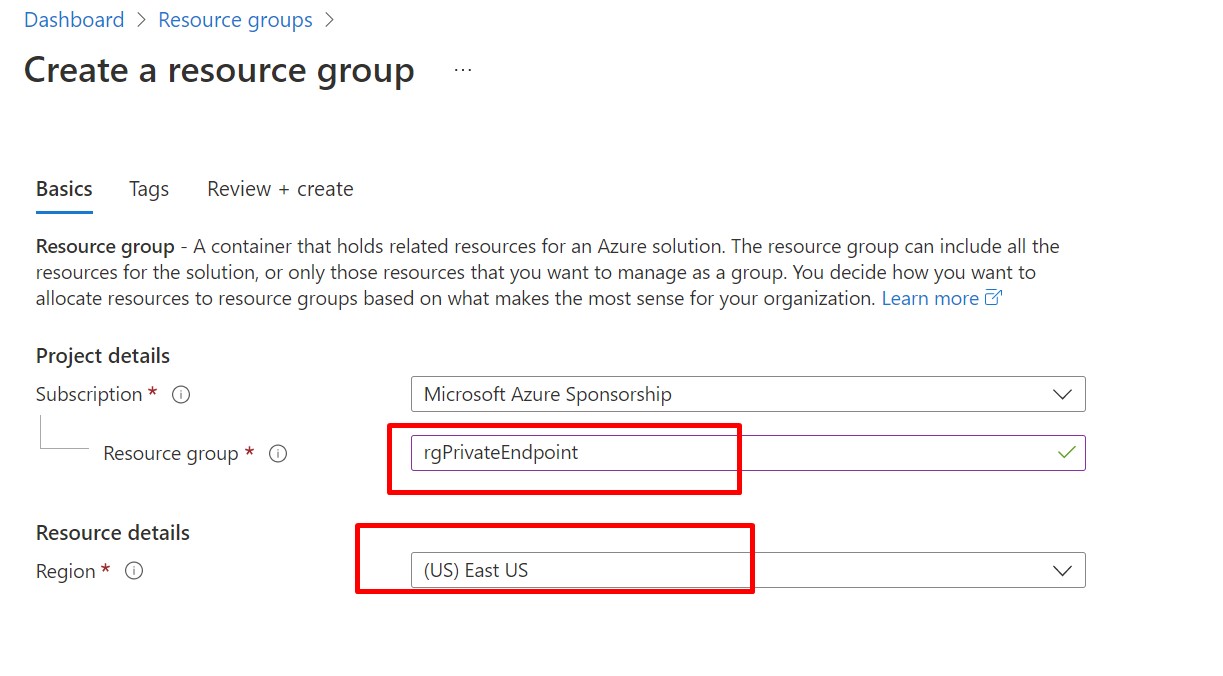
Go to Azure Portal and create a new Resource Group as shown in the image below
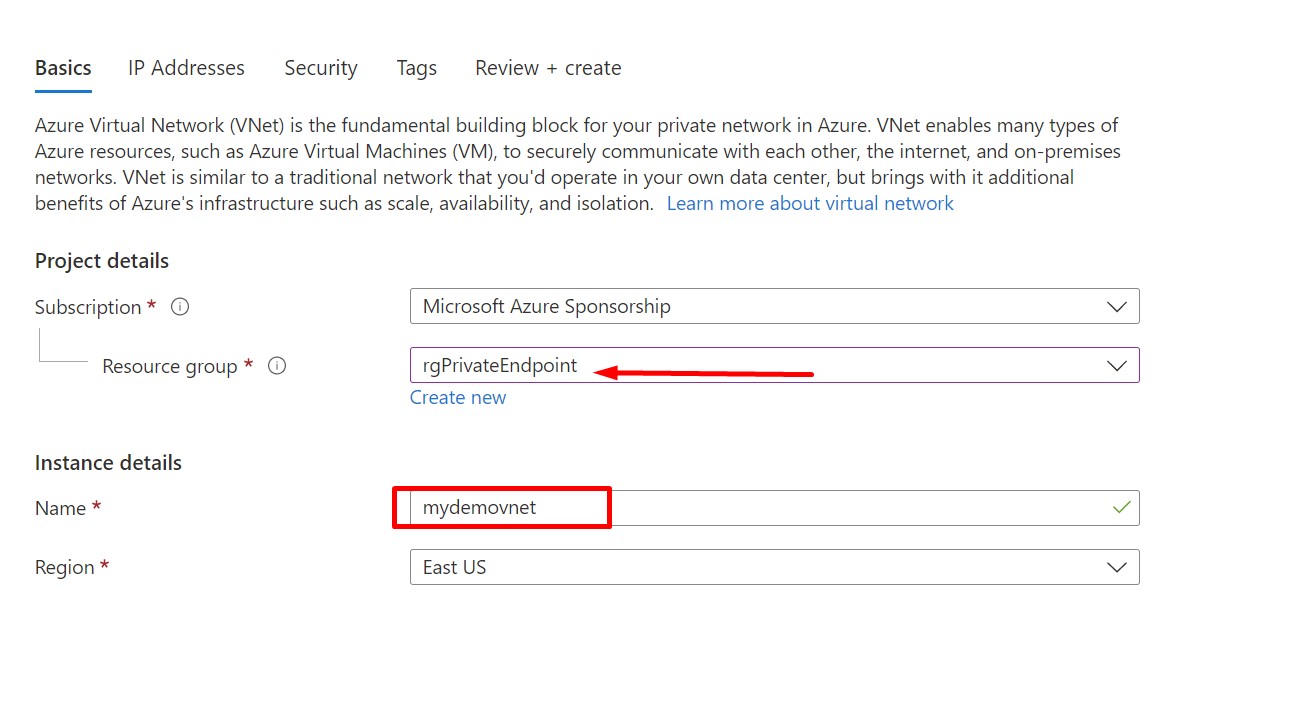
Now, Provision a new Virtual Network under the newly provisioned Resource Group.
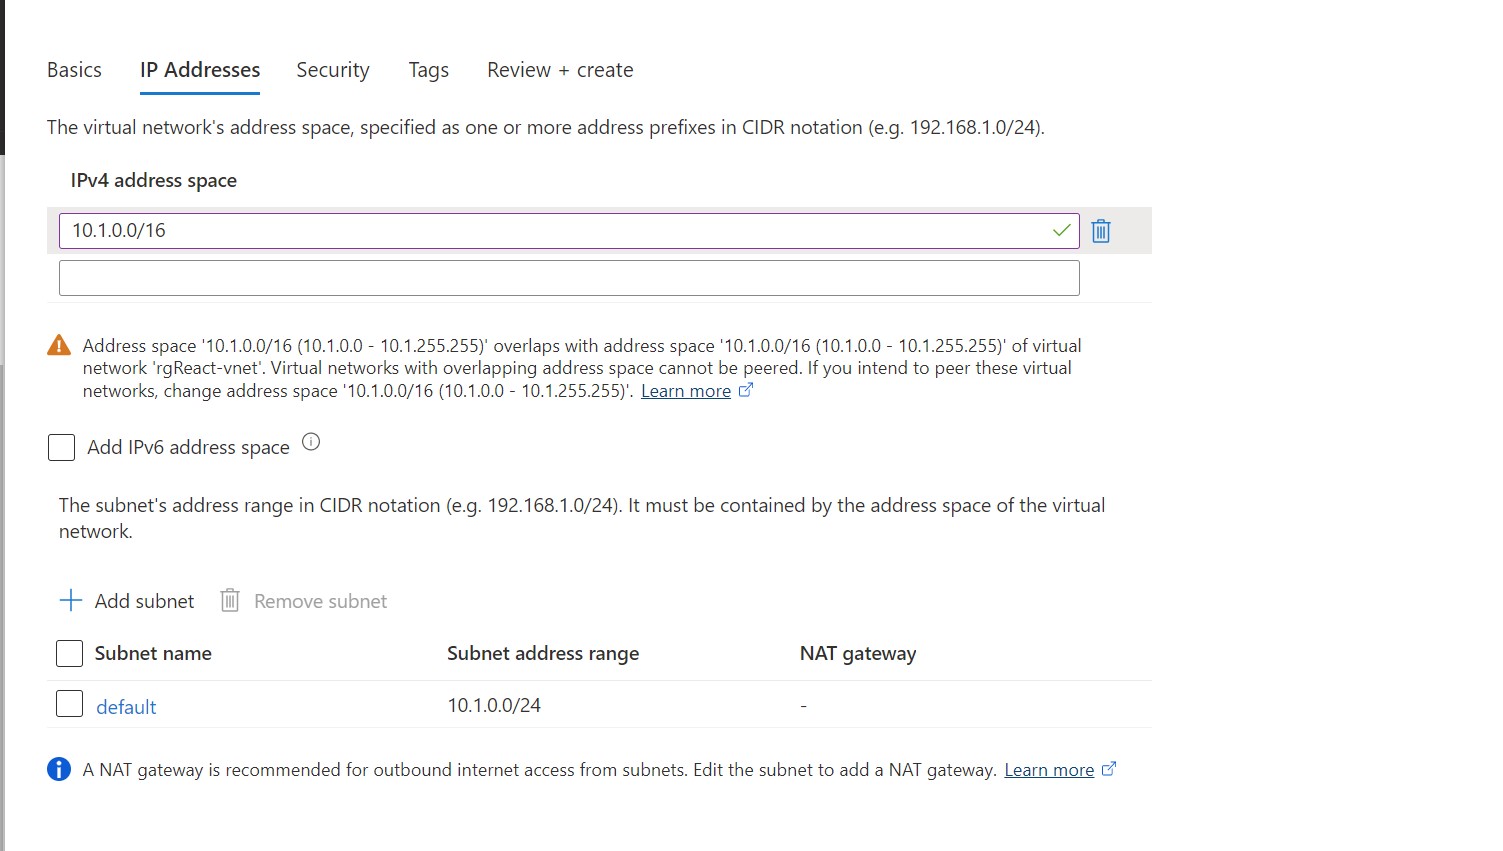
Set Address space for VNet is 10.1.0.0/16 and default subnet is 10.1.0..0/24 and click on Review+Create and Create.
Now, we will create a Virtual Machine. Under the newly created Resource Group, we will provision Windows Server 2019 Datacenter VM. Provide the credentials.
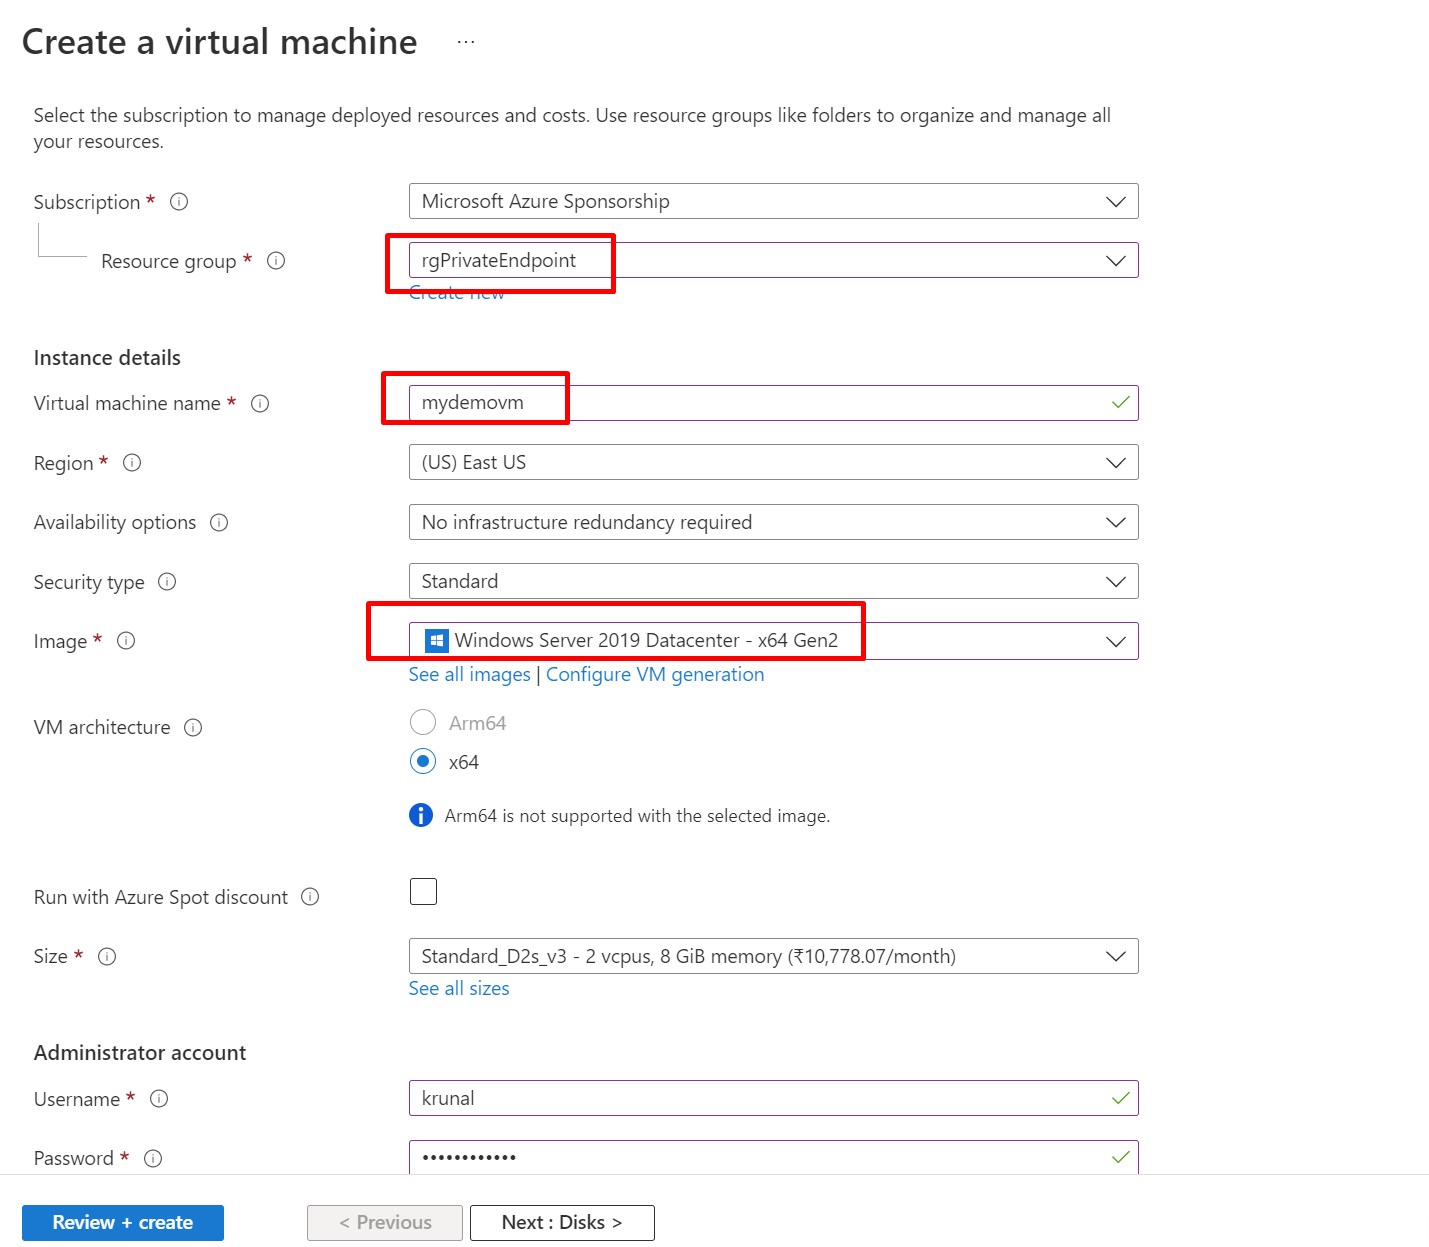
Navigate to Networking Tab. Make sure you have selected the VNET and default subnet what we have just provisioned. Also,Select HTTP and RDP for the allowed ports.

Click on Review + Create and Create the VM.
Now, we will create a new SQL Database.
For that, Click on Create Resource and find out SQL Database. Now, Provision a new database under the resource group rgPrivateEndpoint. Here, we also need to create new SQL Server.
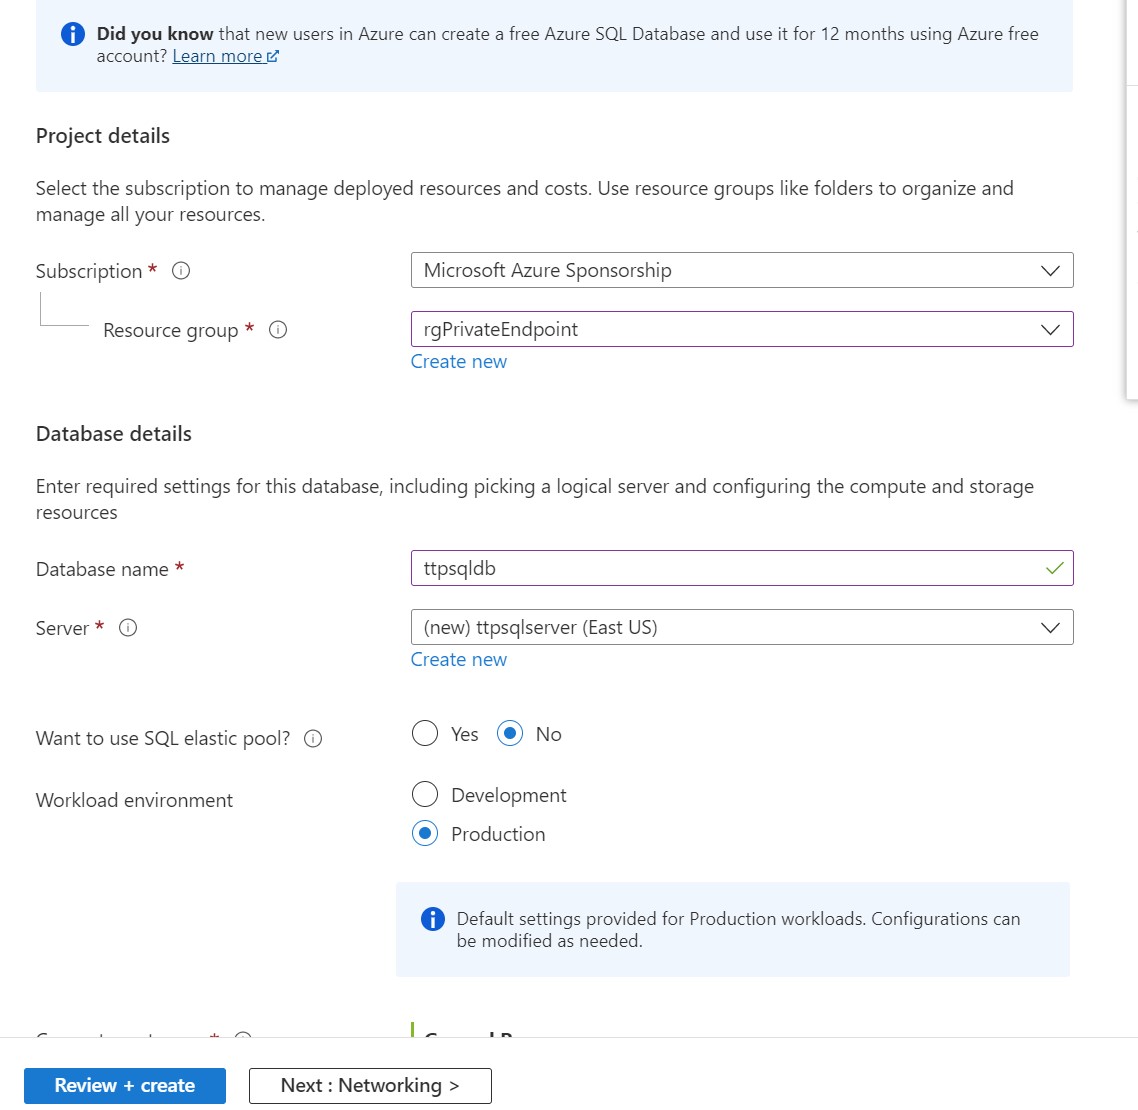
Click on Review + Create and Create .
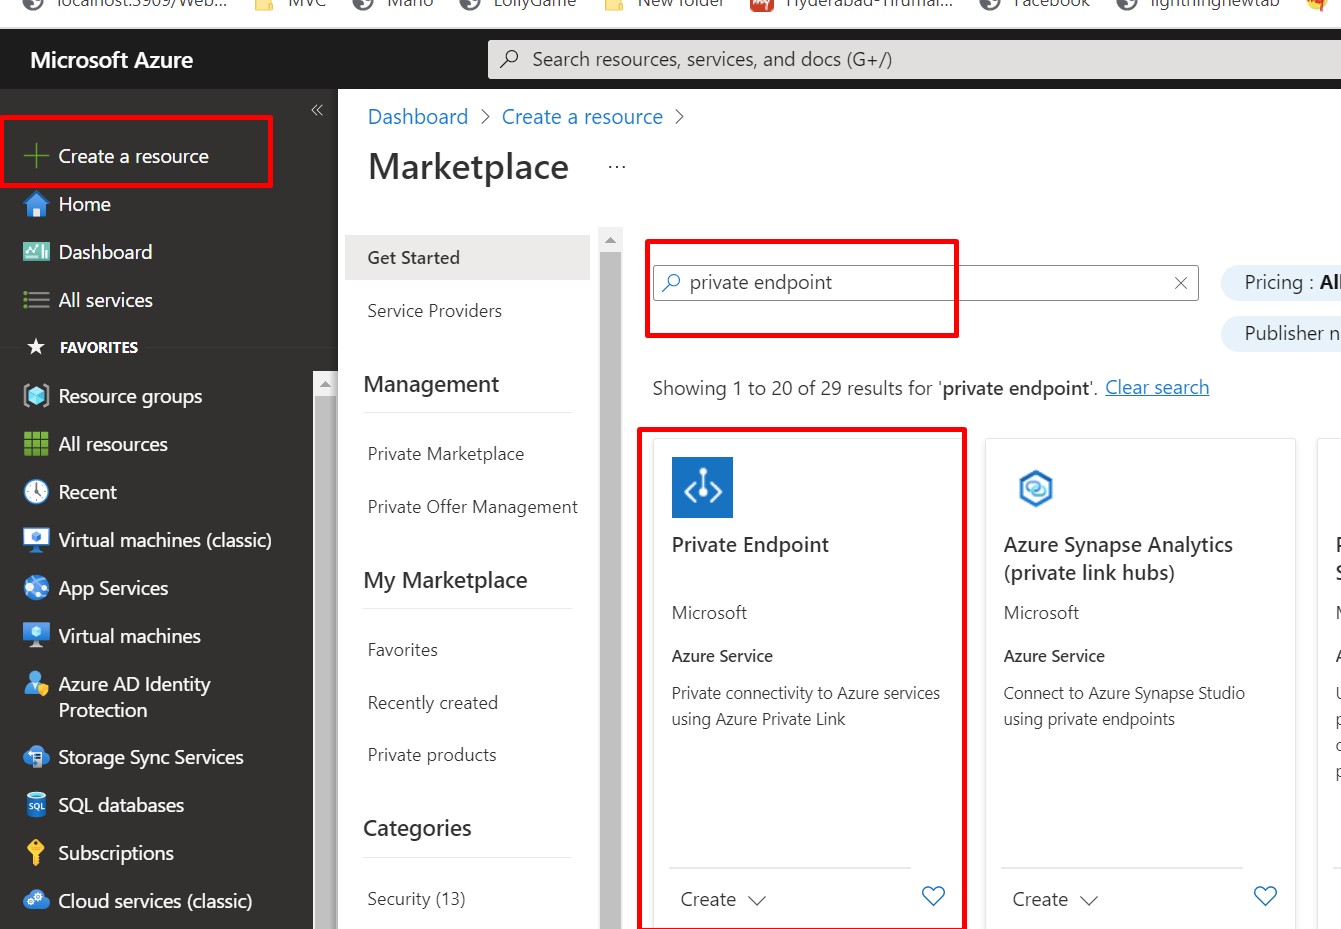
Now, we need to create Private Endpoint for SQL Server database.
So Click on Create Resource and search for Private Endpoint a shown in the figure
On the basic tab, we select the resource group which we have provisioned in the beginning of the exercise, provide Name and select the region and click on Resource Tab.
Now, here on the resource tab, we select the resource we want to connect using Private Link and click on next Network tab.

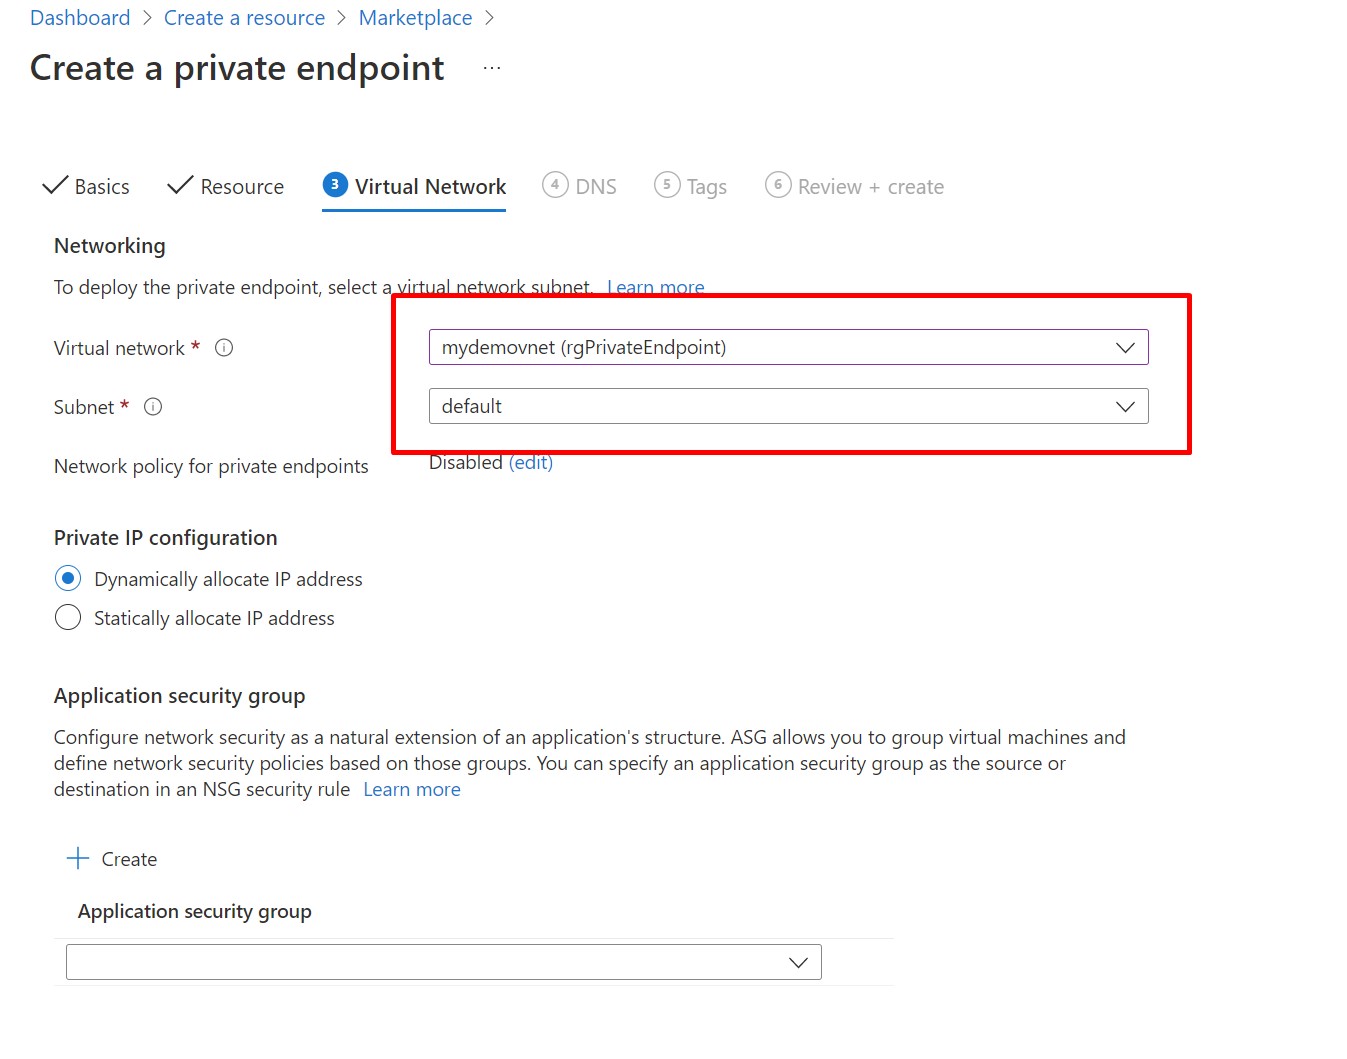
Here, on the Virtual Network tab, select the VNet and Subnet which we have already provided.
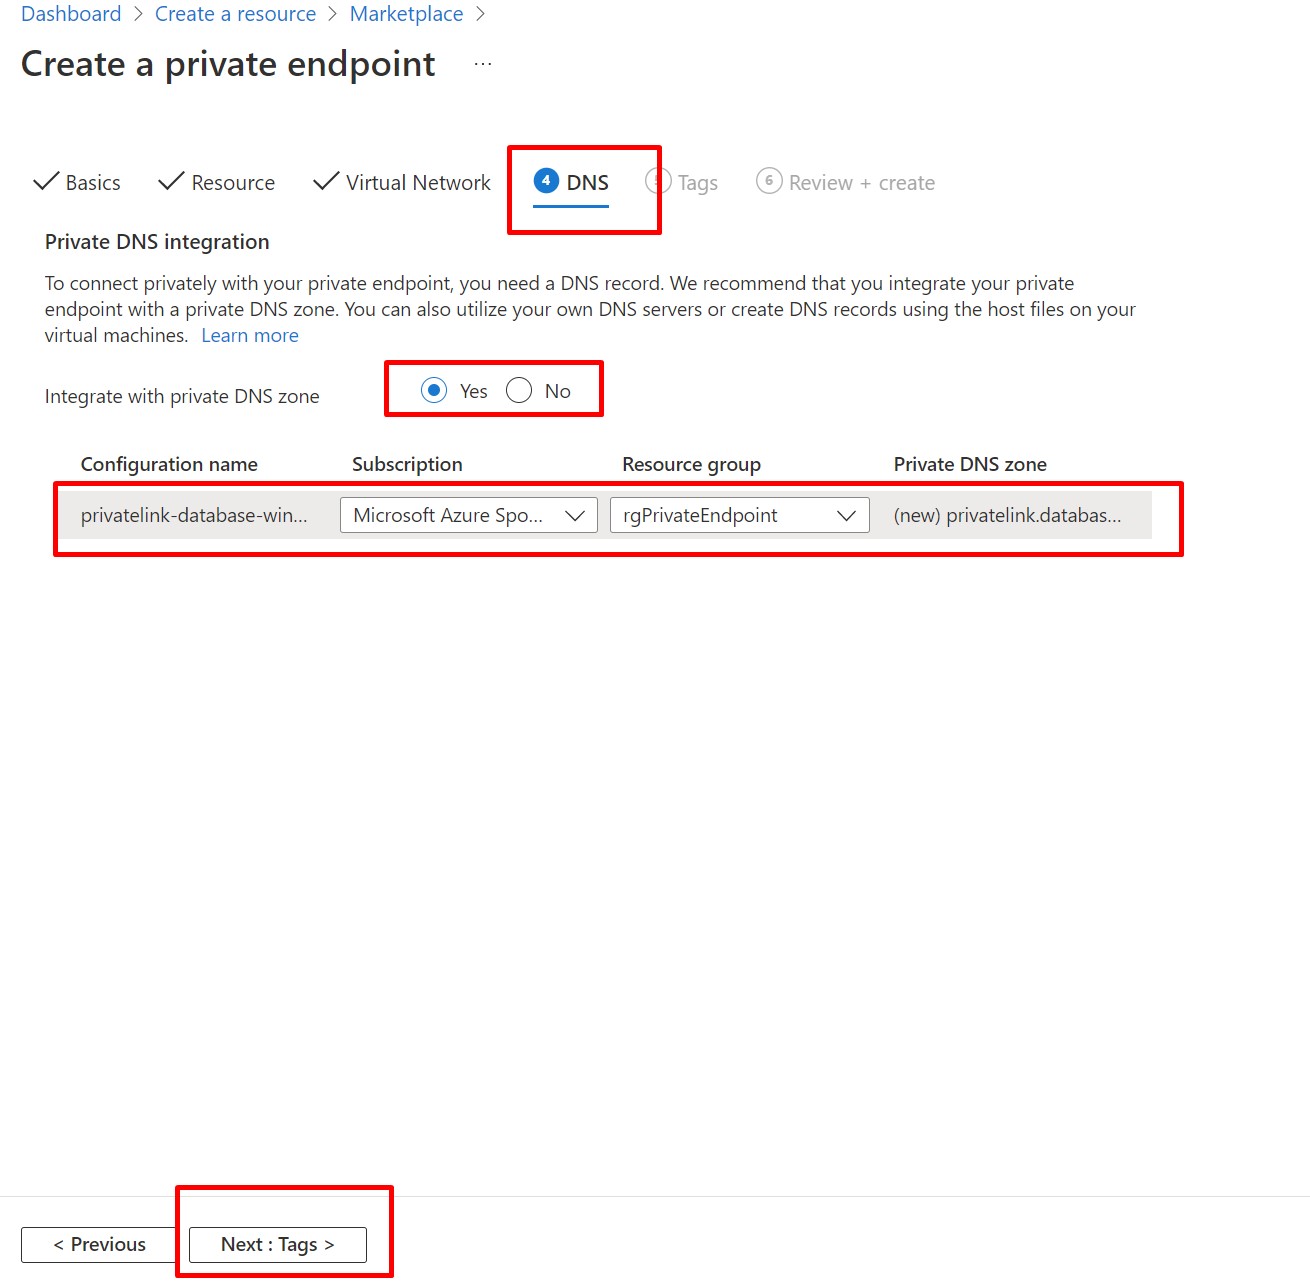
Next, go to DNS tab, make sure,integrate with Private DNS zone is enabled and go with the default Private DNS zone value. Here, we have selected our subscription and the resource group.
Next click on Review+Create and finally click on Create.
Once, the Private Endpoint is provisioned, we will connect to our SQL Database securely.
Go to the Virtual Machine and take the RDP of it.
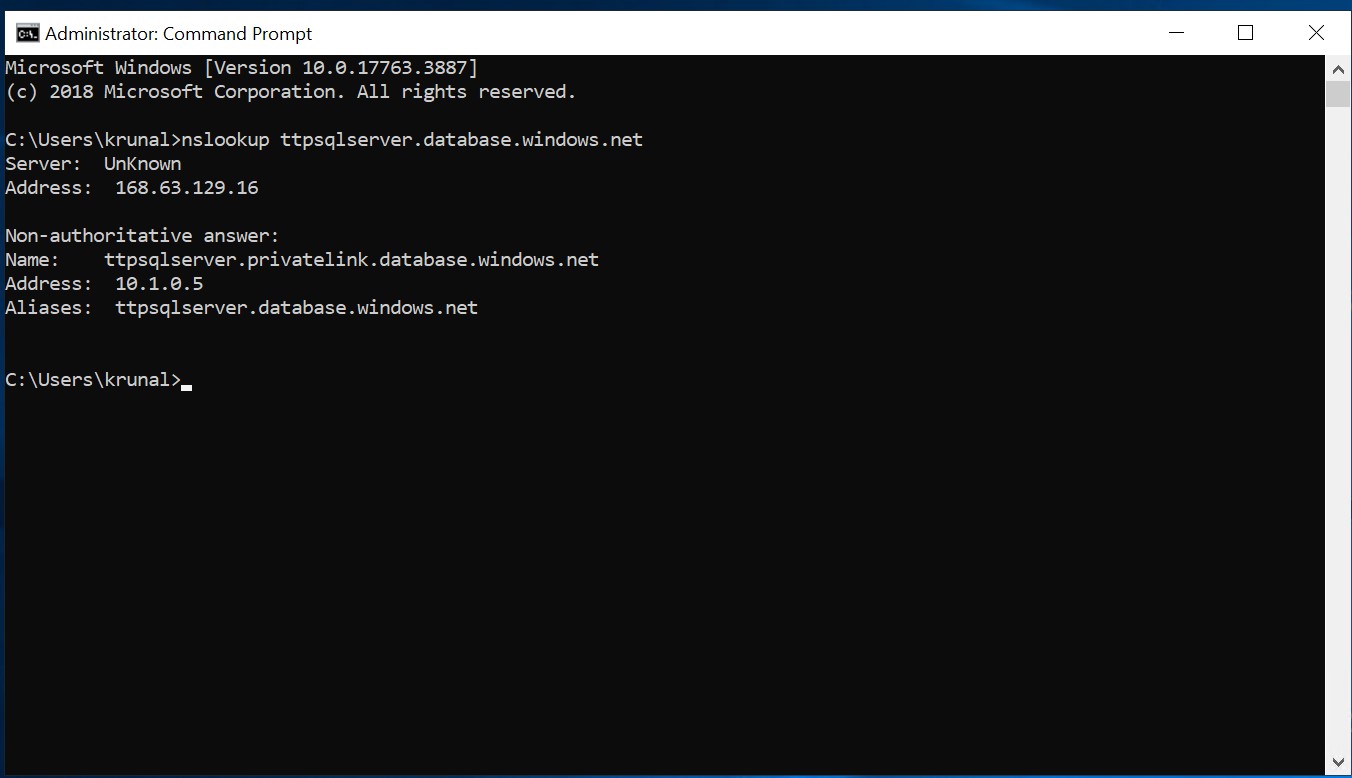
Now it’s time to test our private endpoint.Open command prompt and check the nslook up for your SQL Database server as shown here. In my case, I have used nslookup ttpsqlserver.database.windows.net. You would be seeing output as shown in the image below.
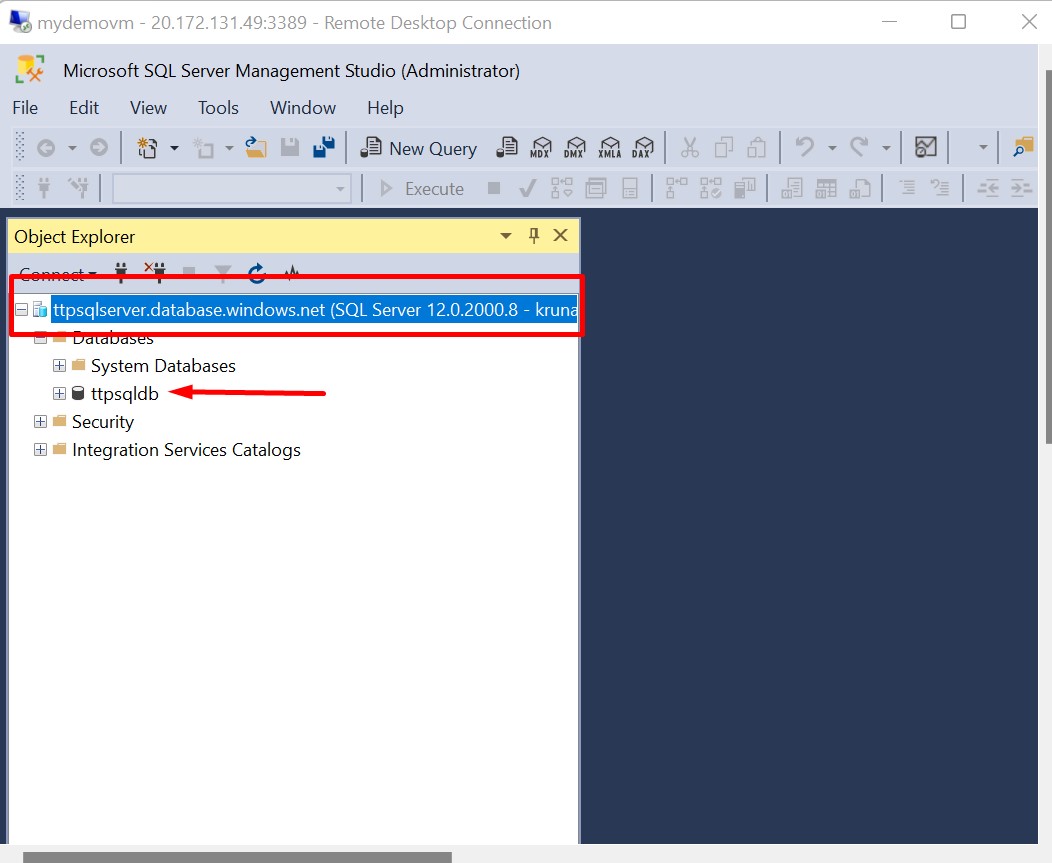
Now, Install SQL Server Management Studio, in your VM and try to connect to our SQL Database hosted in Azure DC. You'll notice that you don't have to add your IP address to the SQL Server firewall. The connection that you now have with the SQL Server and database is secure and travels over the Azure backbone, not over the public internet.
Azure Private Link can be used to establish secure connections to Azure services or your own services
and applications that are behind an Azure Load Balancer.