LEARN HOW TO USE A ROUTE TABLE FOR ROUTING YOUR NETWORK TRAFFIC – PART 1

- Azure routes traffic between all subnets within a virtual network, by default.
- You can create your own routes to override Azure’s default routing.
- The ability to create custom routes is helpful if, for example, you want to route traffic between subnets through a network virtual appliance (NVA).
In this demo, we will:
- Create a route table
- Create a route
- Create a virtual network with multiple subnets
- Associate a route table to a subnet
- Create an NVA that routes traffic
- Deploy virtual machines (VM) into different subnets
In the next part of the demo, we will do the following:
- Route traffic from one subnet to another through an NVA
Let us go ahead with the first of it.
First of all, we will create a route table. Click Create a Resource, search for Route table and click Create.

Fill in the following details. Give it a name. Choose a subscription. Create a new resource group. Choose East US for the location and choose the default enabled option for Virtual Network gateway route propagation. Click Create.

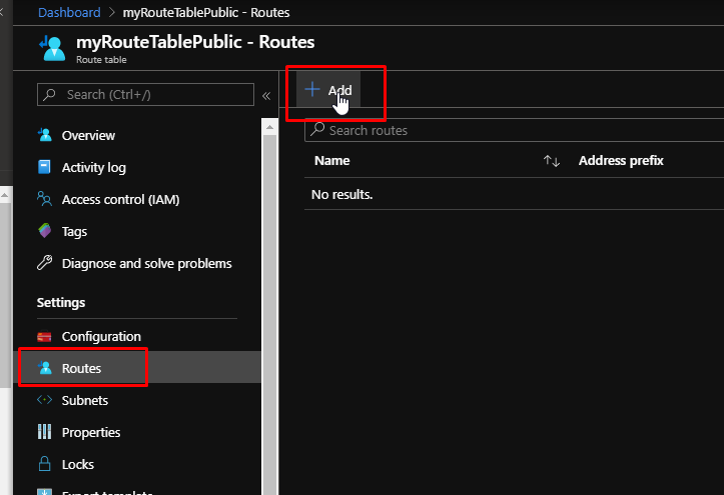
Next, we will create a route. Once the route table gets create, go to the resource à Routes à Click Add.
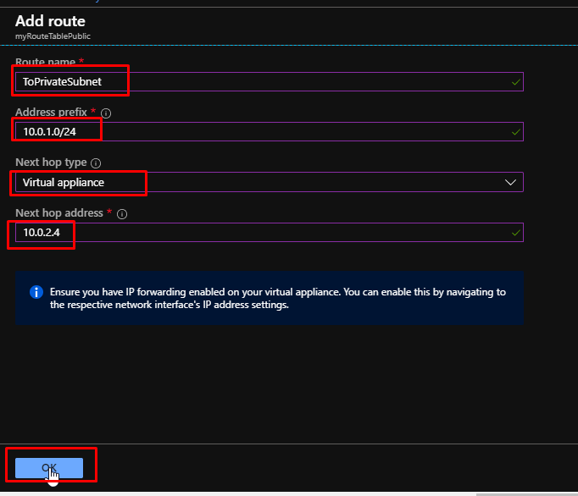
Give name to the route. For the address prefix, enter 10.0.1.0/24. For the Next hop type, choose Virtual Appliance and for the next hop address, enter 10.0.2.4. Click OK.
- Before associating a route table to a subnet, we have to create a virtual network and subnet.
Click Create a Resource –> Networking –> Virtual Networks

Give name to the virtual network. Choose the same resource group as you had created earlier. Keep location as East US.
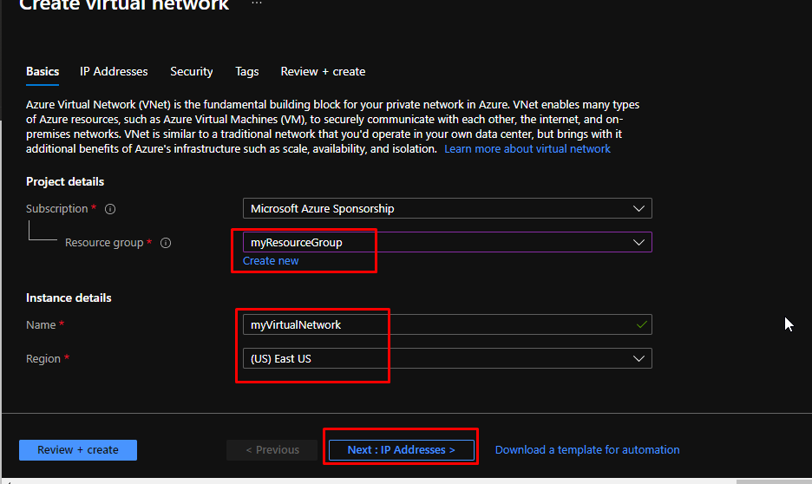
Keep address space as 10.0.0.0/16. Keep the subnet name as Public, and its address space as 10.0.0.0/24. Rest everything default. Click Create.

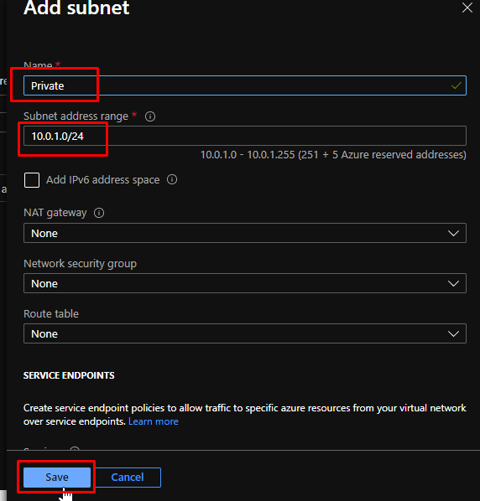
Once the VNet gets created, go to it. Go to Subnets and click to Add Subnet.

Give name Private to the subnet. Address range should be 10.0.1.0/24. Keep everything else as default and click OK.
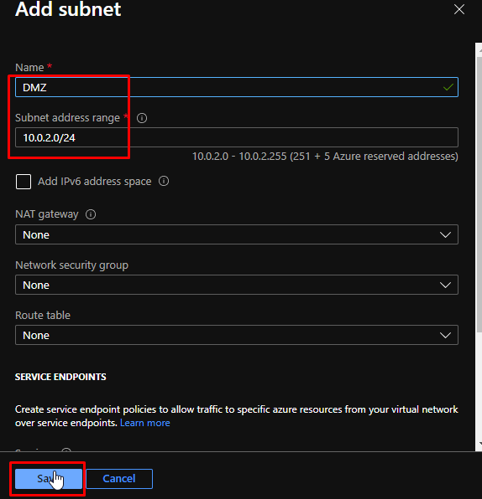
Similarly, create another subnet called DMZ with the address space as 10.0.2.0/24. Like last time, keep everything else as default and click OK.
Now you’ll have three subnets: Public, Private and DMZ.

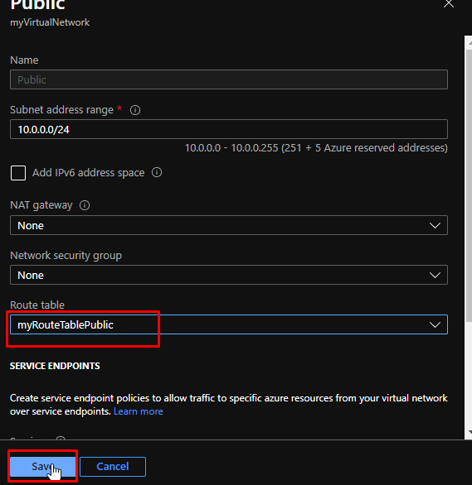
To associate the route table to the Public subnet, go to the Public subnet and choose your route table from the drop down and click save.
Next, we are going to create an NVA.
- NVAs are VMs that help with network functions like routing and firewall optimization.
- You can select a different operating system if you want.
- In this demo, we will be using Windows Server 2016 Datacenter.
Click Create a Resource –> Windows Server 2016 Datacenter.

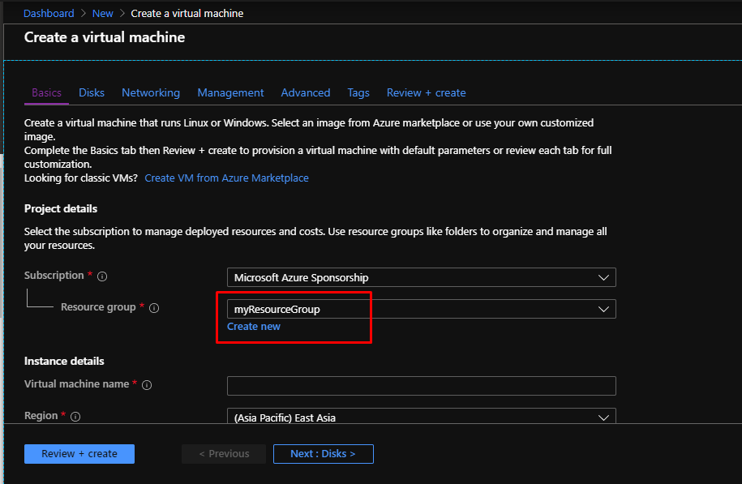
For the resource group, choose the same as the earlier one.
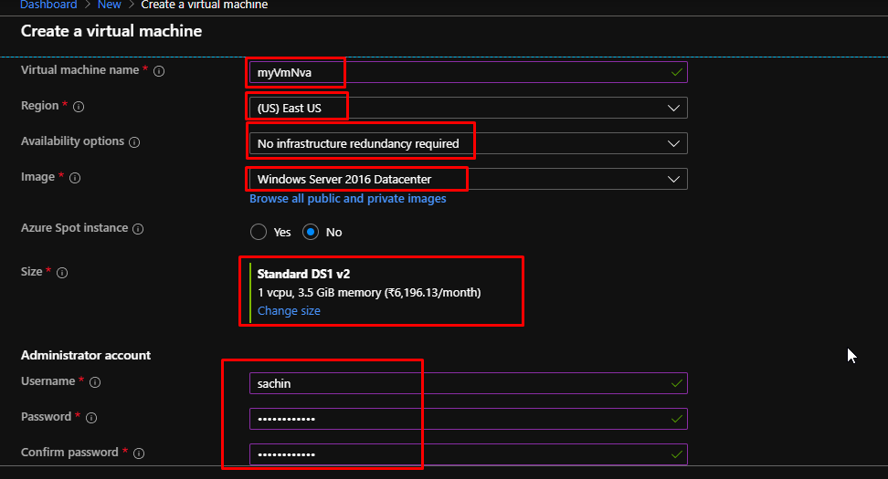
Give name myVmNva to the virtual machine. East US as the location. No infrastructure redundancy. Windows Server 2016 Datacenter as the image and Standard DS1v2 as the size. Give username and password.
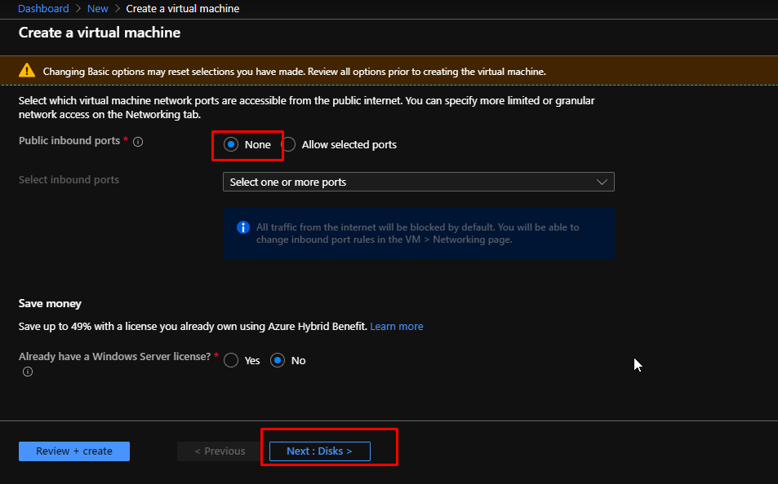
Keep none in the public inbound ports. Click Next to go to the Disks section.
Go with the defaults in the Disks section. Click Next to go to Networking.

Choose the virtual network that you created. Choose DMZ as the subnet. Keep none in the public IP. The VM won’t connect over the internet. Click Next to go to Management.

Create a new diagnostics storage account. Give it a name. Keep the account kind as General purpose V1. Standard performance and LRS by default. Click OK.

Click Review + Create. Once the validation gets passed, click Create.
- In the next part, we will turn on IP forwarding for myVmNva.
- When Azure sends network traffic to myVmNva, if the traffic is destined for a different IP address, IP forwarding will send the traffic to the correct location.
- You can visit part two of this series by clicking this link.