How to Filter Inbound Internet Traffic with Azure Firewall Policy DNAT

Filtering inbound internet traffic with Azure Firewall policy DNAT (Destination Network Address Translation) is a crucial aspect of securing your network infrastructure.
DNAT allows you to redirect traffic from a specific port or IP address on the public-facing side of the firewall to different internal resources, such as specific virtual machines or applications within a virtual network.
In this blog, you will learn how to filter out inbound internet traffic with the help of Azure Firewall DNAT using real-time hands-on labs. Let’s dive in!
What is Azure Firewall DNAT?
Azure firewall DNAT is one of the features of the Azure firewall and it helps to redirect the traffic from a specific IP address or port to a different destination within the Azure Cloud Platform. DNAT can be employed in scenarios where you want to expose internal resources to the web or change the traffic direction to specific services or servers.
Azure Firewall pricing varies based on factors such as the number of rules, data processing, and availability zones, and can be obtained from the official Azure pricing page.
The key characteristics of Azure Firewall DNAT, such as:
- Inbound Traffic Redirection: DNAT generally helps in inbound traffic redirection that evolves at the specified port or IP address to the destinated IP address and portion within the VPN of Azure. It certainly helps to expose internal services or resources to external users or change traffic rates.
- Port Forwarding: DNAT, or Destination Network Address Translation, is employed to route traffic from a specific port on Azure Firewall’s public IP address to a designated internal IP address and port. This facilitates the hosting of services like web servers or application servers behind Azure Firewall, making them accessible from the internet.
- Load Balancer Integration: Azure Firewall DNAT can be combined with Azure Load Balancer. By setting up DNAT rules in Azure Firewall, you can direct traffic to backend pool members behind the load balancer, delivering scalability, high availability, and load-balancing capabilities.
- Application Publishing: DNAT enables the publication of internal applications or services to the internet while safeguarding them behind Azure Firewall. It offers a secure means to expose specific resources or services to external clients while managing access through the Azure firewall rules and policies.
- IP Address Preservation: When DNAT is utilized to redirect traffic, the source IP address remains unchanged, allowing the destination resource to see the source IP of the client initiating the request. This feature proves valuable for auditing, troubleshooting, and maintaining visibility of the client’s IP address.
- Rule-Based Configuration: Azure firewall DNAT rules are established within Azure Firewall’s rule collection. You can craft rule sets to define source IP addresses, destination IP addresses, ports, and protocols for traffic redirection. Multiple DNAT rules can be set up to address various scenarios or applications.
What are DNAT rules on Azure Firewall?
Azure Firewall DNAT configuration has to be done to filter out inbound internet traffic to destined subnets. Whenever the DNAT configuration is completed, then the NAT rile collection action will be changed into Dnat. Each rule specified in the NAT rule can be used to translate the firewall’s public IP address as well as port into a private IP port and address.
By configuring DNAT rules within Azure Firewall policies, you gain more control over incoming traffic, enhance security, and ensure that the right data reaches the right destination. This capability is particularly valuable for organizations looking to protect their resources while still providing necessary access to specific services.
Now, DNAT will implicitly append a network rule to permit the traffic that gets translated. For security reasons, the suggested solution is to add a specified internet source to permit the DNAT access to the network and eliminate the use of wildcards.
DNAT rules can be used to both allow or deny inbound traffic via a firewall public IP address.
You can employ a DNAT rule when you need to convert a public IP address into a private one. Azure Firewall’s public IP addresses are entry points for incoming internet traffic. They filter and transform this traffic to connect with internal resources within Azure.
How to filter inbound internet traffic with Azure Firewall policy DNAT: A step-by-step guide
Step 1: Sign in to Azure Portal
- Go to the Azure portal by clicking the Open Console button or visiting the URL https://portal.azure.com.
- For a smooth experience, consider using incognito mode to avoid Azure portal cache issues.
- If the portal automatically logs into another Azure account, log out and clear your cache. Sign in with the help of a username and password.
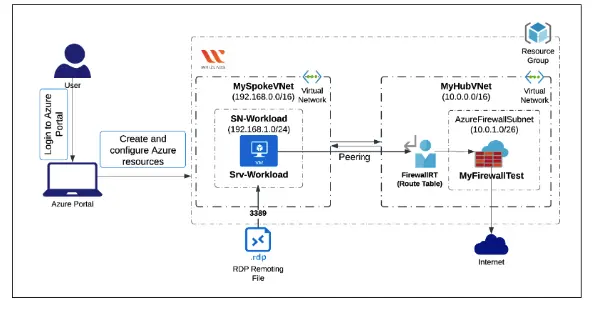
Step 2: Create a Hub VNet
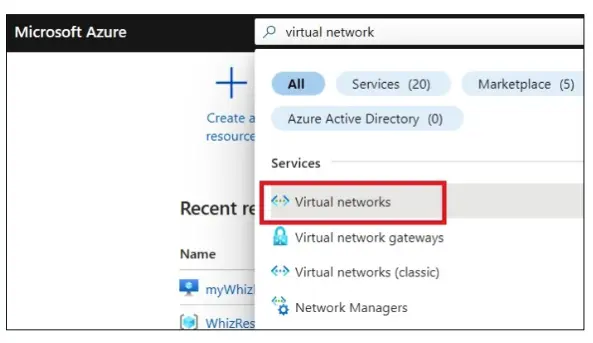
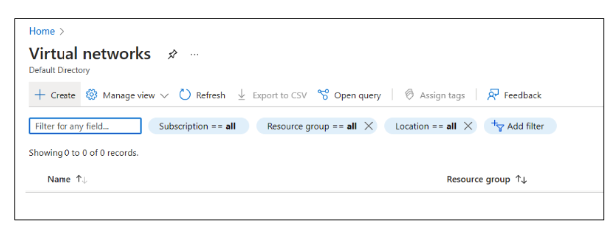
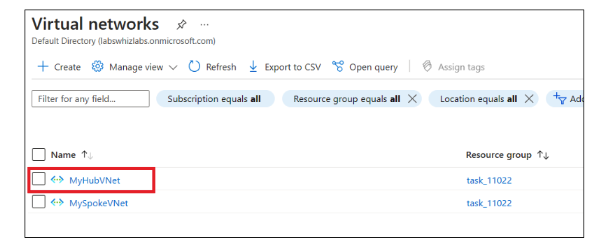
In the Azure portal, at the top, use the search box and enter Virtual network. Select Virtual Networks in the search results.
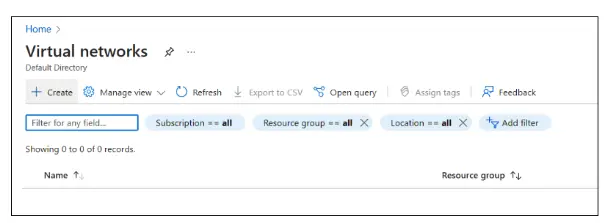
Click on "+Create" in the Virtual Networks section.
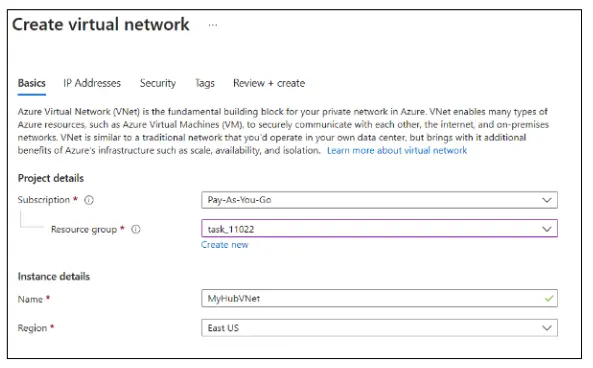
In the Create virtual network page, provide the following details in the Basics tab Resource group, Name, and Region.

-
- Select the IP Addresses tab or click Next: IP Addresses at the bottom.
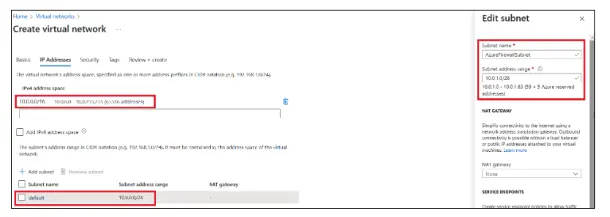
- In the IP Addresses tab, enter the following information such as IPv4 address space as 10.0.0.0/16
- Under the Subnet name, click default.
- In the Edit Subnet section, provide the Subnet name, and Subnet address range and Click Save.
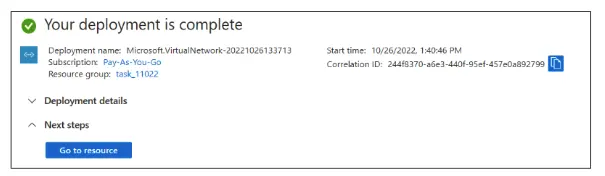
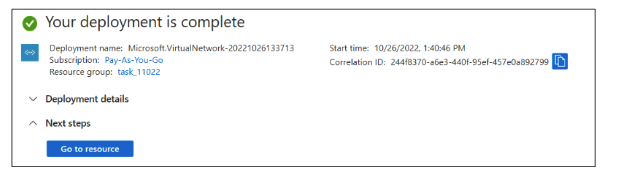
- Click Review + Create and then Create. This step might take a few minutes.
- Select the IP Addresses tab or click Next: IP Addresses at the bottom.
Step 3: Create a Spoke VNet
- In virtual networks, select "+ Create".
In the Create Virtual Network page, enter these details in the Basics tab
-
- Resource group: Select resource group_XXXXX
- Name: Enter MySpokeVNet
- Region: Choose (US) East US
- Go to the IP Addresses tab (or click Next: IP Addresses).
- Adjust the default IPv4 address space to 192.168.0.0/16.
- Delete the Default Subnet and click on + Add Subnet.
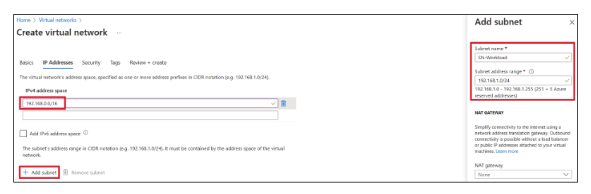
- In the Edit Subnet section, provide:
- Subnet name: Enter SN-Workload
- Subnet address range: Enter 192.168.1.0/24 and Click Add.
- Click Review + Create and then Create. This step may take a few minutes.
Step 4: Peer the VNets
- In the Azure portal, search for Virtual Networks and select MyHubVNet (the hub VNet created earlier).
- In the Overview page, under Settings, select Subnets. Click on "+ Subnet".
- In the Add subnet tab, provide the name and click add.
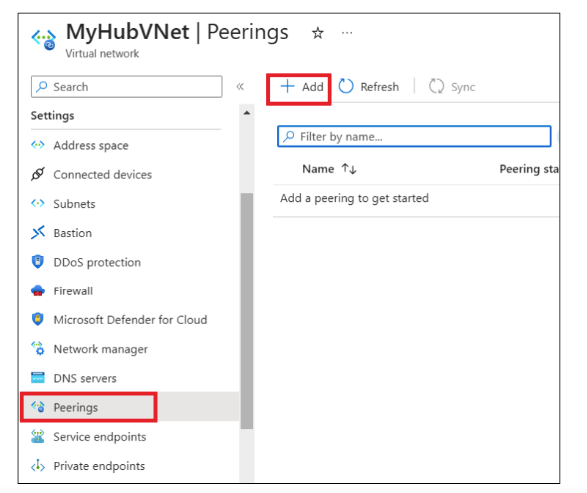
- In the Overview page, under Settings, select Peerings. Click on "+ Add".
- In the Add peering tab, provide the following details:
- Under This virtual network:
- Peering link name: Enter Peer-HubSpoke
- Under Remote virtual network:
- Peering link name: Enter Peer-SpokeHub
- Virtual network: Select MySpokeVNet
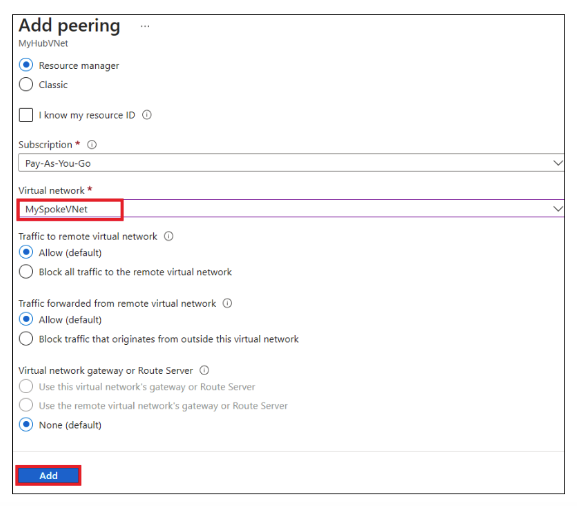
- Click Add. You will see this displayed in the Peerings tab.
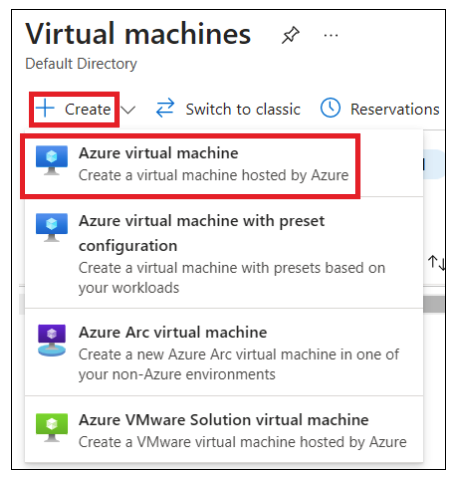
Step 5: Create a Virtual Machine
- Search for Virtual machines in the Azure portal and select Virtual machines from the results.
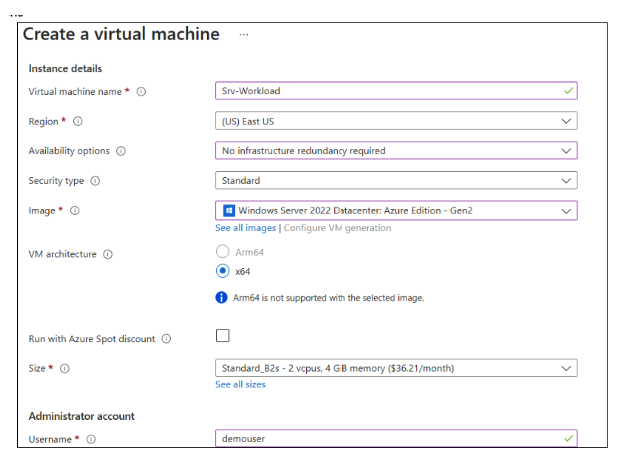
In the Virtual Machines tab, click + Create, then select Azure virtual machine.
In the Create a Virtual Machine tab, provide the following values in the Basics tab
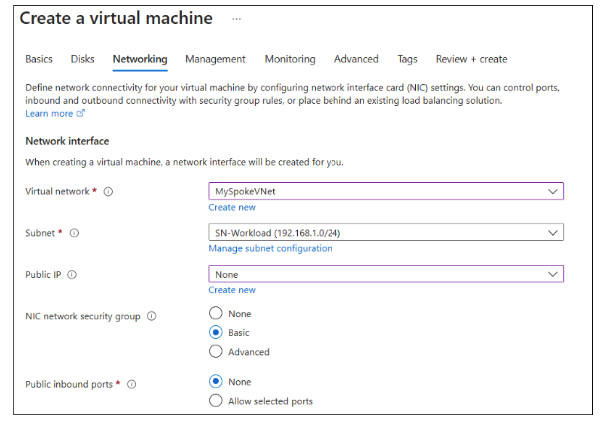
Click "Review + Create" and then Create. Your deployment will be completed in a few minutes.
Step 6: Deploy the Firewall and Policy
In the Azure portal, enter Firewall at the top and select Firewalls from the results.
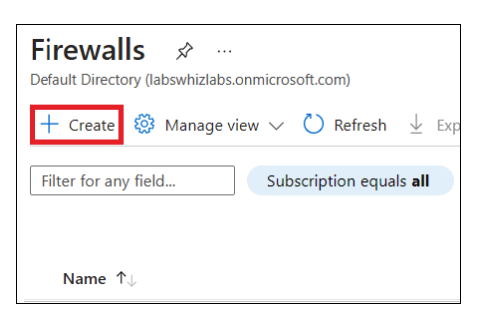
On the Firewalls page, click "Create".
In the Basics tab of the Create a Firewall page, include the following details.
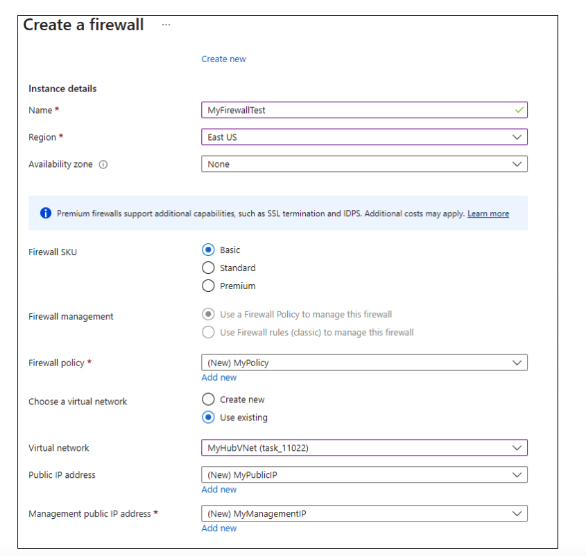
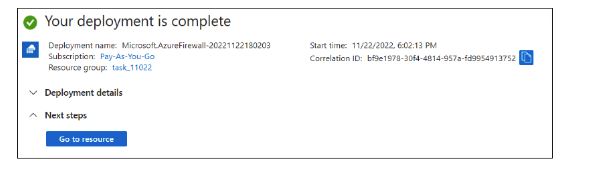
Click "Review + Create" and then Create. Your deployment will be complete.
Step 7: Create a Default Route
In the Azure portal, go to All services, and under Networking, select Route tables.
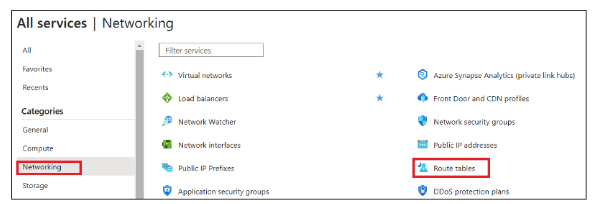
In Route tables, click "+ Create".
In the Create Route table page, provide the details.
Leave other settings as default and click "Review + Create". Then, click "Create".
Step 8: Configure a NAT Rule
Go to your resource group and select your firewall policy.
Under Settings, select DNAT rules and click "+ Add a rule collection".
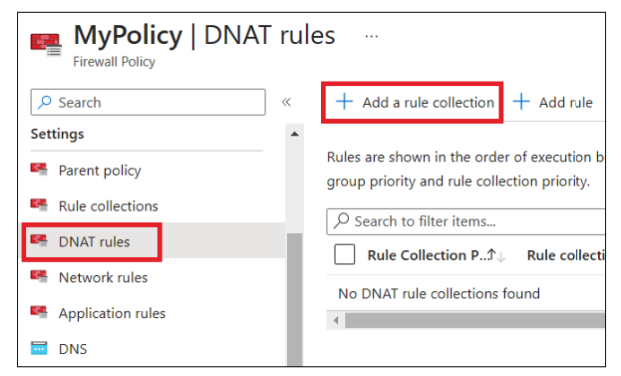
- In the Add a Rule collection tab, enter the following values such as Name, Priority, and NAT rule details.
- Click "Add".
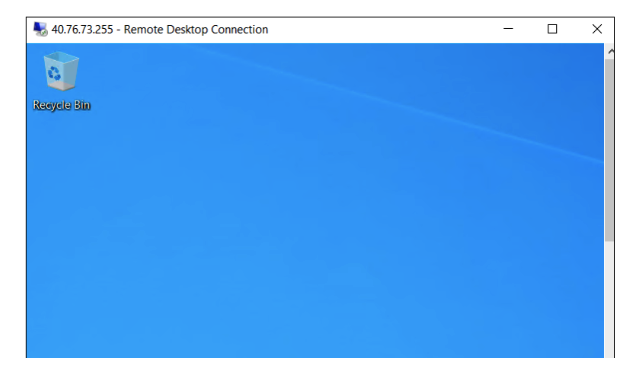
Step 9: Test the Firewall
Copy the public IP address of your firewall.
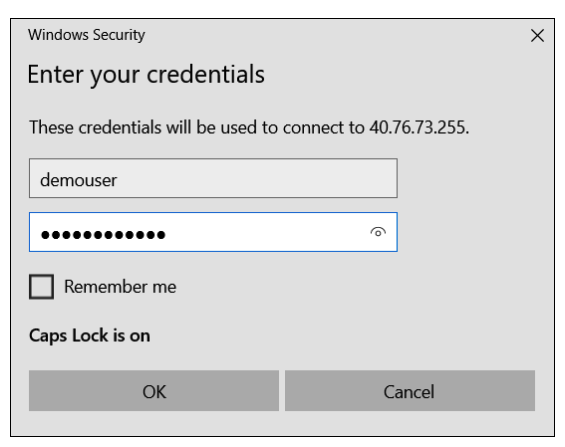
On your local computer, use Remote Desktop Connection and enter the public IP address to connect to your virtual machine.
Step 10: Validation Test
After completing the lab steps, click the Validation button or go to the Lab Validation section to verify your progress.