AZURE TRAFFIC MANAGER – STEP BY STEP DEMO (GEOGRAPHIC METHOD)

In the previous article, I showed you how to set up Performance Method in Azure Traffic Manager. You will have to go through that one first in order to create the resource that will be needed during this article. You can find the article here : Azure Traffic Manager – Step by Step Demo (Performance Method).
Currently, we have two virtual machines. One is in the Southeast Asia region and the other one is in East US region. Both the virtual machine have IIS server installed and we have made some changes to the IIS image that loads up when we visit the server using the public IP address or using the traffic manager profile’s DNS name.
Talking about the Traffic Manager Profile, we have created one using the performance method and now we are going to change the method to geographic. We already have two endpoints which we will delete for this demo and create two new endpoints to work with. Let us go ahead and see how the geographic method of Azure Traffic Manager works.
Step 1) Go to the endpoints tab and select Endpoint1.
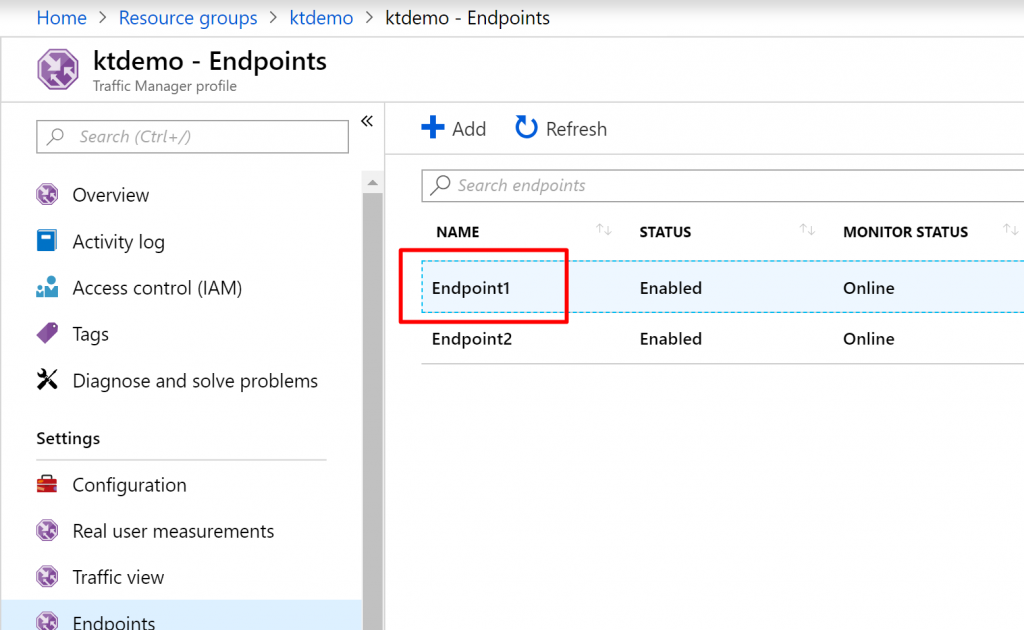
Step 2) Click on delete to delete the endpoint.

Step 3) Similarly, delete Endpoint2 as well. We need to delete the existing endpoints because if we don’t do that, Azure won’t let us change the routing method from Performance to Geographic.
Step 4) Back in the traffic manager, go to the configuration tab and change the routing method to Geographic.
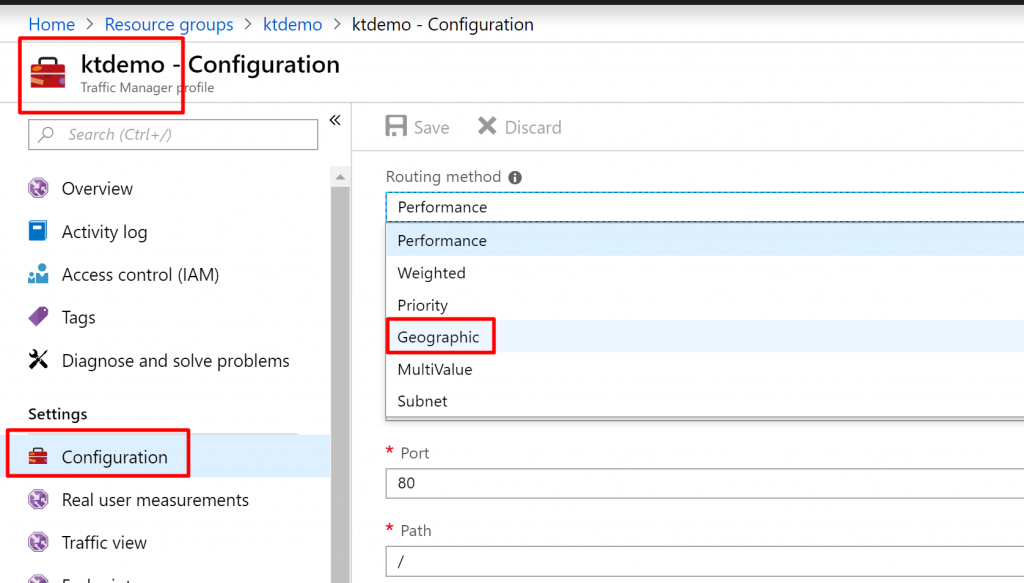
Step 5) Then click on Save.

Step 6) Now we need to create new endpoints. So, go to the endpoints tab and click on Add to add a new endpoint.
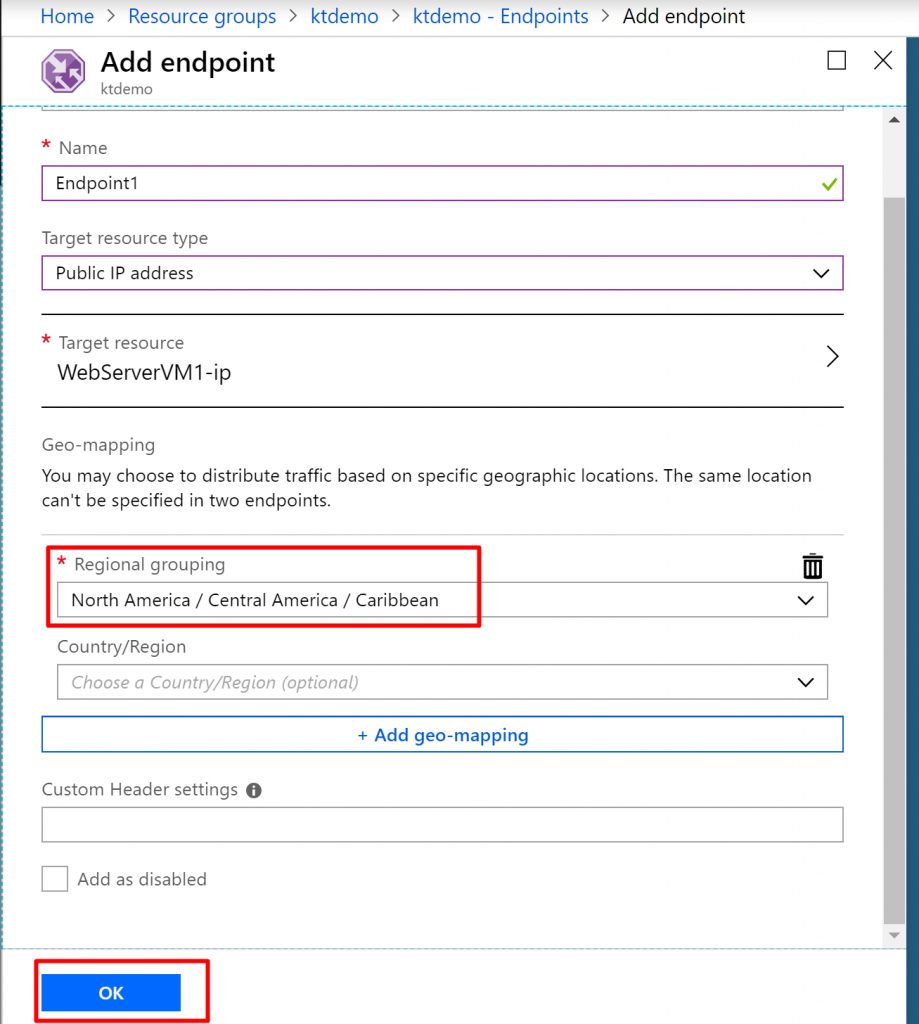
Step 7) Select the type as Azure endpoint. Give name Endpoint1 and select the target resource type as Public IP address. Choose WebServerVM1-ip as the target resource. Next, we need to mention the regional grouping.
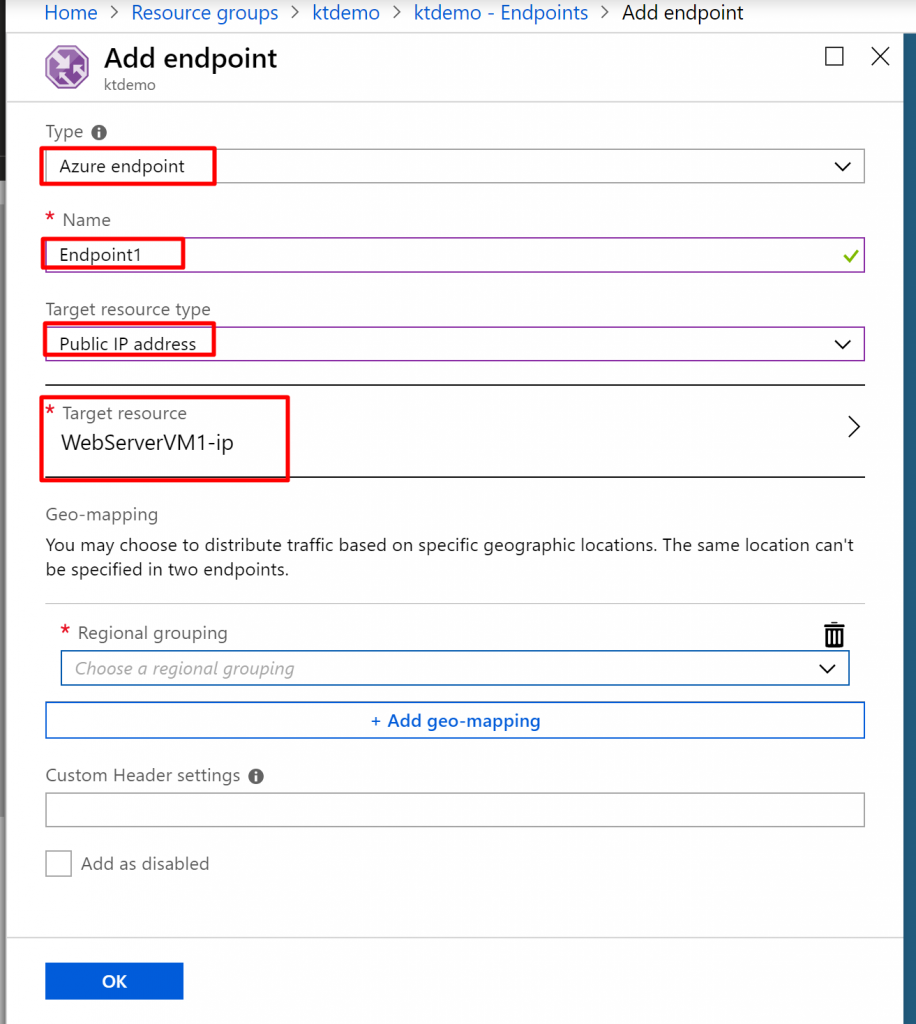
Step 8) In the Regional Grouping section, choose North America/Central America/Caribbean. You can also select specific countries/region but we don’t need to mention that right now. What this means is that every request coming from the mentioned regions will be directed towards the resource located in Southeast Asia. So, if someone hits the request from the US, they will be directed to the server located in the Southeast Asia because we chose WebServerVM1-ip as the target resource. Click on OK.
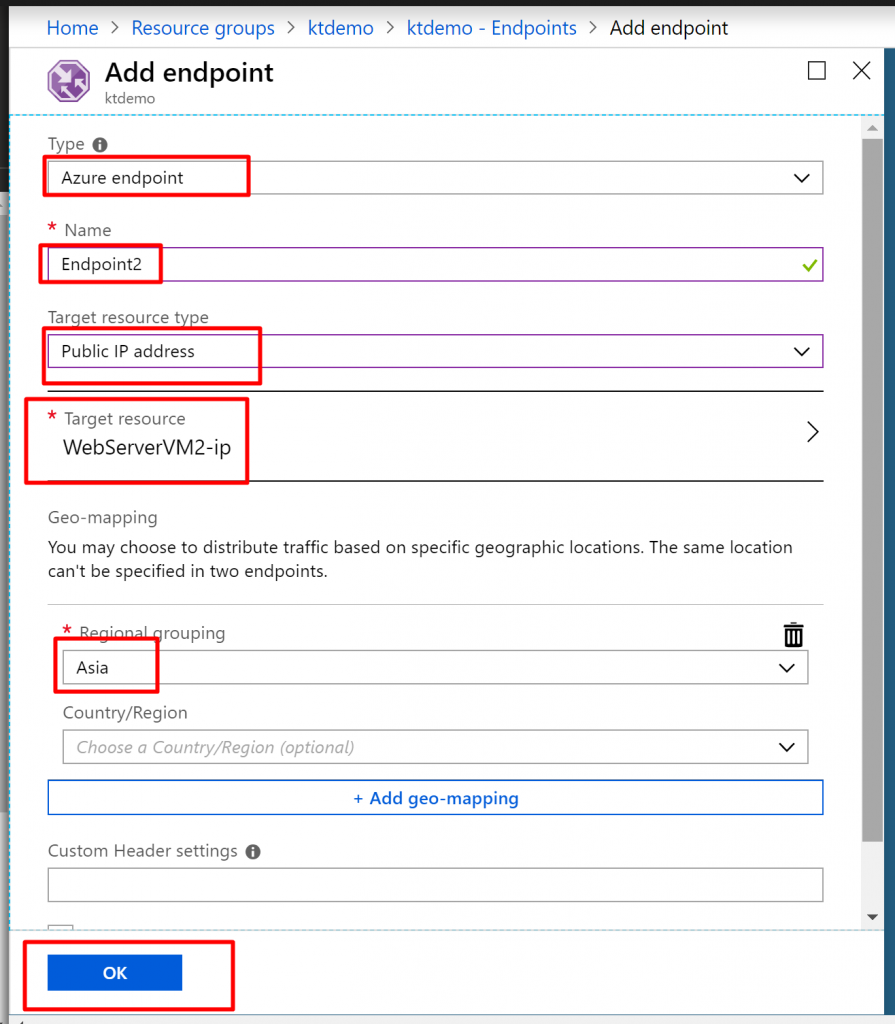
Step 9) Add one more endpoint with the following details. Give name Endpoint2 and select the target resource as WebServerVM2-ip. Keep the regional grouping as Asia. This means that any request coming from the Asia region will be directed to the server located in the East US region because our target resource is WebServerVM2-ip.
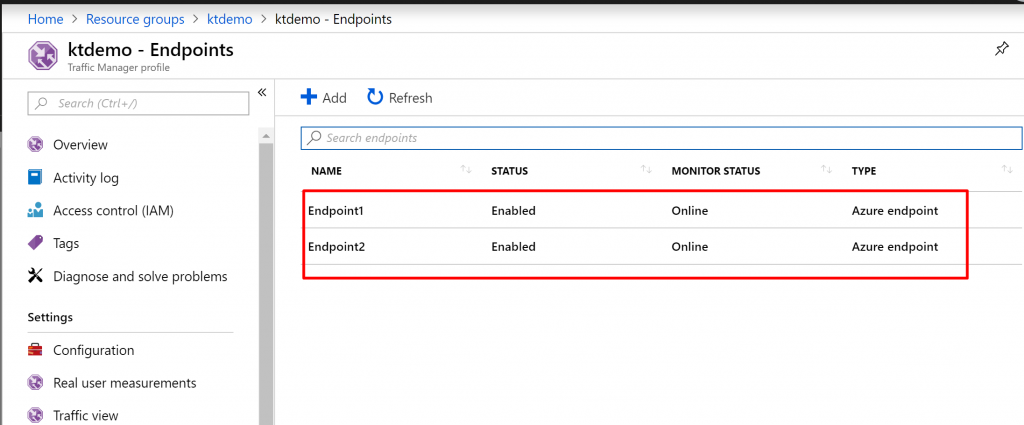
Step 10) Again you will have two endpoints, both enabled and online.
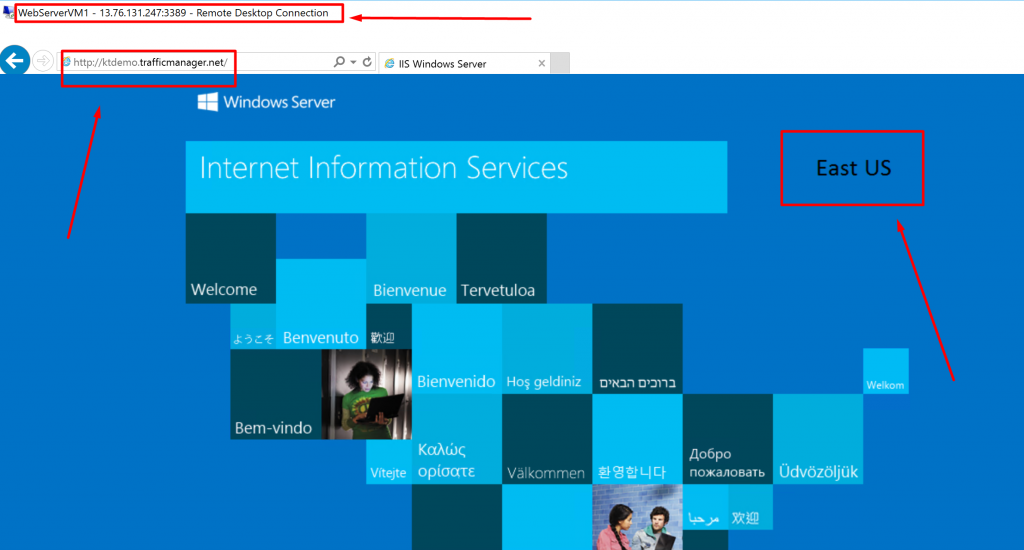
Step 11) Copy the DNS name of the traffic manager profile and paste it in the WebserverVM1‘s browser. This VM is in Southeast Asia location, so the request is going from Asia. It will direct you to the resource located in the East US region because we had selected the target resource as WebServerVM2-ip which is in the East US region.
Step 12) Similarly, go to WebServerVM2 and paste the URL. WebServerVM2 is in the East US region so the request is coming from either North America. It will direct you to the resource in Southeast Asia because we had selected the target resource as WebServerVM2-ip which is in Southeast Asia.

Step 13) Likewise, if I hit the request from my own machine, it is directing me to the resource located in East US because I am in India which comes in the Asia region.

- So this is how you can implement geographic routing method in Azure Traffic Manager.