AZURE MANAGEMENT GROUPS – TUTORIAL

In the case where we want to apply governance consistently across subscriptions, we need to use Management Groups. In this article, I am going to show you how to create and use Azure Management Groups.
- Go to Azure Portal –> Click on All Services –> Search for Management Groups

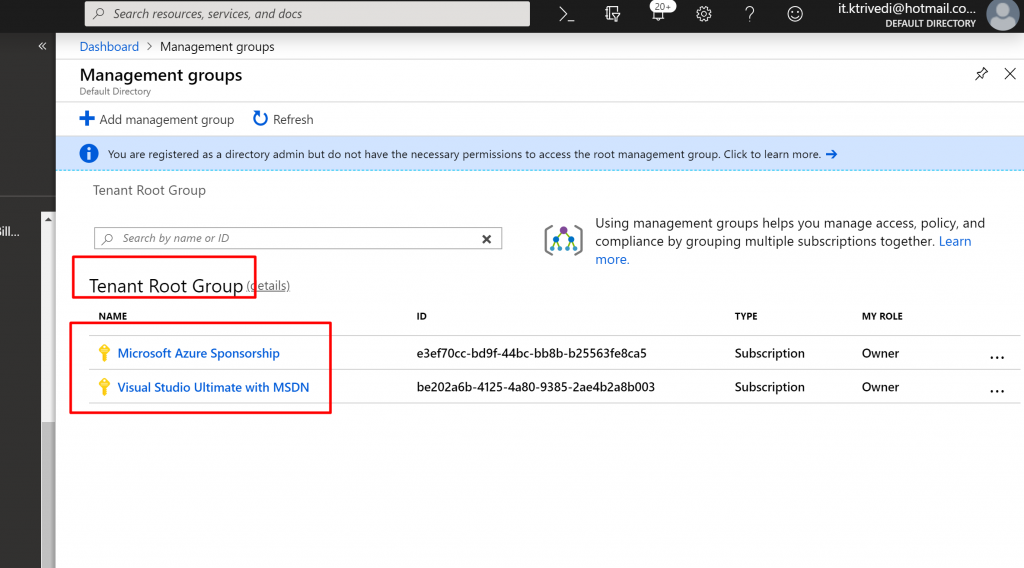
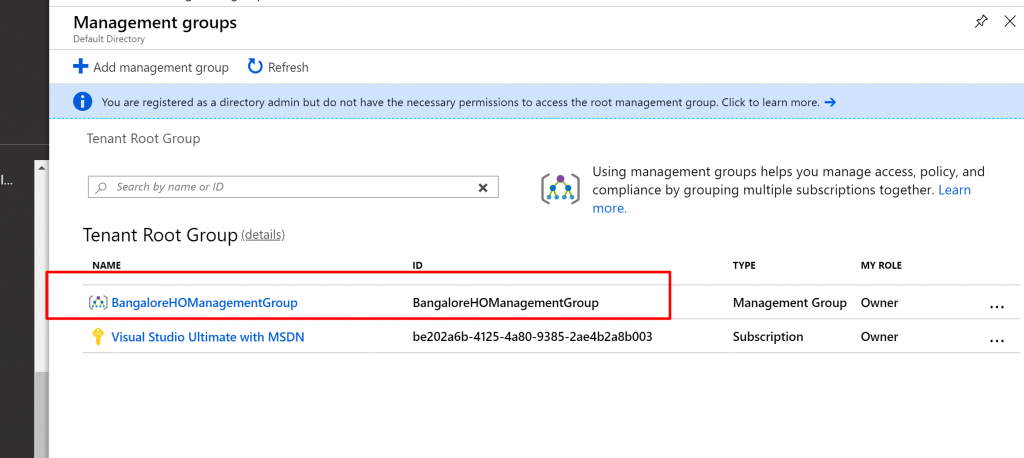
- Once you are inside Management Groups, you can see we have one default group available called Tenant Root Group. By default, all your subscriptions would be a part of this Tenant Root Group.
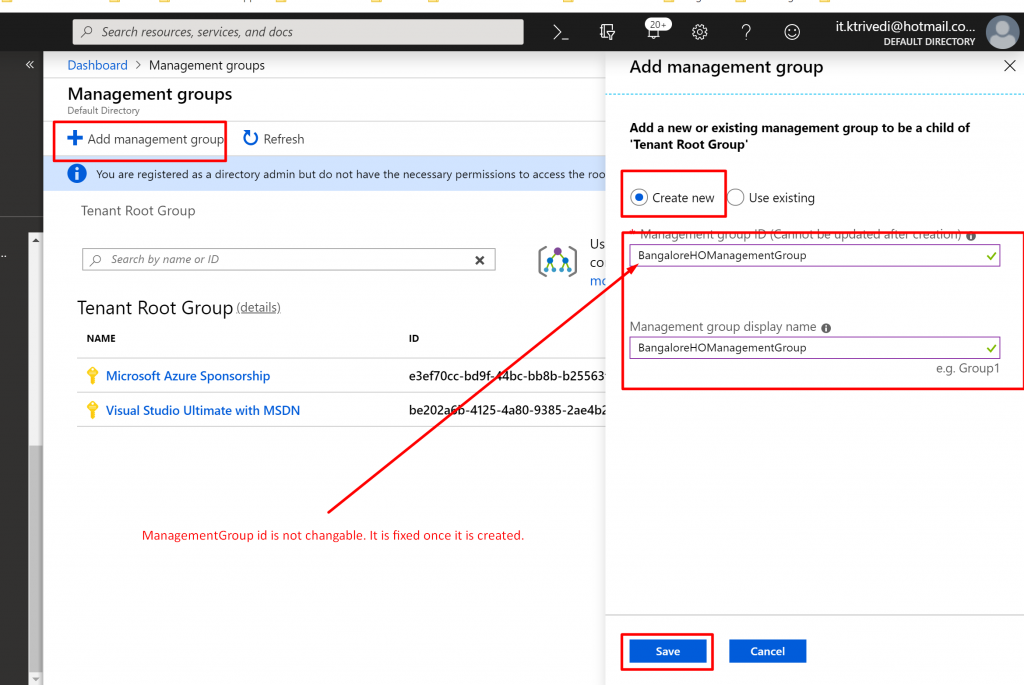
- Click Add Management Group and provide ID and Display Name. ID is not changeable; it is fixed.
- You can see the new Management Group will be created successfully.

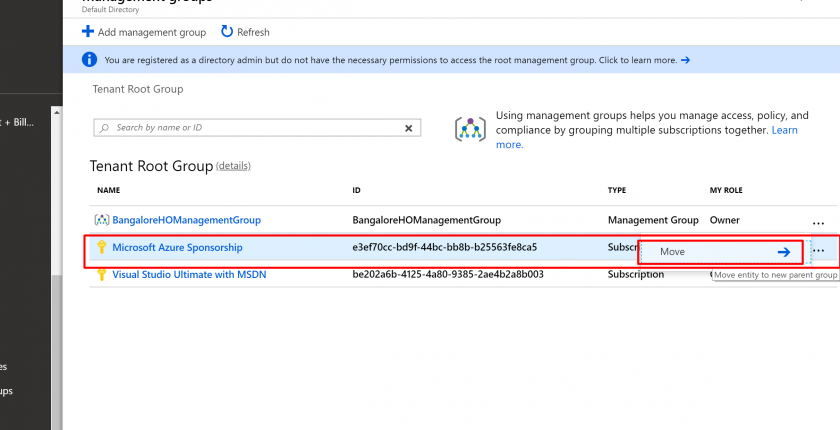
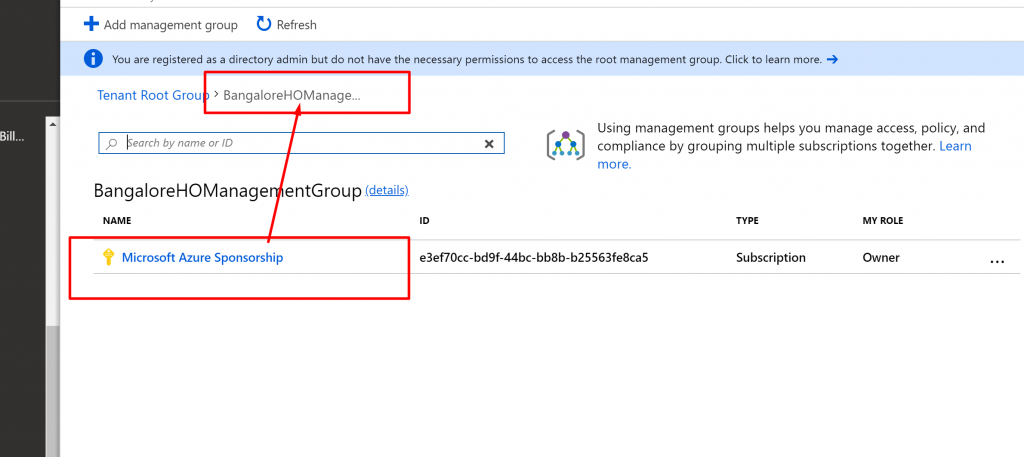
- You can see still your subscriptions are under Tenant Root Group and they are not inside the newly created Management Group. So, let us move our subscription to the newly created Management Group.
- Click on ellipsis button the subscription that you want to move and click Move.
- Now on that pane, select the Management Group name you want to move your subscription to.
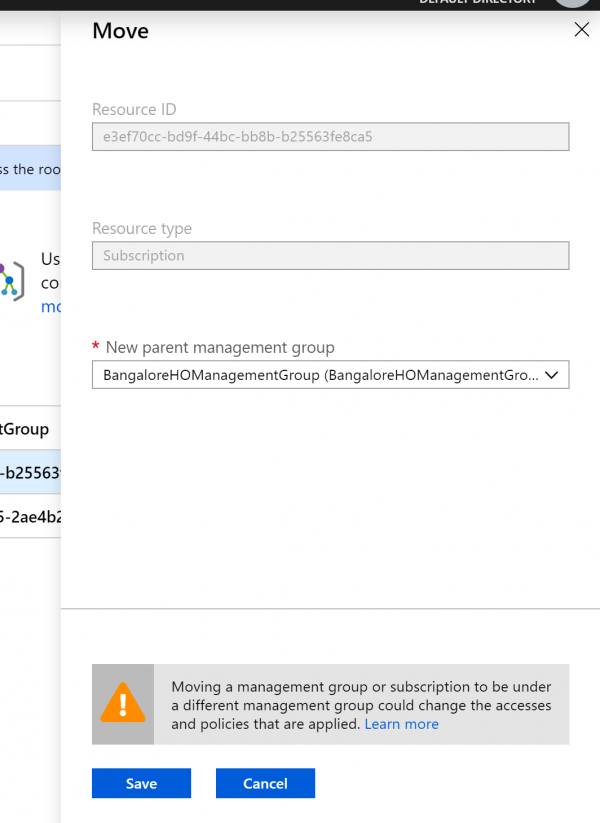
- Then you will see that the subscription would be moved inside the newly created Management Group.
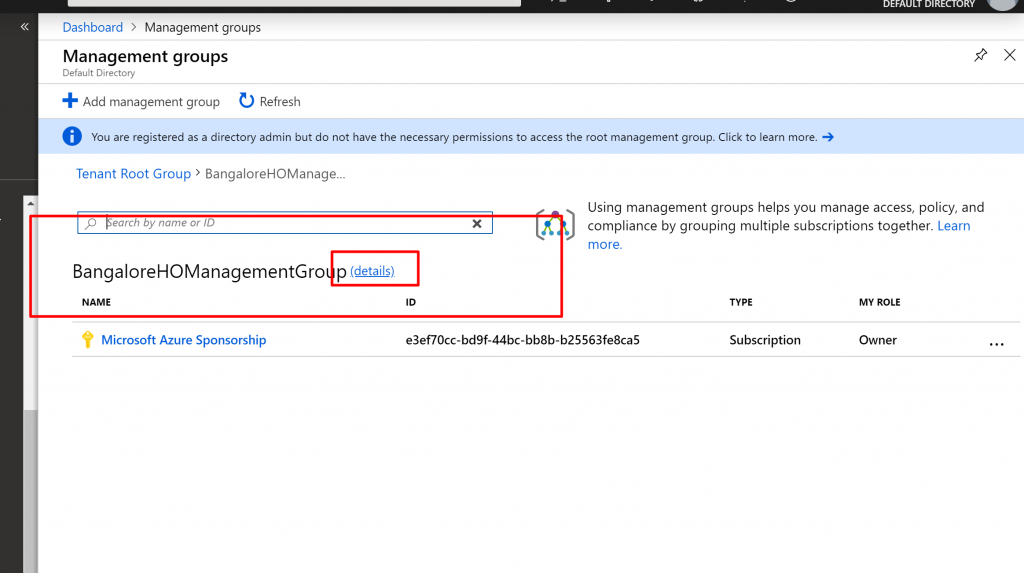
- Next, let us add RBAC to the management group. Select the Management Group and click on Details.
- Click on Access Control. Click Add –> Role Assignment. Select Contributor as a Role and select User or a Group. Then, click Save.

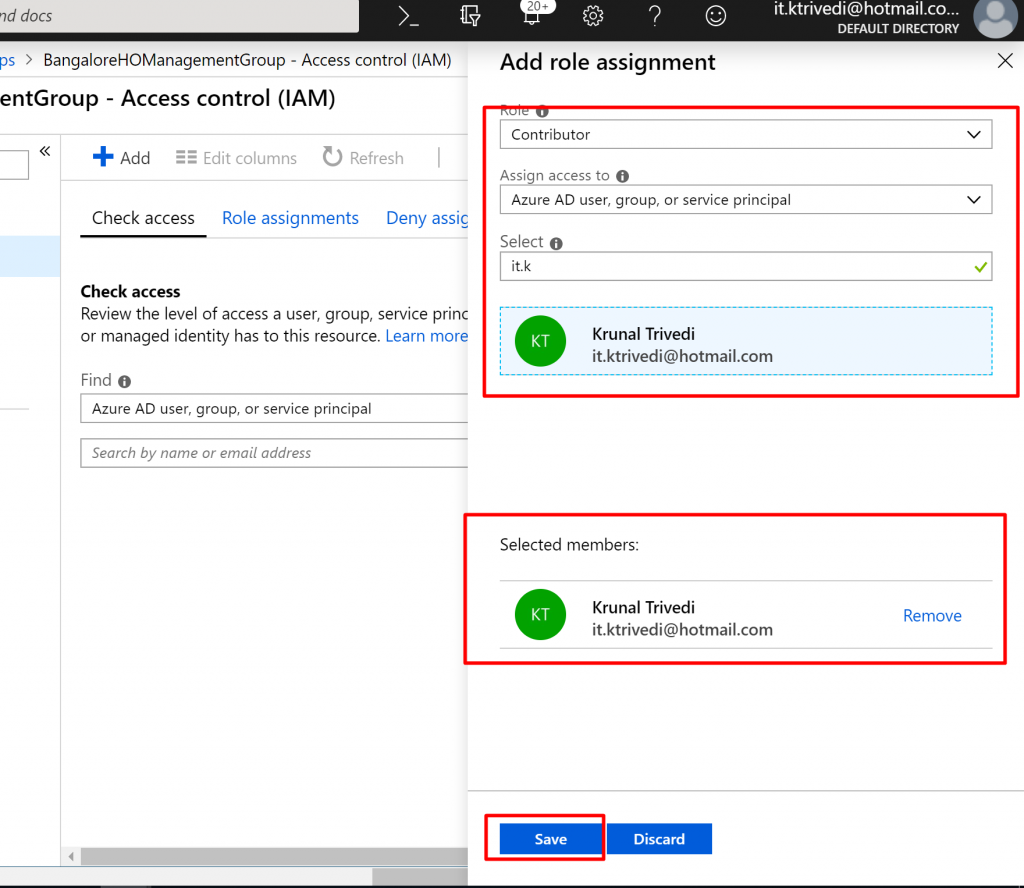
- This means that now you have a contributor permission for any of the subscription in the Management Group.
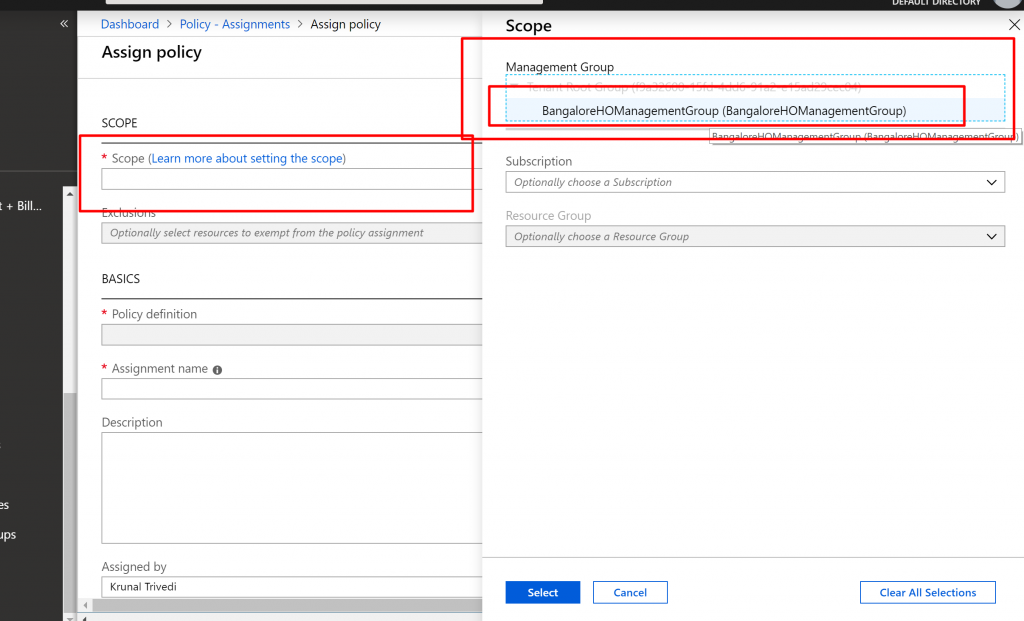
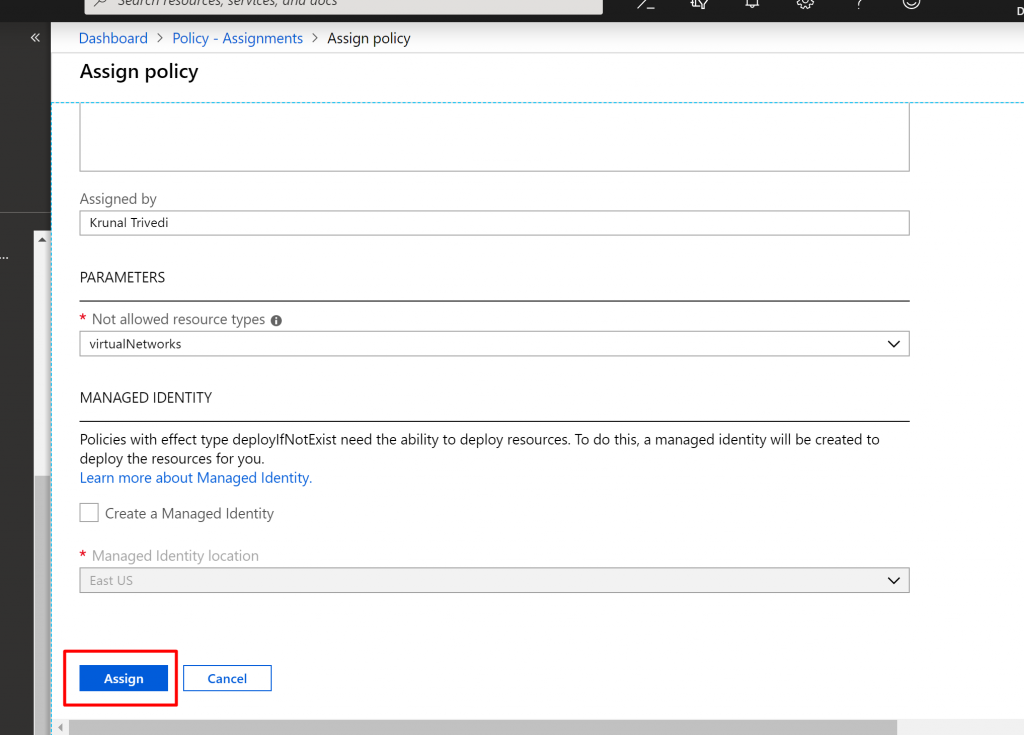
- Next, click on Policy and Select Assignment.
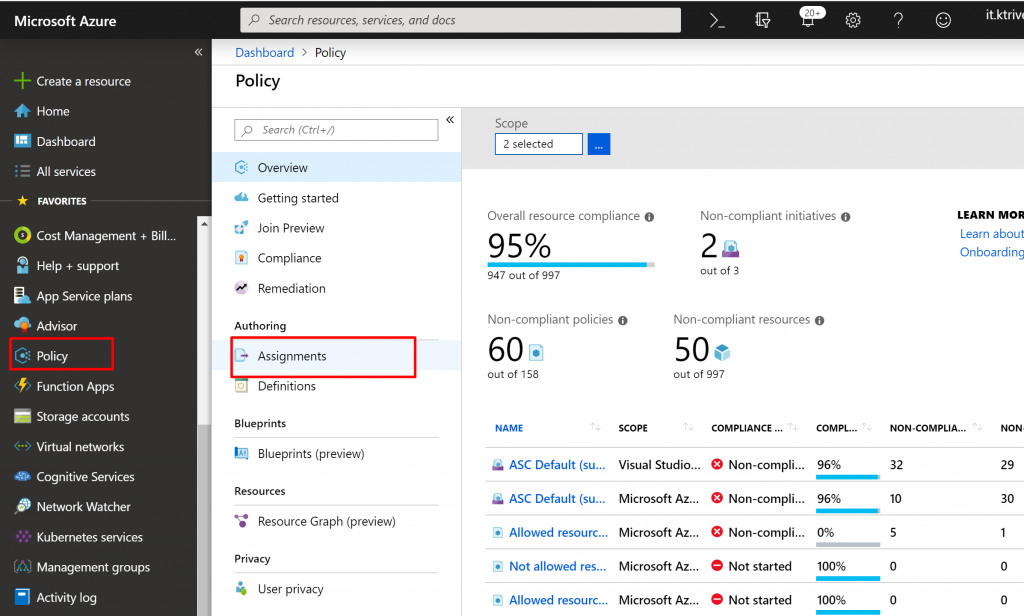
- In the Scope Box, instead of Subscription we are going to select Management Group Name.

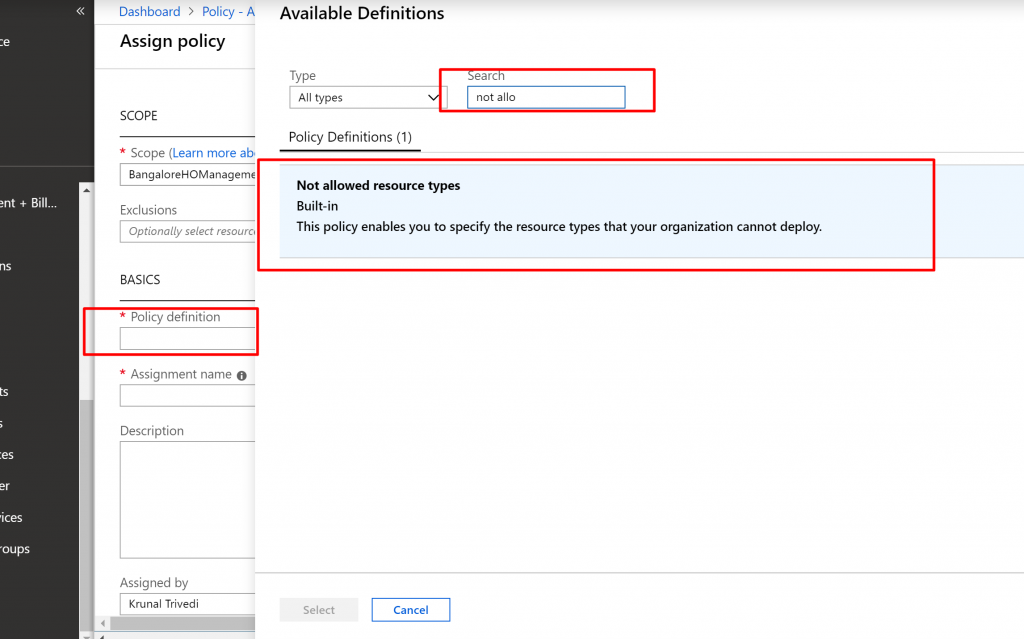
- Click on the ellipsis button for Policy Definition Box. Search for not-allowed and select Not Allowed Resource Types.
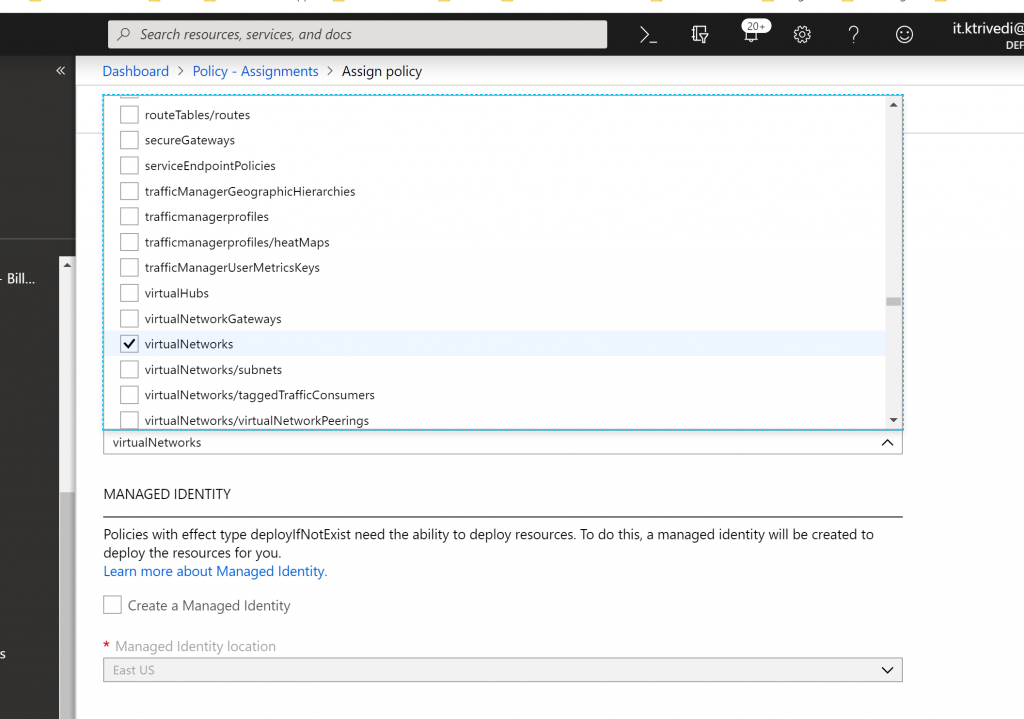
- Select the Resource Type we are not going to allow. We are not going to allow Virtual Networks. Click Assign.
- It is similar to how we assign a Policy. But instead of a Subscription, we set our Policy scope to a management group. This way, we can have multiple Policies to be a part of a single management group and apply policy in all subscriptions at the same time without repeating the task again and again.
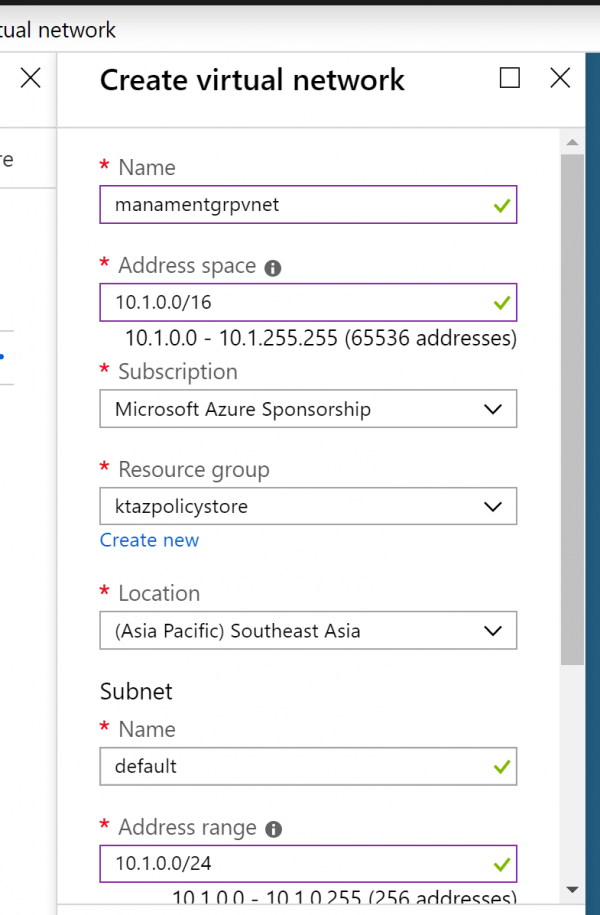
- Now let us check this out. Let us try and create a Virtual Network inside our subscription.
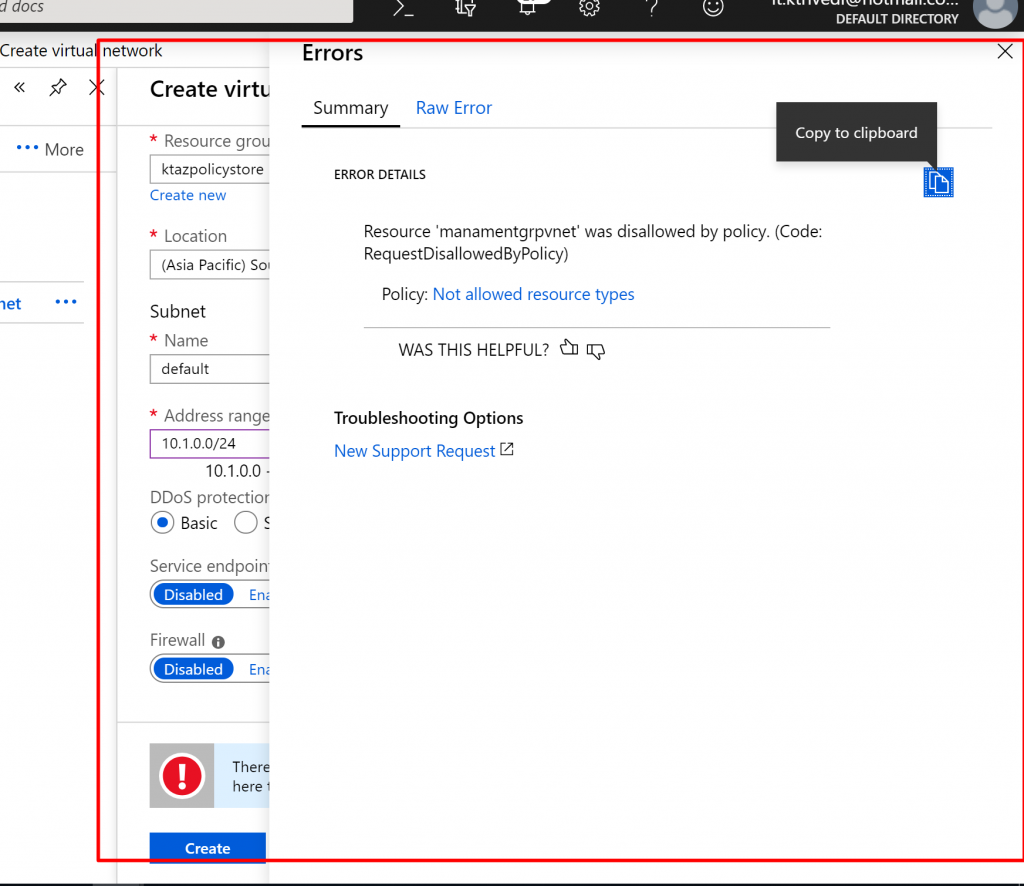
- When we click create, you can see that we will get validation errors. If you click on the validation error, it will show you the summary mentioning ‘disallowed by the policy’.
- So, this is how you create and use Azure Management Groups.