Accessing the superpower of Azure Virtual Desktop

The Azure Virtual Desktop enables you to create virtual machines that several users can use at the same time.
What’s more? You can virtualize Microsoft 365 apps and Windows apps that users can access from their own device, which can be computer or tablet or guess what… even a phone.
Let’s dive right into the step by step of how you can start working with Azure Virtual Desktop.
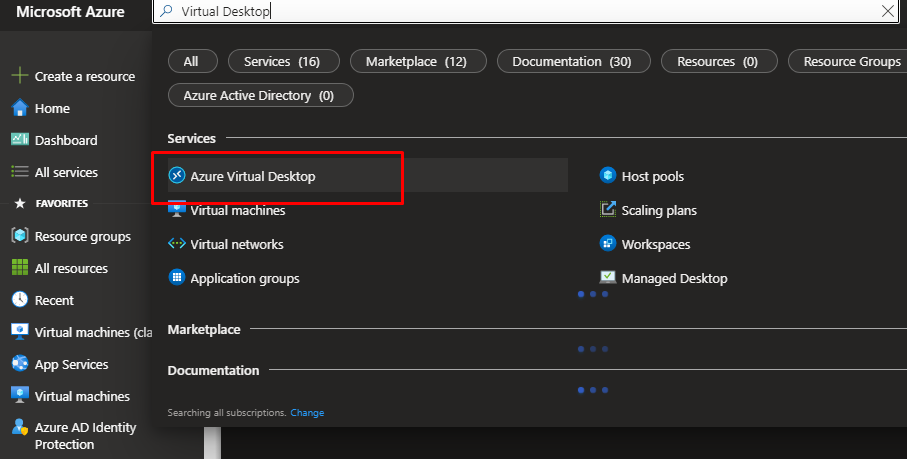
Go to Azure Portal and search for Azure Virtual Desktop.
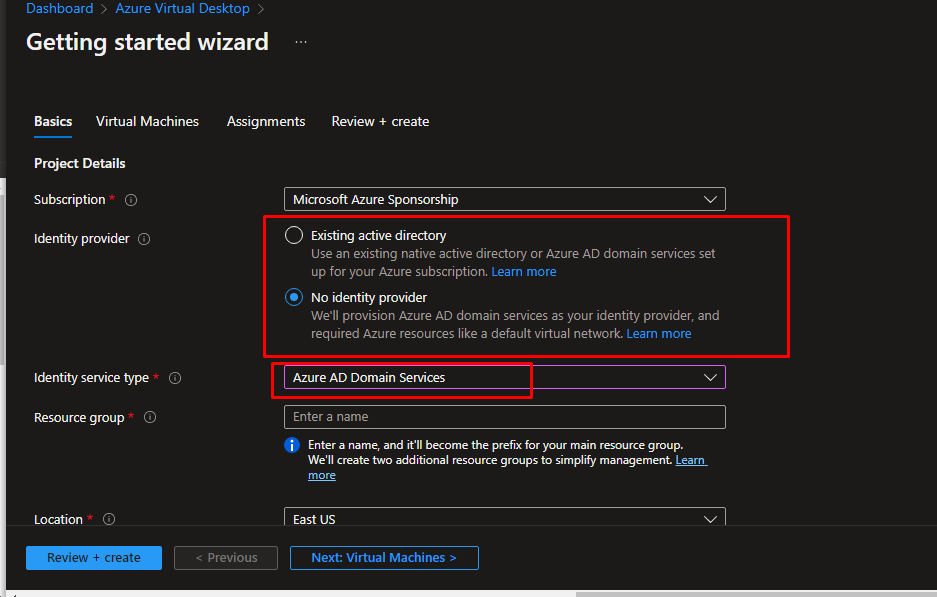
In the management blade, go to Getting Started and click start. From here, we are going to create a host pool with an application group and a user and session hosts which are VMs.

For the identity provider, choose no identity provider. For the identity service type, choose Azure AD Domain Services.
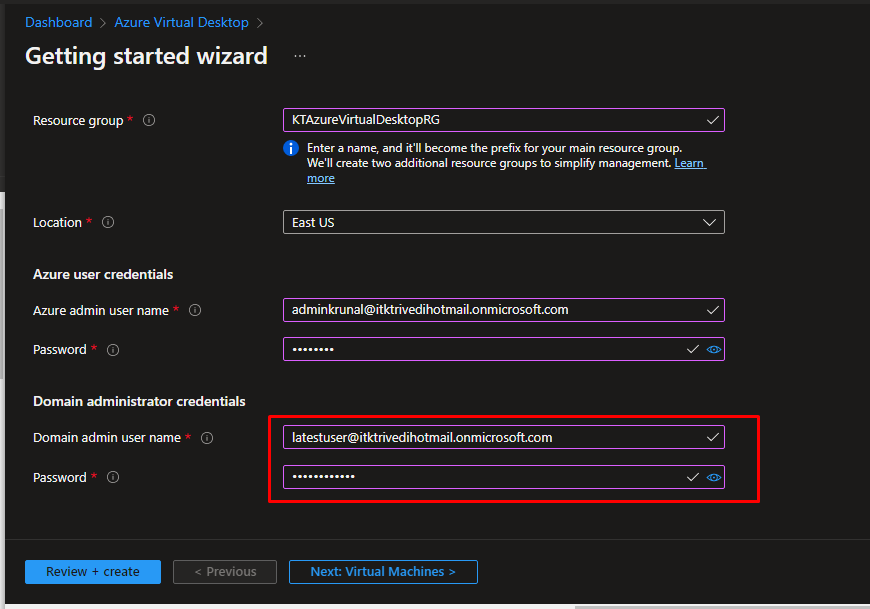
Create a new resource group and put it in a location.
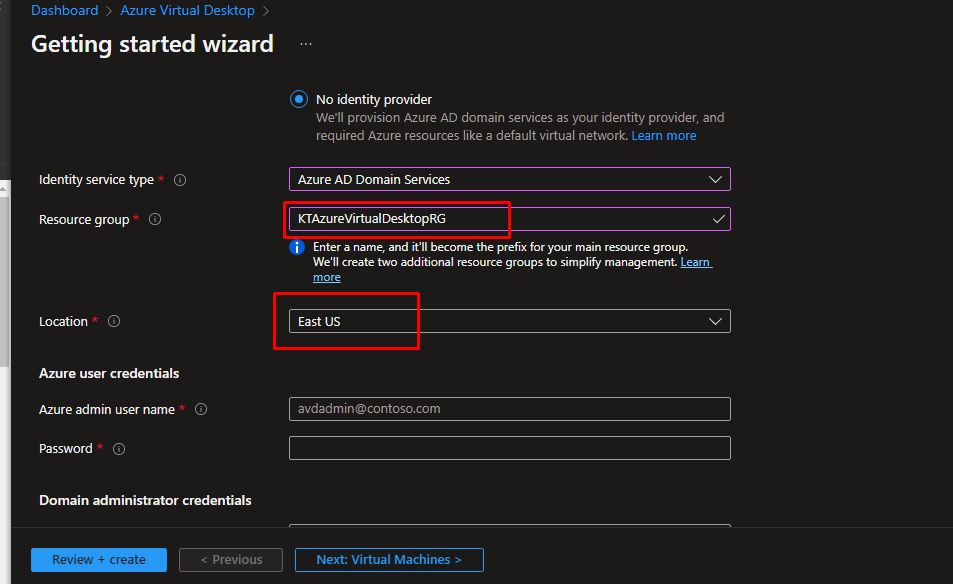
Next, give Azure admin credentials of the user that has all the admin rights from your directory.
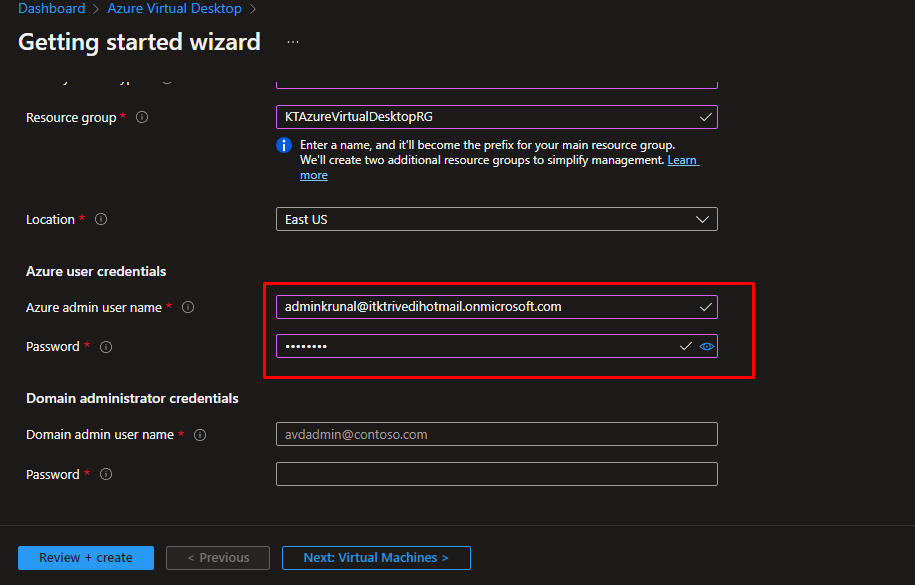
Next, create a new user that will be able to join machines to your domain.
- At first, this might seem a little bit complicated because the Virtual Desktop host pool will now be created in a new domain.
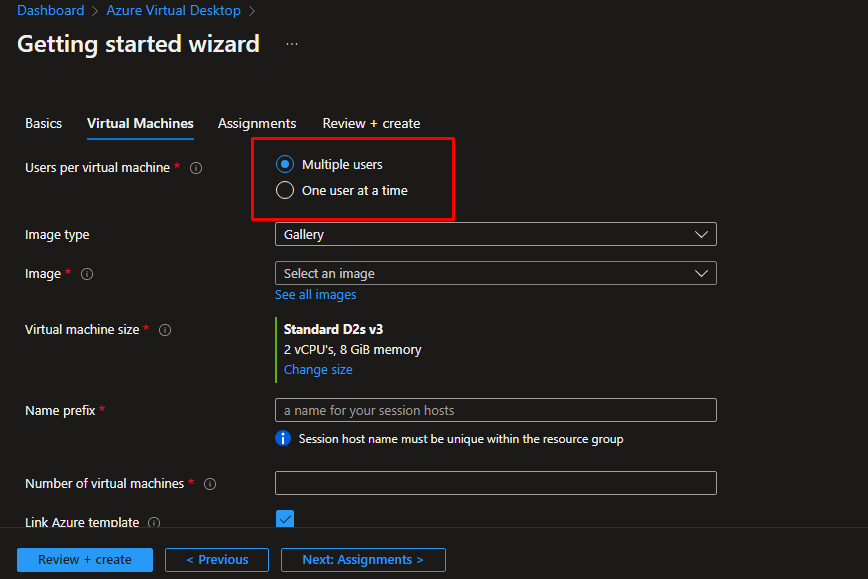
Next in the virtual machines blade, choose multiple users to access the VMs in the Virtual Desktop host pool. It is useful because it saves a lot of resources.
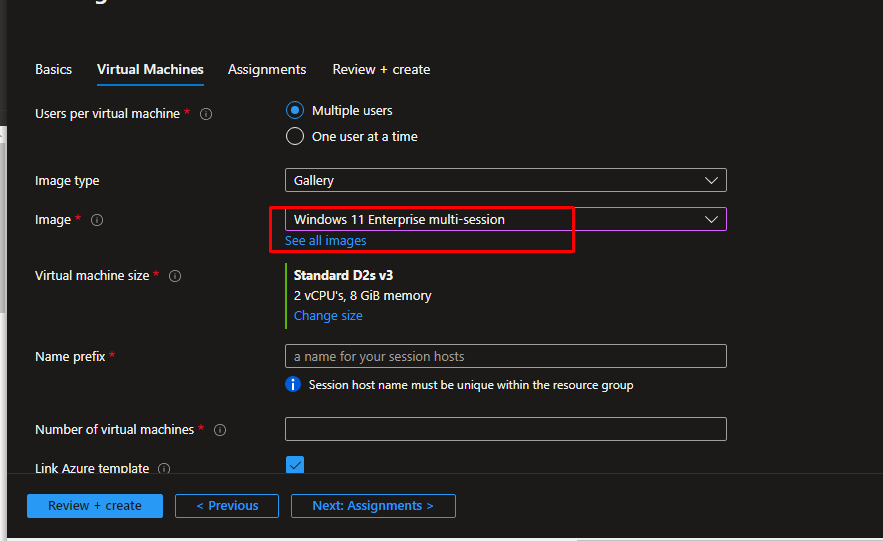
Choose a multi-session VM image.
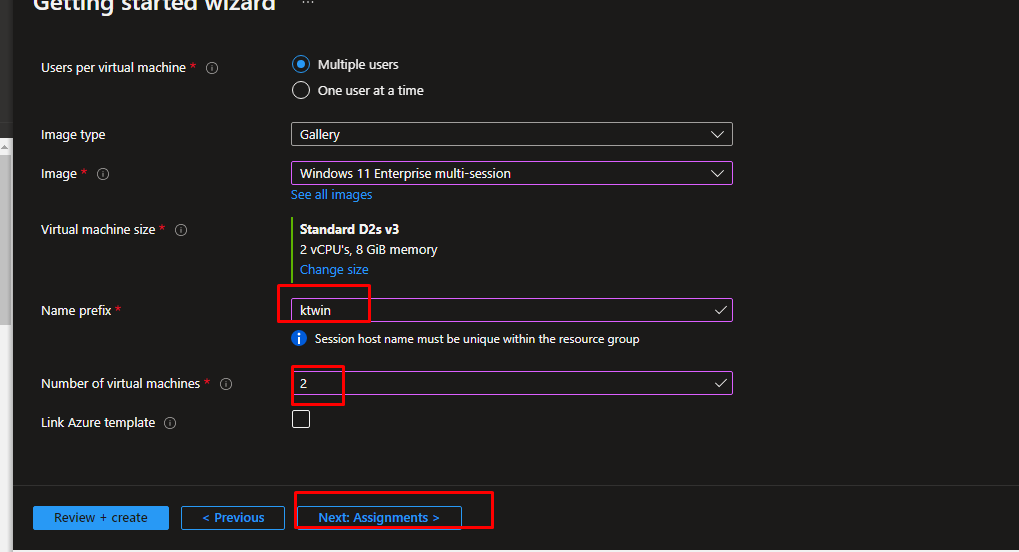
Add a name prefix and we are going to have 2 virtual machines. We are not going to link any Azure template as of now. Next, go to assignments.
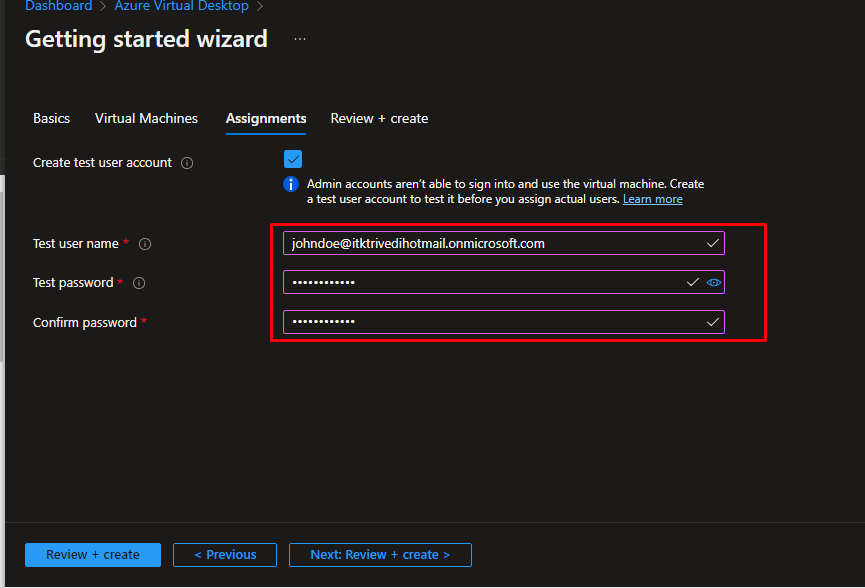
Then, we are going to create a test user account for the same.
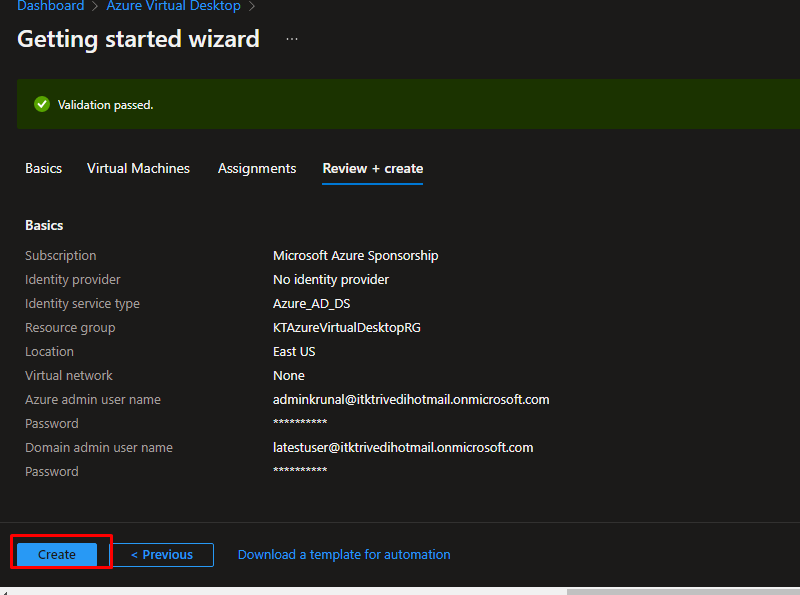
Once the validation gets succeeded, create it.
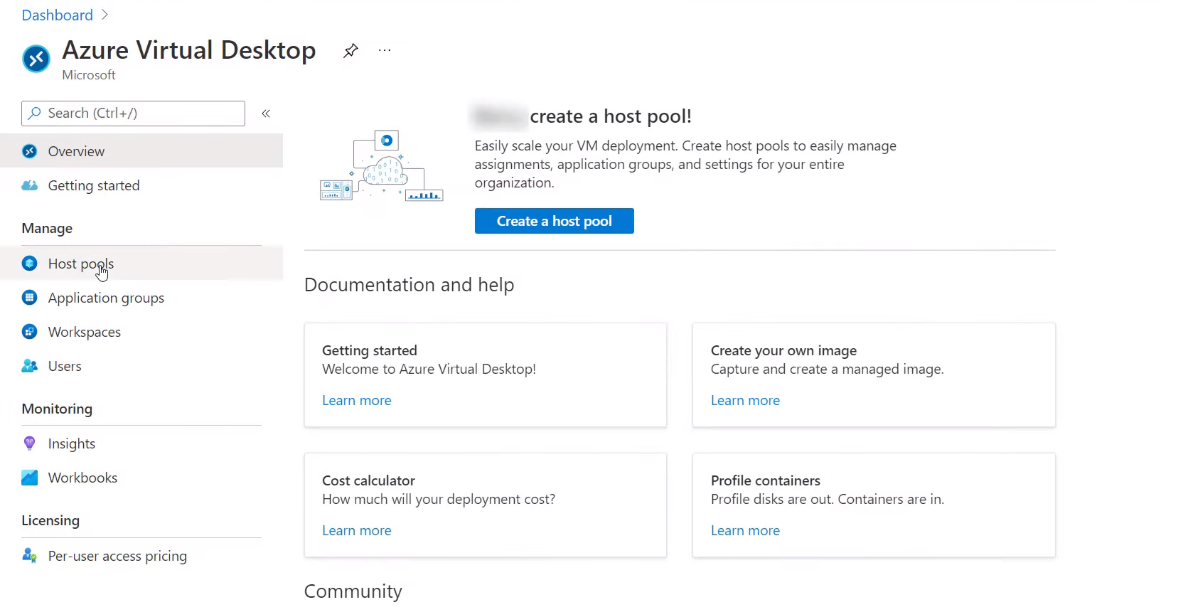
Once created, you can easily access the host pool and access the virtual machines just like you do with regular VMs.
- You can create multiple host pools with different types of VMs in it. For example, you can create a pool for the sales department with VMs and another pool for the administration department with other types of VMs in it.
- You can also scale the VMs and configure them however you like.
What are you waiting for? Go explore the Azure Virtual Desktop now.