WORKING WITH AZURE LOGIC APPS USING VISUAL STUDIO 2017

- Along with working on Azure Logic Apps from inside the Azure Portal, you can also work on them from Visual Studio 2017.
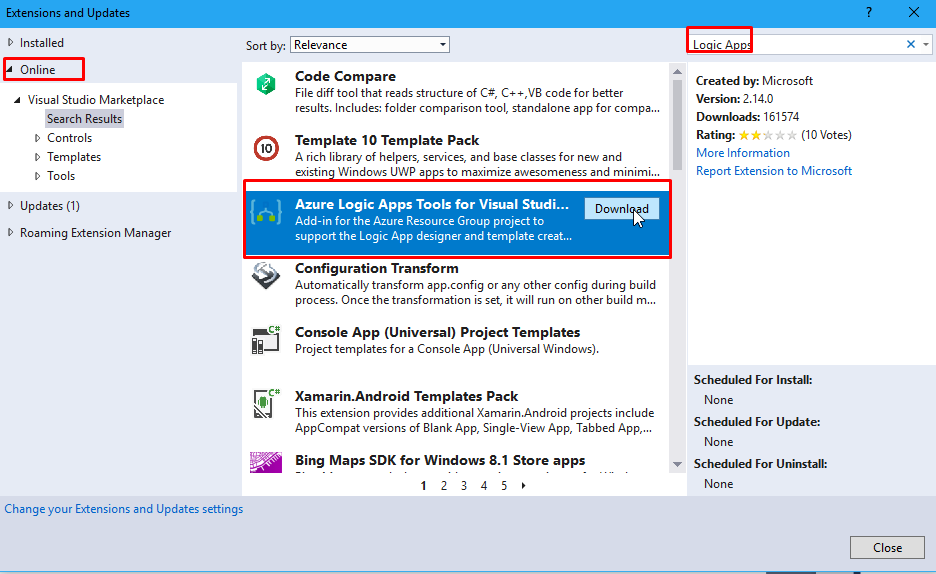
- Open Visual Studio 2017 and go to Tools –> Extensions and Updates

- Go to online and search for Logic Apps. Download the Azure Logic Apps Tools for Visual Studio extension.
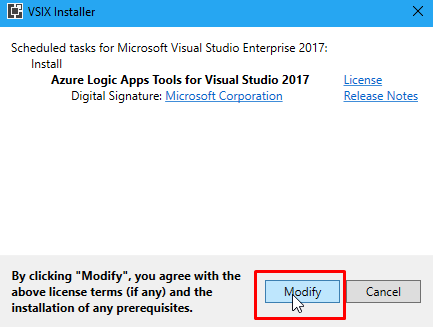
- n order to finish the installation, you will have to close all the instances of Visual Studio that are open.
- When the Dialog box appears, click on Modify.
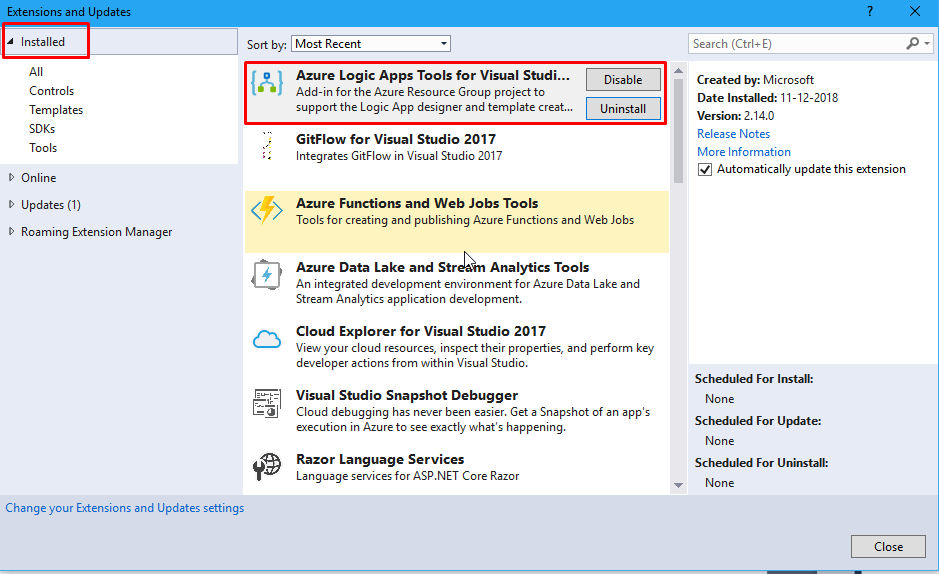
- Once the Modifications get completed, close the dialog box. And open Visual Studio 2017 again.

- Now if you go to the installed extensions and updates, you will find Azure Logic Apps Tools there.
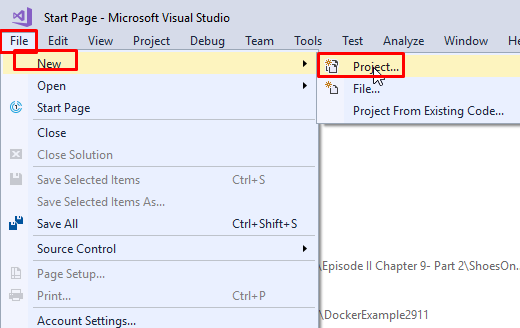
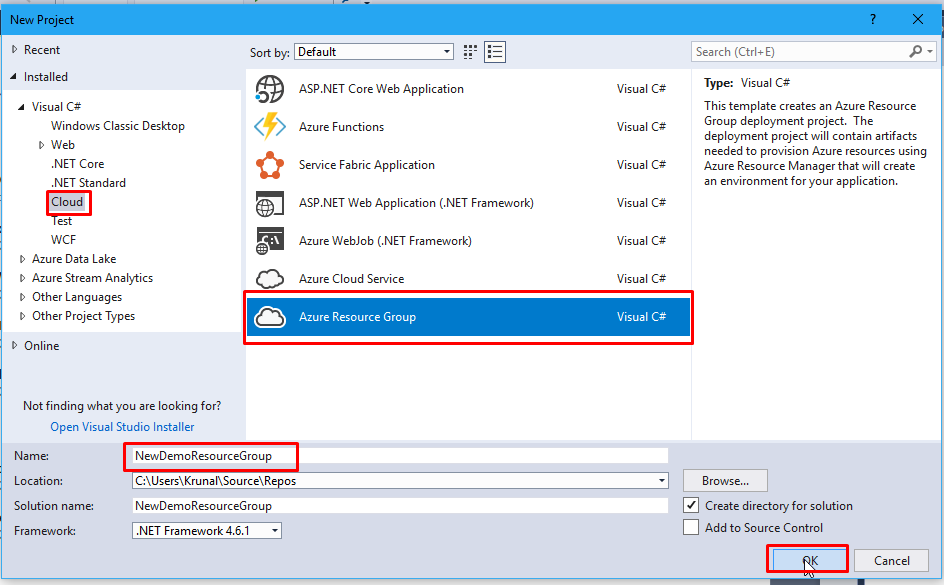
- Go to file to create a new Project.
- Under the Cloud category, select Azure Resource Group, give it a name and click on OK.
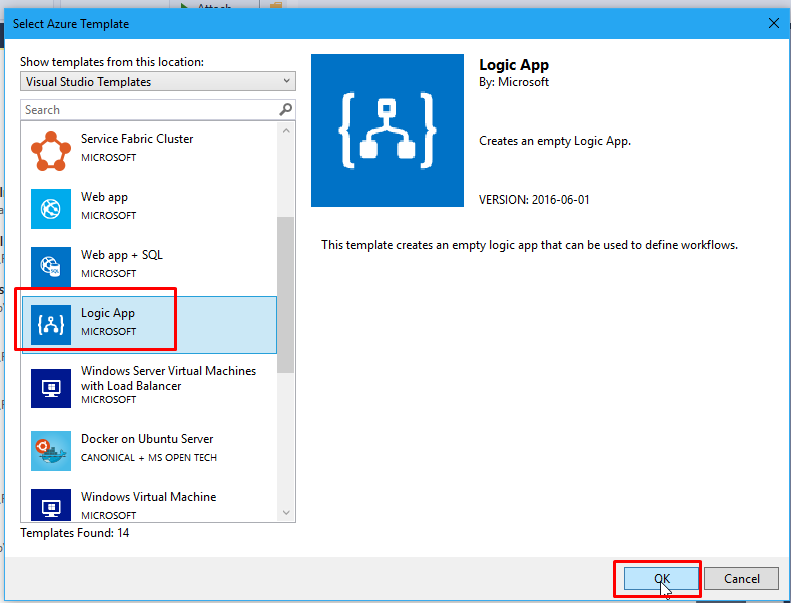
- Then from the list of Azure Templates, choose Logic App and click on OK.
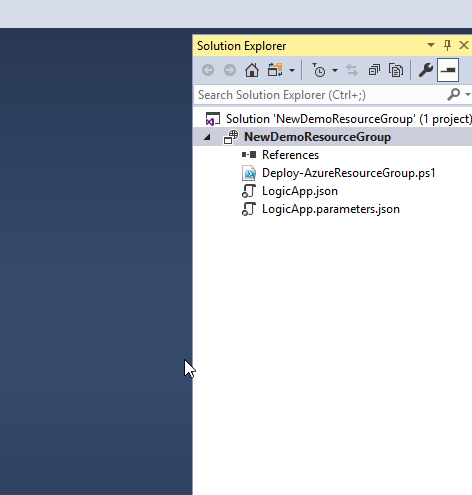
- Visual Studio will scaffold a project for you and you will see that you have a list of files.

- The first file, Deploy-AzureResourceGroup is sort of a partial script that you can use to deploy your Logic App.

- The second file is LogicApp.json where the definition of the Logic App designer lives.

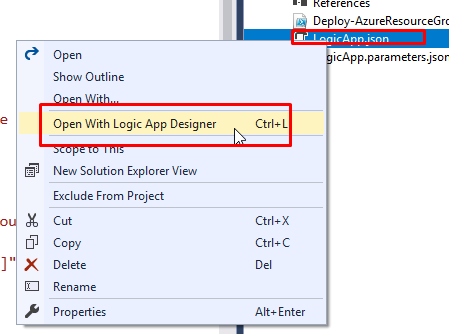
- Right click on LogicApp.json and select open with Logic App Designer.
- Select an appropriate Azure account, select subscription, select/create a resource group and choose the location. Click on OK.

- And you will see the Logic Apps Designer just like it is on the Azure Portal.
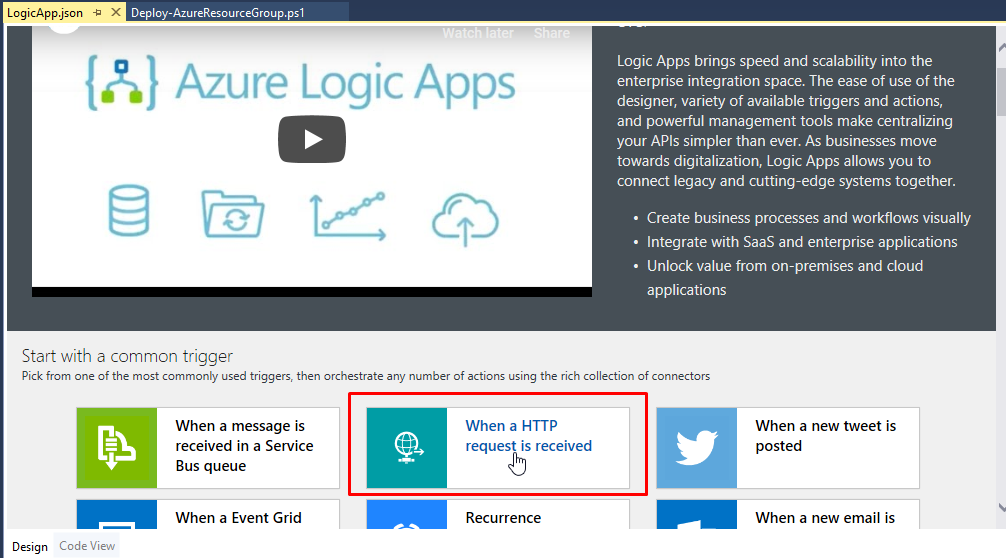
- You can create new steps, add actions and conditions.

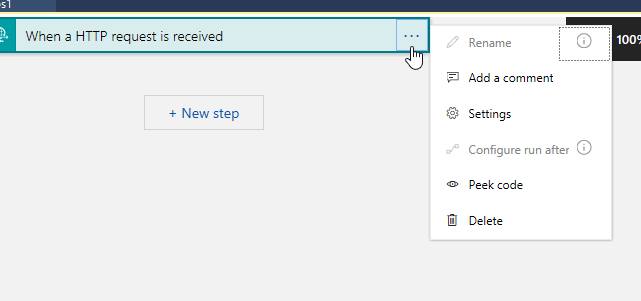
- Make modifications, add comments, settings, etc.
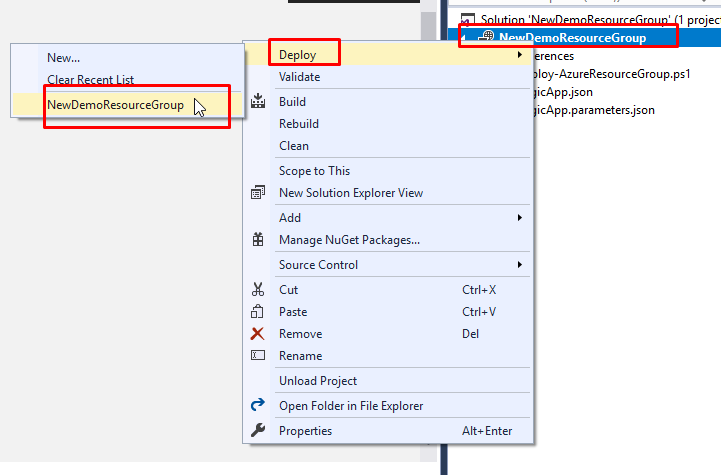
- And to Deploy, you can just right click on the project name and go to deploy where you will find the resource group.
This is how easy it is to work with Azure Logic Apps Visual Studio Extension.