POWERSHELL FUNCTION IN AZURE

n this demo, I am going to show you how to create an Azure Function using PowerShell and Visual Studio Code.
Prerequisites:
- PowerShell Core
- VS Code
- PowerShell extension for VS Code
- .NET Core SDK 2.2+ (required by Azure Functions Core Tools and available on all supported platforms).
- Azure Functions Core Tools version 2.x
- Active Azure Subscription
- To install PowerShell core on Windows, you need to go to this link https://github.com/PowerShell/PowerShell/releases and download the appropriate installer.
- To install VS Code, you need to go to this link https://code.visualstudio.com/
To install PowerShell extension for VS Code, open VS code, go to extensions tab and search for PowerShell. Click Install.

Once it gets installed successfully, you will find it alongside the other tabs.
To download and install .NET Core SDK 2.2, you need to go to this link https://dotnet.microsoft.com/download and find this button to download and install.

- Now to install Azure Functions Core Tools 2.x, you need to keep a few things in mind
- You should have .NET Core SDK for Windows
- You need to have Node.js install which includes npm
- Only Node.js 8.5 and later versions are supported
To install the Azure Functions Core tools, open command prompt and run the command npm install -g azure-functions-core-tools

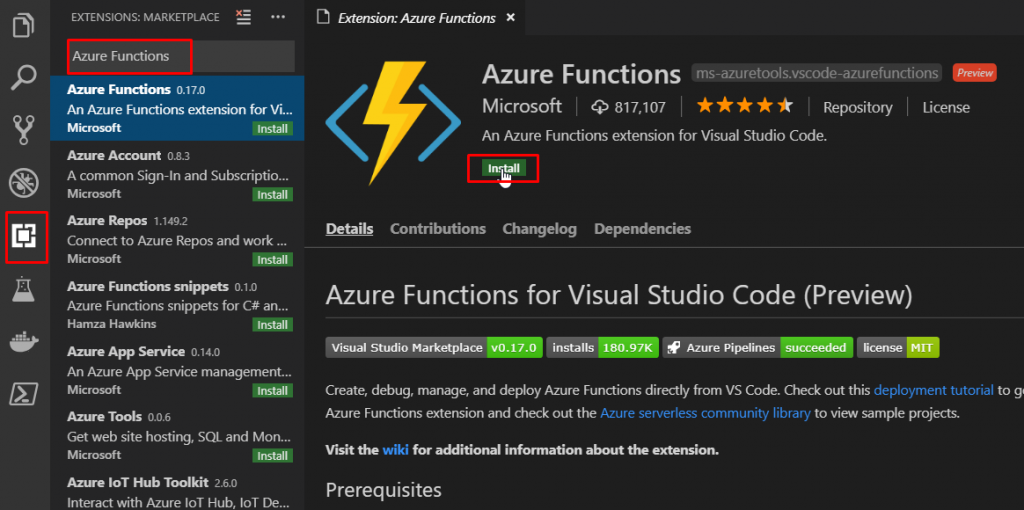
Now we need to install the Azure Function extension in VS Code. Open VS Code, go to Extensions and search for ‘azure functions’. Select Install.
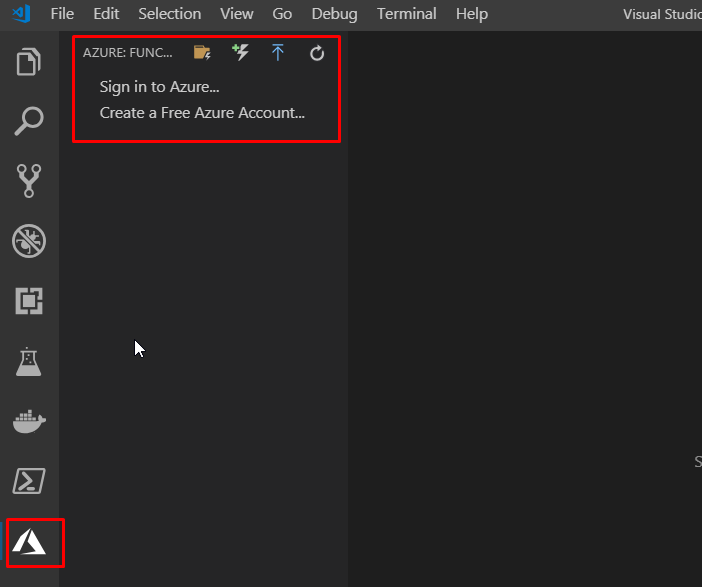
Restart Visual Studio Code and select the Azure icon on the Activity bar. You should see an Azure Functions area in the Side Bar.
- The Azure Functions project template in Visual Studio Code creates a project that can be published to a function app in Azure.
- A function app lets you group functions as a logical unit for management, deployment, and sharing of resources.
Select the Azure logo to display the Azure: Functions area, and then select the Create New Project icon.

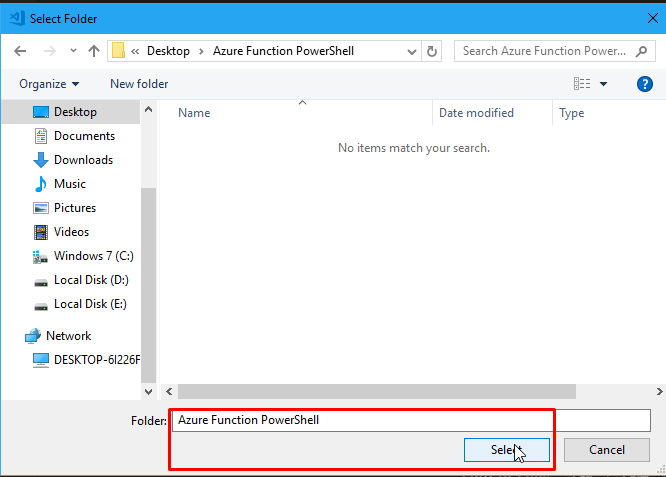
Choose a location for your Functions project workspace and choose Select.
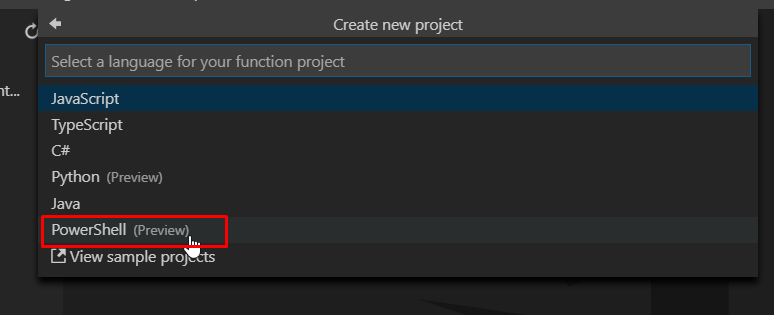
Select the Powershell (preview) as the language for your function app project.
Choose HTTP Trigger as the template for your first function.

Use HttpTrigger as the function name.

And choose an authorization level of Function.

- The Functionauthorization level requires a function keyvalue when calling the function endpoint in Azure.
- This makes it harder for just anyone to call your function.
When prompted, choose Add to workspace.

- Visual Studio Code creates the PowerShell function app project in a new workspace.
- This project contains the host.json and local.settings.json configuration files, which apply to all function in the project.
- This PowerShell project is the same as a function app running in Azure.
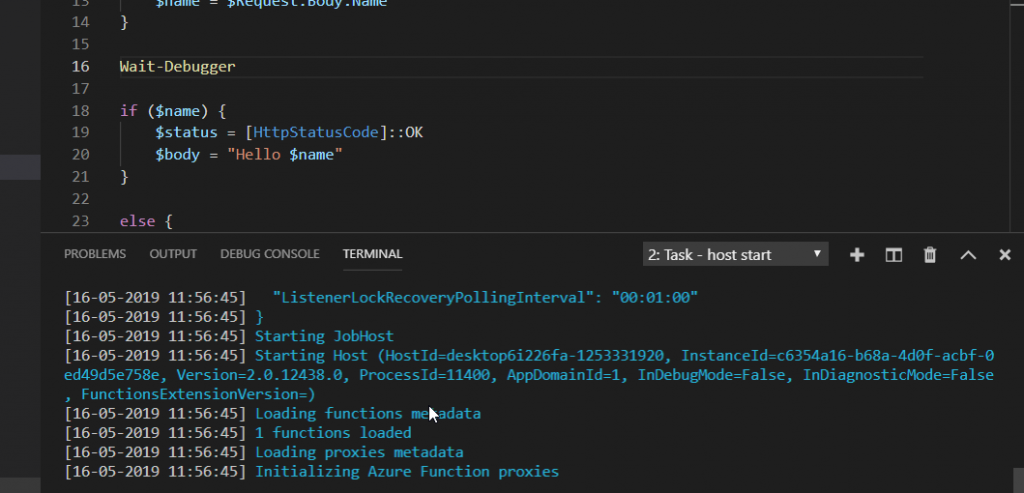
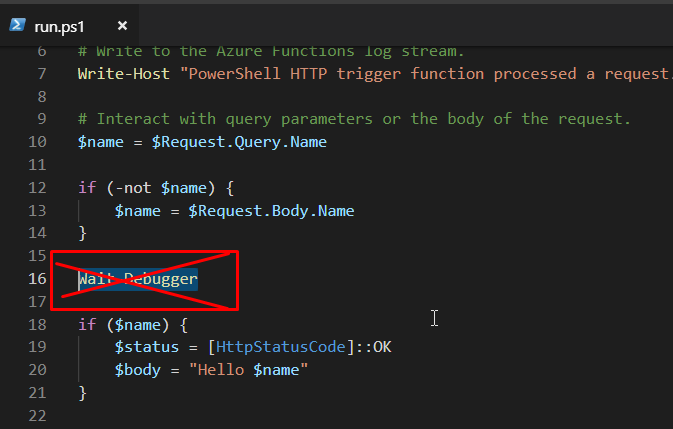
Azure Functions Core Tools integrates with Visual Studio Code to let you run and debug an Azure Functions project locally. To debug your function, insert a call to the Wait-Debugger cmdlet in the function code before you want to attach the debugger.

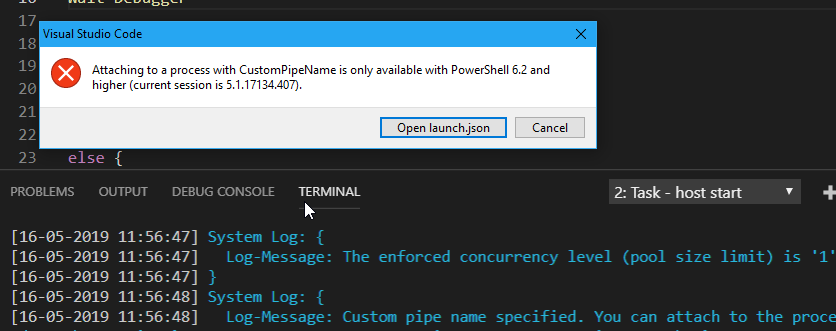
Press F5 to start the debugging process.
Most of you might get this error. Click Cancel. We need to fix this in order to go ahead.
Go to File –> Preferences –> Settings

Search for PowerShell and select PowerShell Configuration.

Scroll down to find these two settings. Power Shell Default Version and Power Shell Exe Path. In the first one, write ‘PowerShell Core 6’ and in the latter one, write the path as ‘C:Program FilesPowerShell6pwsh.exe’. The settings will be automatically saved.

Close the settings and press F5. This time the debugging would be done successfully. Copy the URL endpoint of your HTTP-triggered function.
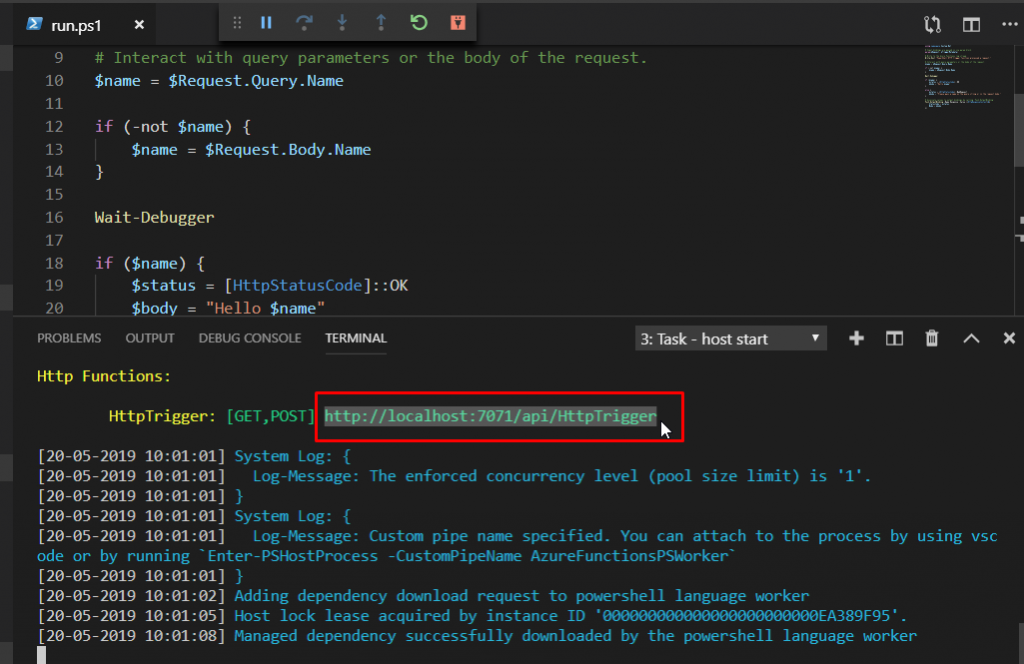
Go to the PowerShell terminal which would be running by default. If it is not running, you can start a new one by clicking the + sign.

Append the query string ?name= to this URL, and then use Invoke-RestMethod to execute the request, as follows.

Click Continue.

Since we have placed the Wait Debugger, it will pause there. You can hover the cursor over $name and see that the value has been stored. Click Continue.

In the PowerShell terminal, it will return with the message ‘Hello PowerShell’.

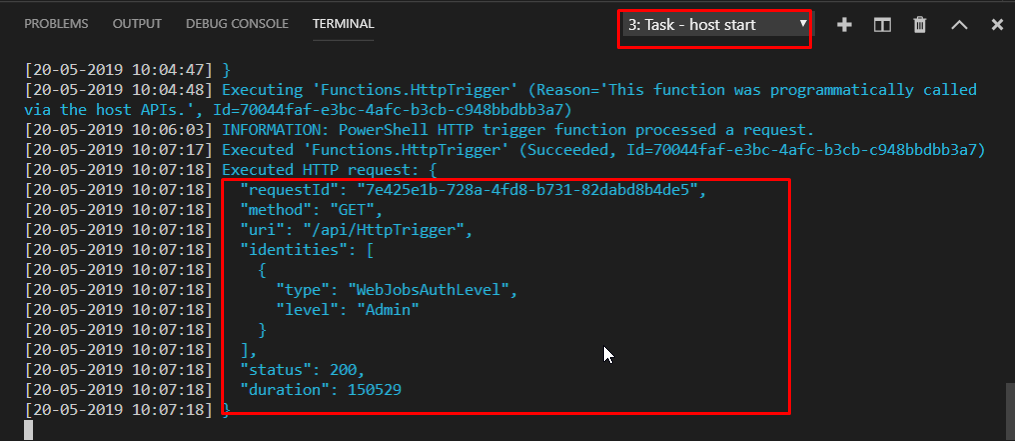
And in the Task terminal, it will return this.
- You can also execute the GET request from a browser.
- When you call the HttpTrigger endpoint without passing a name parameter either as a query parameter or in the body, the function returns a 500 error.
- When you review the code in run.ps1, you see that this error occurs by design.
- To stop debugging, press Shift + F5.
—————————————————————————————————-
- After you’ve verified that the function runs correctly on your local computer, it’s time to publish the project to Azure.
Remember to remove any calls to Wait-Debugger before you publish your functions to Azure.
Go to settings once again. Search for Azure Functions. Tick the Azure Functions: Advanced Creation option. This enables the advance creation of Azure Function apps where you can select the values while creating the resource. If you keep this unchecked, it will take the values by default and just ask you for the function app name.

- Visual Studio Code lets you publish your functions project directly to Azure.
- In the process, you create a function app and related resources in your Azure subscription.
- The function app provides an execution context for your functions.
- The project is packaged and deployed to the new function app in your Azure subscription.
In the Azure: Functions area, select the Deploy to Function App icon. If not signed-in, you are prompted to Sign in to Azure. You can also Create a free Azure account. After successful sign in from the browser, go back to Visual Studio Code.

Next, select an appropriate subscription.

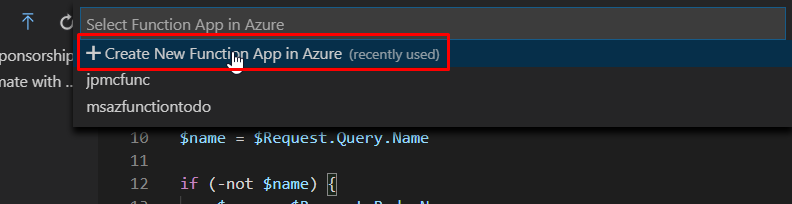
Next, select +Create New Function App in Azure.
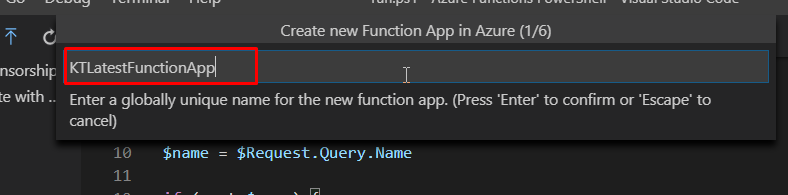
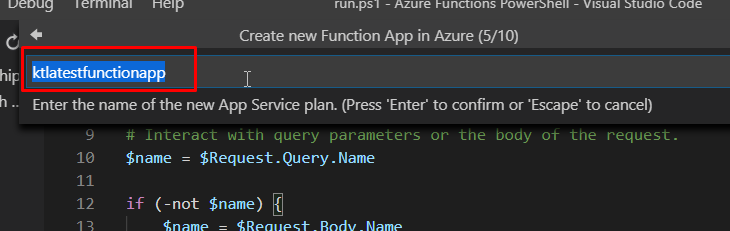
Give a globally unique name to your function app.
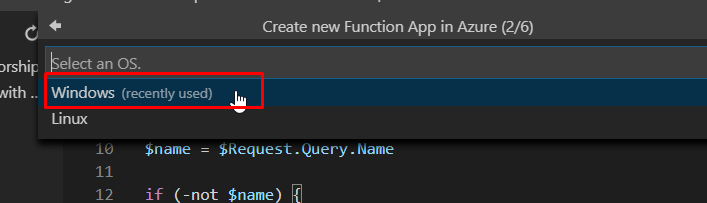
Select Windows OS.
Select App Service Plan.

Select create new app service plan. In most cases, it will select the name of your function app as the app service plan’s name. Press enter.

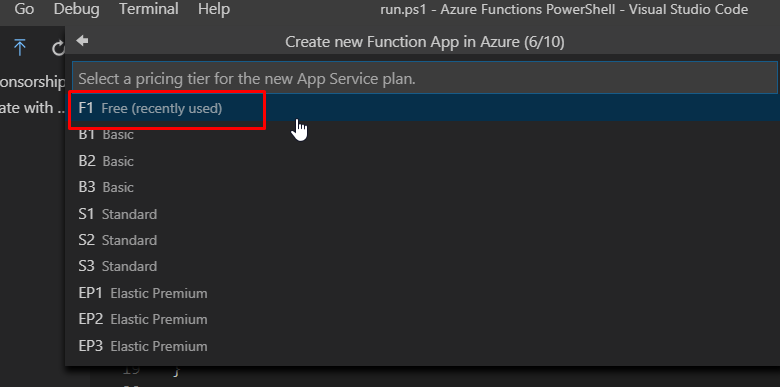
Select Free Pricing Tier and location closest to you.

Select PowerShell as runtime. You can see that right now, it is in Preview.

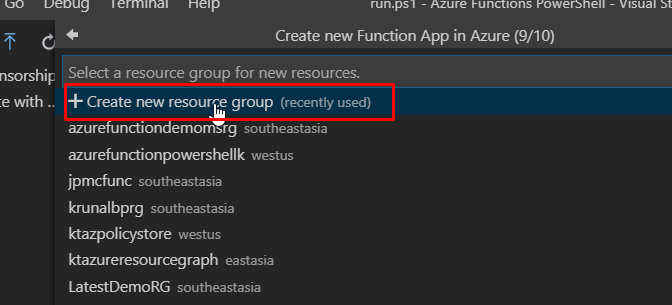
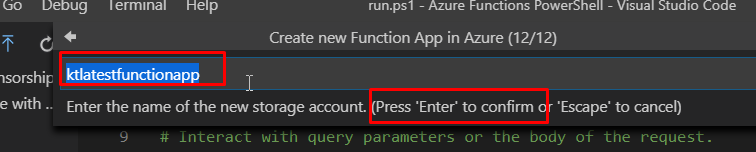
Create a new resource group and to go with the default name in the next step, press enter.

And the same thing with storage account.

You will see the progress of your deployment at the bottom right corner of your VS Code instance.

Once the deployment gets completed, you will see this notification.

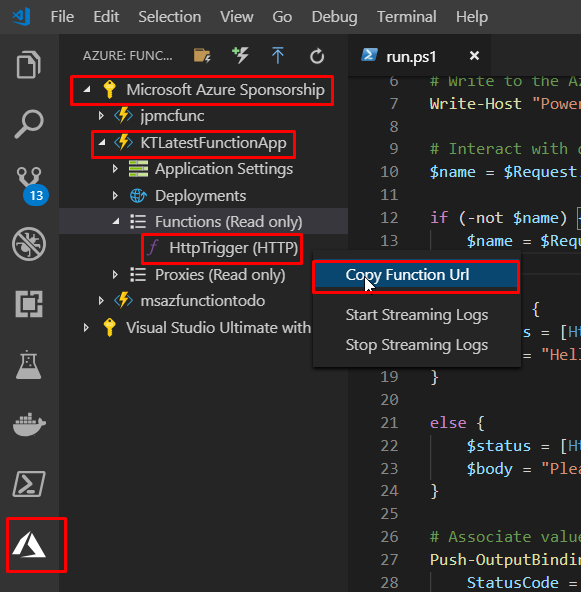
Back in the Azure: Functions area, expand the new function app under your subscription. Expand Functions, right-click HttpTrigger, and then choose Copy function URL.
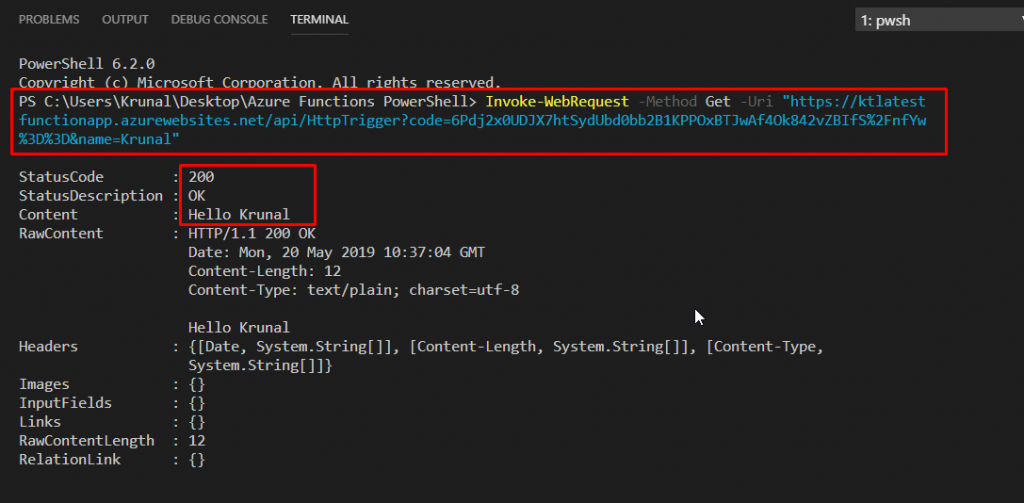
To verify that your published function runs in Azure, execute the following PowerShell command, replacing the Uri parameter with the URL of the HTTPTrigger function you just copied. As before, append the query string &name= to the URL, as in the following example.
Invoke-WebRequest -Method Get -Uri “YourCopiedURL&name=”
- You can delete the resource group by going to the Azure portal.
- We have successfully used Visual Studio Code to create a PowerShell function app with a simple HTTP-triggered function.