ENCRYPTING A VM USING AZURE KEY VAULT AND CLOUDSHELL

Files on an Azure Storage account are by default encrypted using secure storage encryption. But a VHD within a storage account is not encrypted. So, you can use what’s called a BitLocker in order to encrypt the virtual disk within Azure. The cryptographic keys for this are going to be stored in Azure Key Vault. So, the first thing that you are going to need is a key vault.
Key vaults allow you to store secrets and these secrets can be either cryptographic keys, application secrets or security secrets. In order to encrypt a virtual disk, we need to use keys. It is also important to remember that in order to encrypt the key vault for a virtual machine, it has to exist in the same region as the virtual machine itself. So, if you have a virtual machine in Southeast Asia region, then your key vault will have to be in the Southeast Asia region as well.
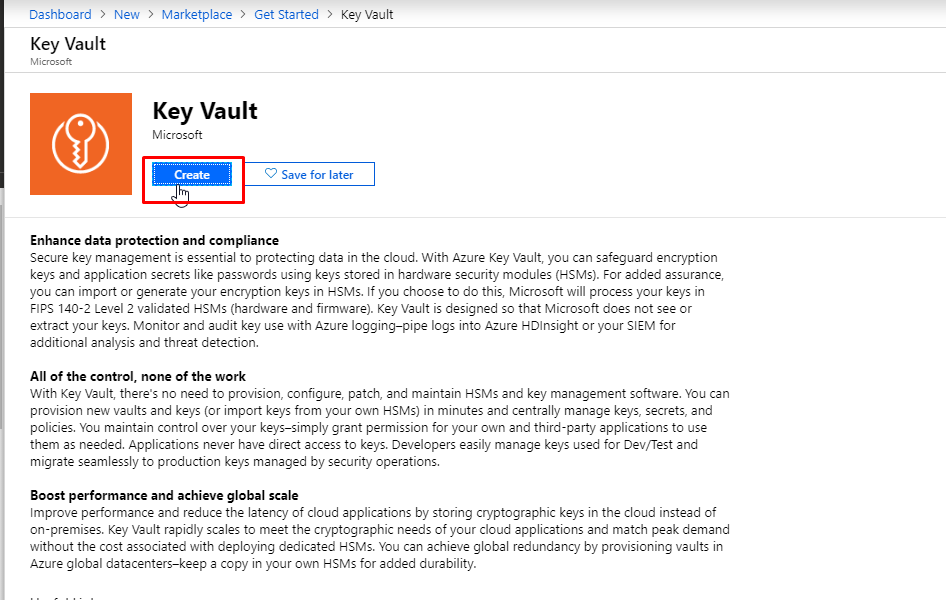
First of all, we are going to create an Azure Key Vault.
- Login to the Azure Portal and click Create a resource. Search for Key Vault and select it from the results.

- You can read more about it in the resource description blade. Click Create.
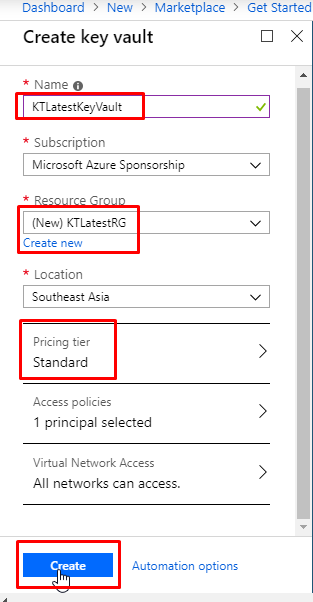
- Give a unique name to your key vault. Create a new resource group. Select Standard Pricing tier. Keep the rest of the settings as default and click create.
- Once the key vault gets deployed, go to the resource. Go to the Keys tab and click +Generate/Import.
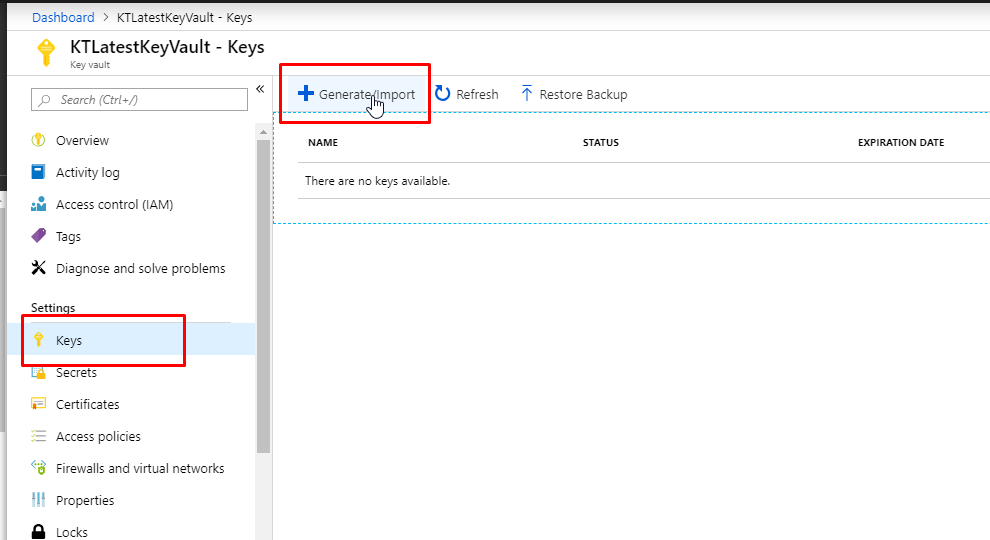
- In the options, select generate since we are going to generate a key. Give a name to the key. Select RSA algorithm type. Select the RSA key size as 2048 bits. Do not set activation and expiration date. Keep yes in enabled. Click create.

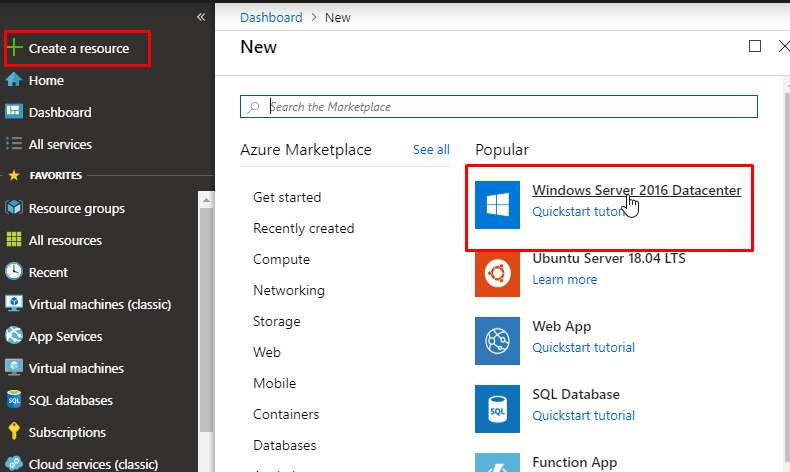
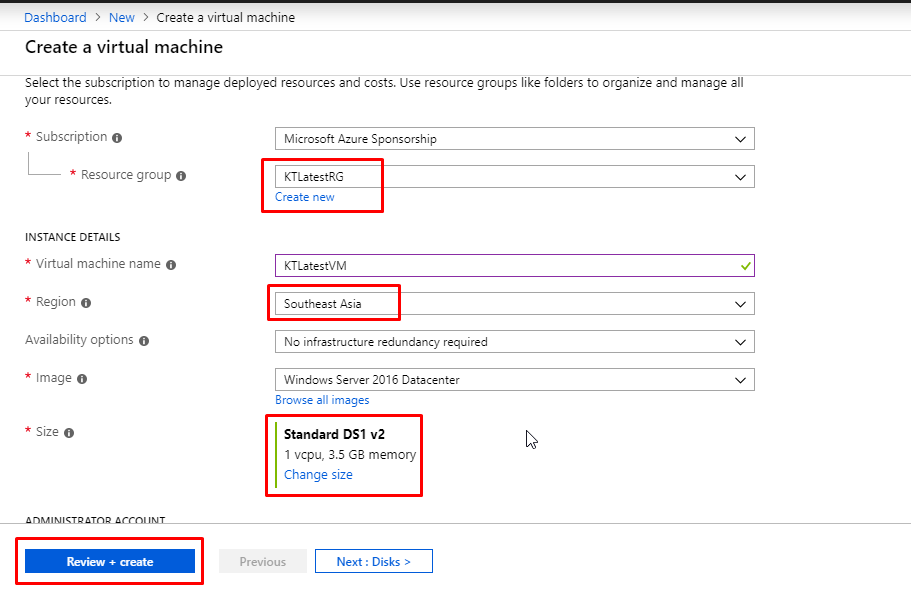
- Next, we need to create a Virtual Machine. Click Create a resource and select Windows Server 2016 Datacenter.
- Keep virtual machine in the same resource that you created for the key vault and keep it in the same location as the key vault because that is important. Select virtual machine size as Standard DS1 v2. Encryption can only be done on VMs with Standard size or above. Click Review + Create and then in the next blade, click create after validation.
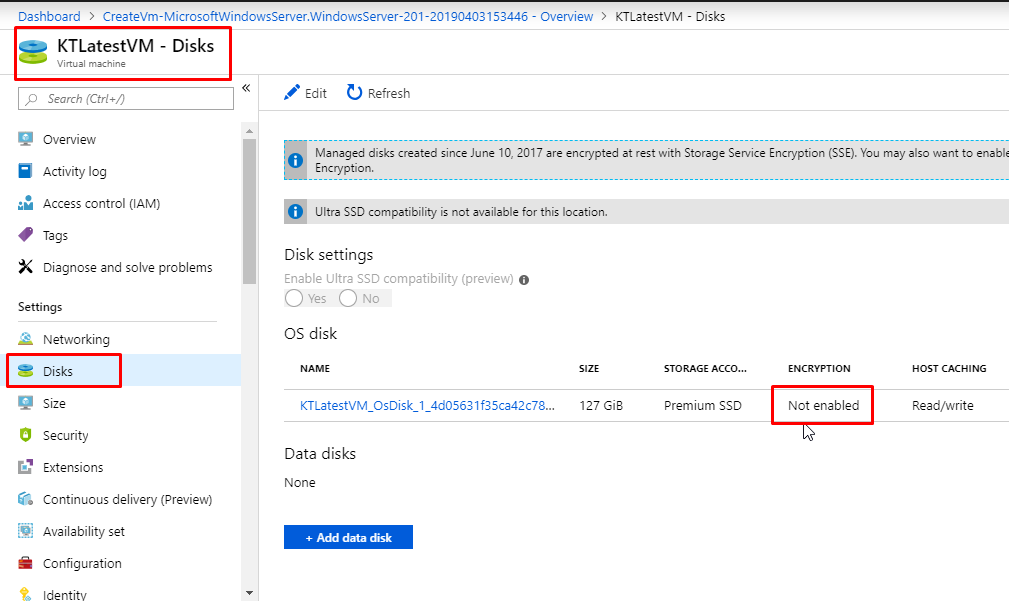
- Once the VM gets deployed, go to the disks tab. You will find the OS disk there whose Encryption is not enabled.
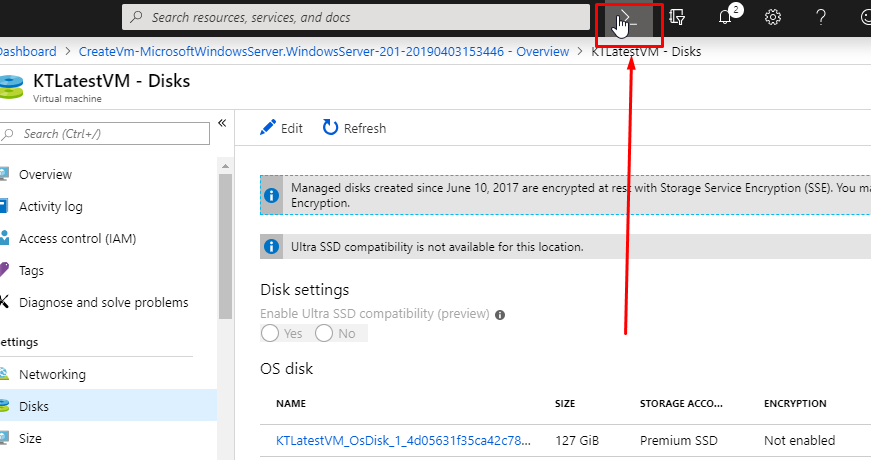
- Now to enable the disk encryption for this OS disk, we are going to use CloudShell.
- Click this icon to open CloudShell.
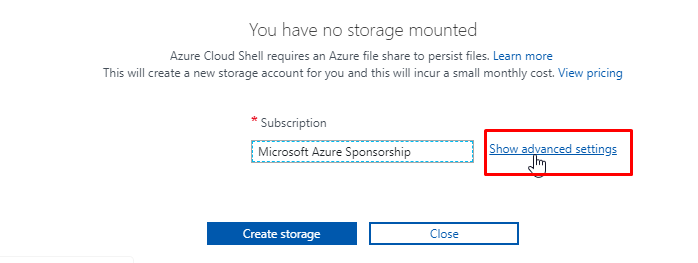
- If you are running CloudShell for the first time, you will have to go through a small setup process.
- CloudShell needs a storage account in which it stores its files.
- So, if you are running it for the first time, you will have to configure that.
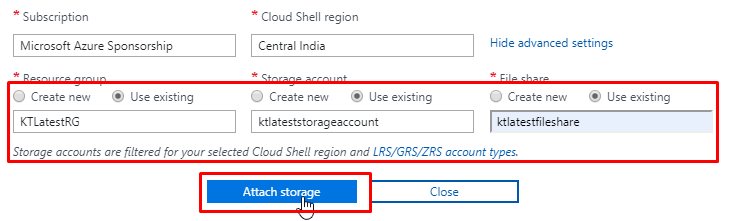
- If you need to configure it, follow these steps. Click Show Advanced Settings.
- Here I have selected y existing resource group and made a storage account inside it and a file share as well.
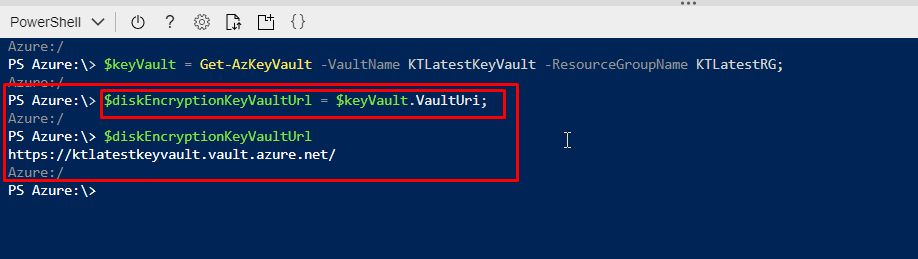
- Now the first line of the script is to get the key vault. We have created a key vault running within a region so we are just going to grab that and put that into a variable.
$keyVault = Get-AzKeyVault -VaultName KTLatestKeyVault -ResourceGroupName KTLatestRG;

- For the next step, we need the URI. Every key vault has a universal resource identifier. So, we are going to fetch it for this one.
- Run the following command for that. You will see the key vault URI after fetching it.
$diskEncryptionKeyVaultUrl = $keyVault.VaultUri;
- Then you need to fetch the resource ID of your key vault.
$keyVaultResourceId = $keyVault.ResourceId;

- Now to get the encryption key and store it in a variable, run the following command. Here the vault name should be yours and the key name should be yours as well.
$keyEncryptionKeyUrl = (Get-AzKeyVaultKey -VaultName $keyVaultName -Name myKey).Key.kid;

- Now to enable the encryption, all you need to do is run this command. It will take some time to finish the execution. And if everything is right, the disk will get encrypted.
Set-AzVMDiskEncryptionExtension -ResourceGroupName $rgName -VMName “KTLatestVM” -DiskEncryptionKeyVaultUrl $diskEncryptionKeyVaultUrl -DiskEncryptionKeyVaultId $keyVaultResourceId -KeyEncryptionKeyUrl $keyEncryptionKeyUrl -KeyEncryptionKeyVaultId $keyVaultResourceId

- One last thing that you might want to keep in mind is that if you are using a production virtual machine or if you are doing this on a machine that is being actively used, you might want to pause that.