DESIGN AND IMPLEMENT A BASIC KUBERNETES APPLICATION ON AZURE CONTAINER SERVICE (AKS)
- In this demo, we will implement a Kubernetes application using the Azure Container Service (AKS).
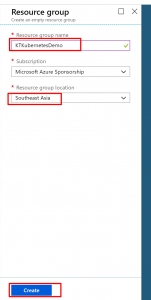
1) Login to your Azure Portal and go to Resource Groups. Click on Add to create a new Resource Group.

2) Give a unique name to your resource group ‘KTKubernetesDemo’. For resource group location, choose the one that is nearest to you or your client location.
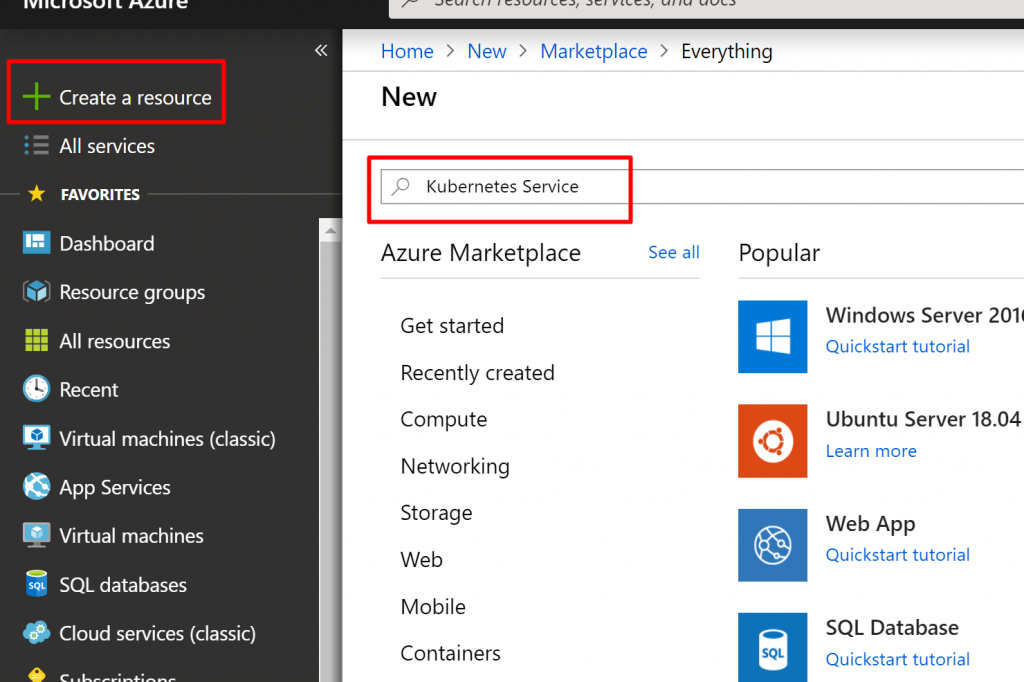
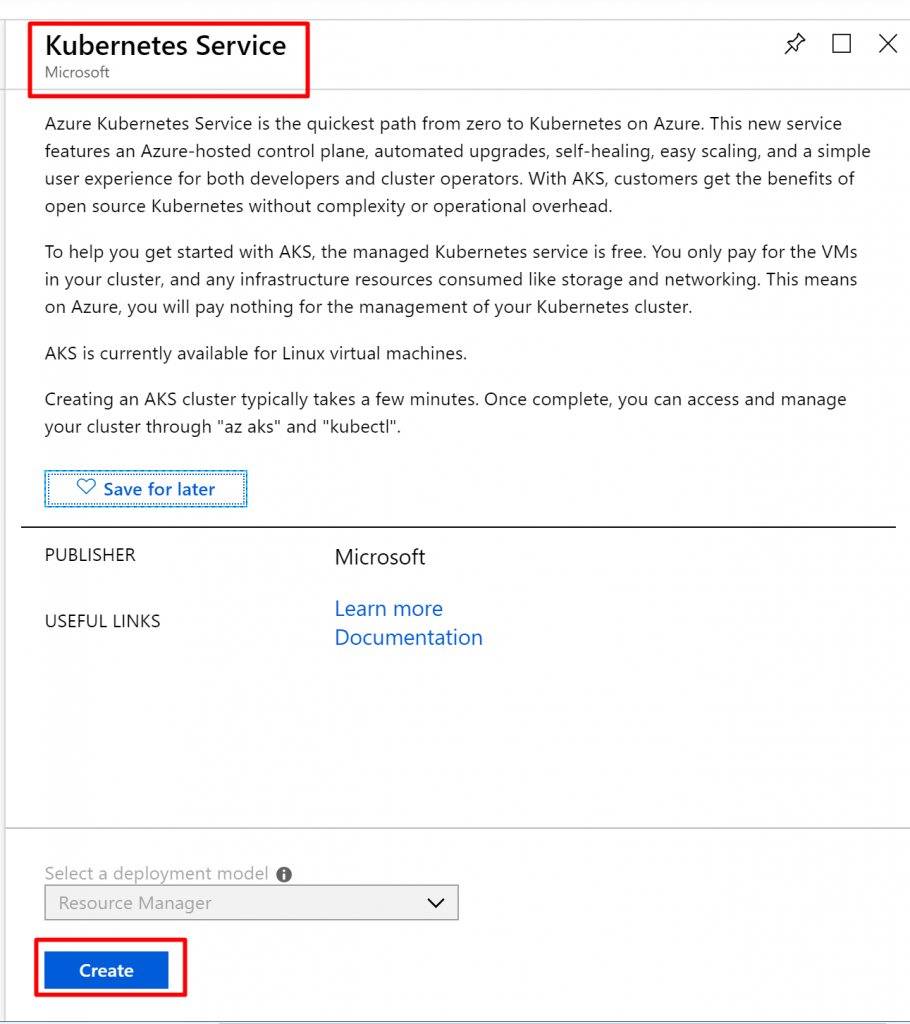
3) Once the resource group gets created, click on create a resource and search for Kubernetes Service
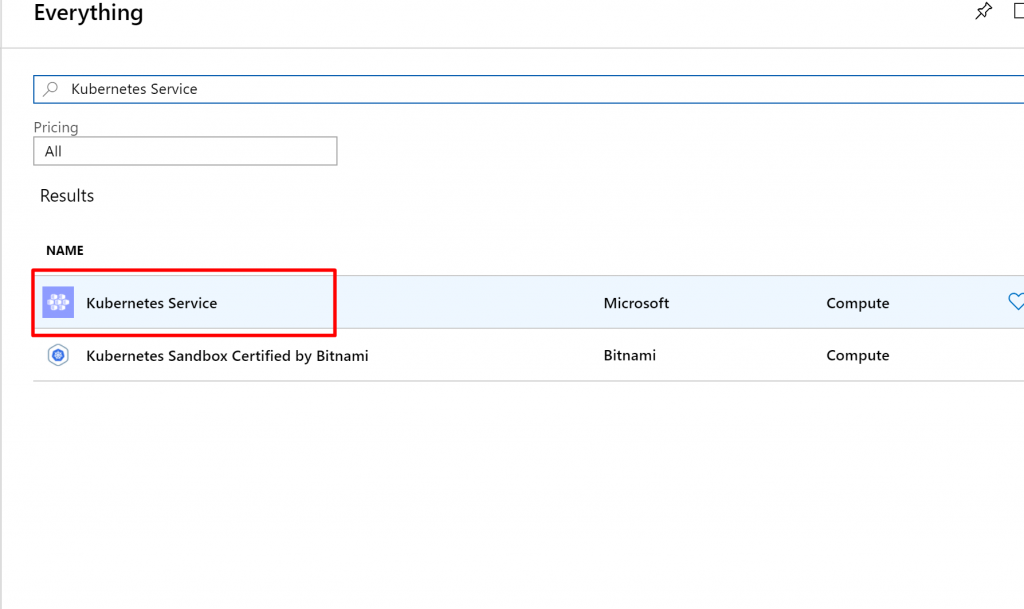
 4) Select Kubernetes Service from the results
 5) Click on create
6) Select an appropriate subscription and the resource group that you have just created. Give the cluster some unique name. Select the region same as the resource group and keep the Kubernetes version as 1.11.2. For the DNS name prefix, keep it same as your cluster name. For the node size, choose Standard B2s and keep the initial node count to 1. Click on next for the next step i.e. authentication.
 7) Keep the Service Principal as default i.e. (new) default service principal and enable the Role Based Access Control (RBAC). Then click on the next step to configure networking

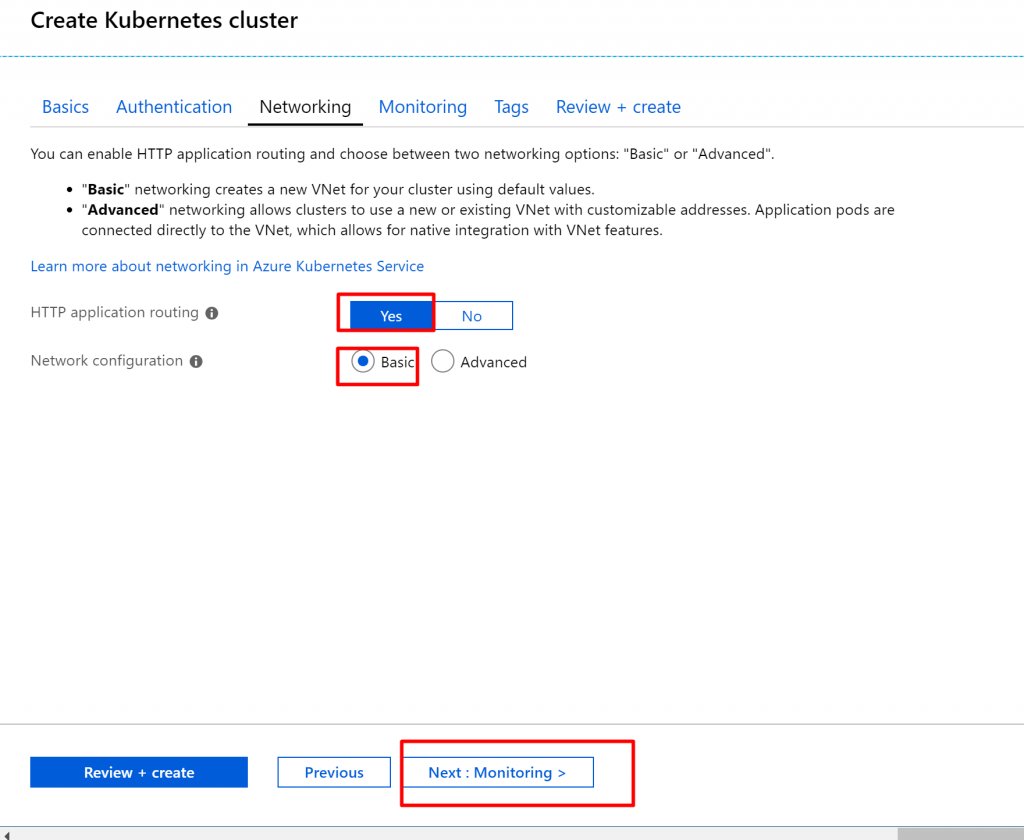
8) Keep Yes to use the HTTP application routing and select the basic network configuration. Click on the next step to configure monitoring.
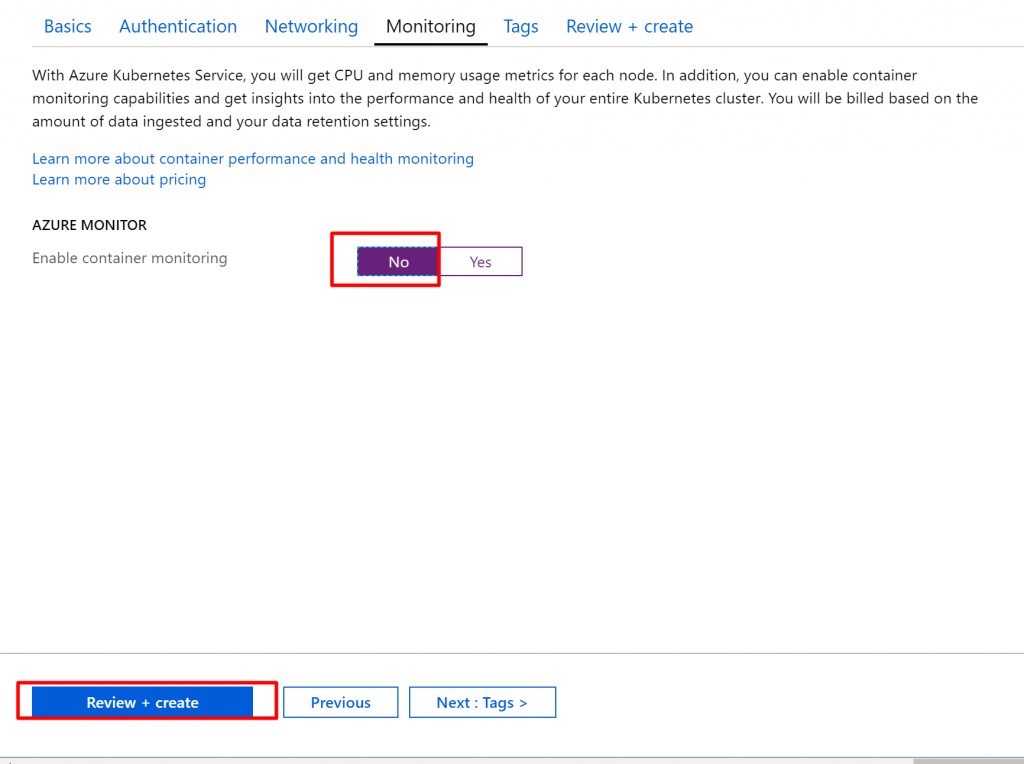
9) Disable the container monitoring and click on Review + Create.
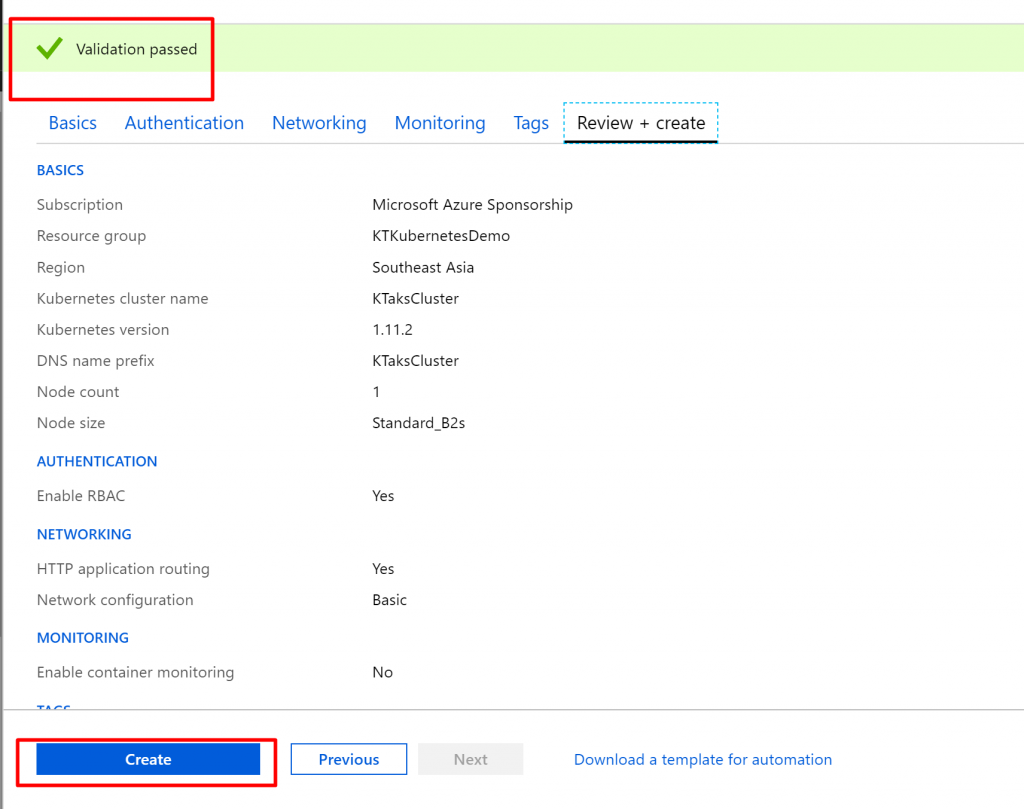
 10) Once the validation gets passed, click on create. If in the first time, your validation doesn’t pass, just go to the authentication page to see if the service principal has been generated. Then come back to the review + create page and click on create.
11) Open Cloud Shell and select PowerShell. It might prompt you to create a new storage account and a file share. If it does, create a new storage account and file share in the same resource group that you have created for the demo.
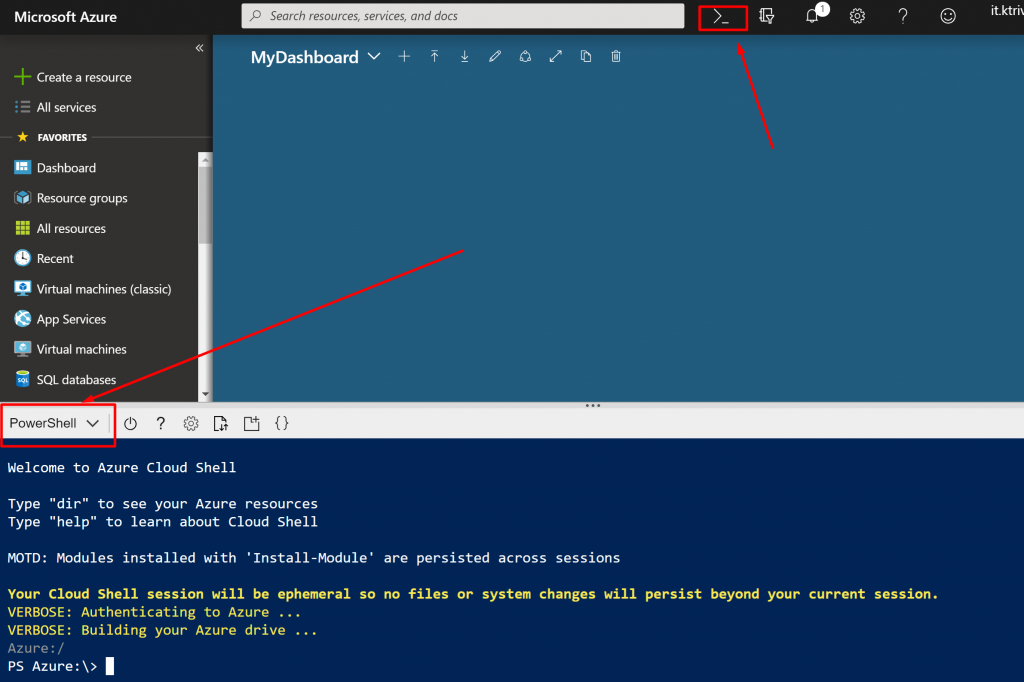
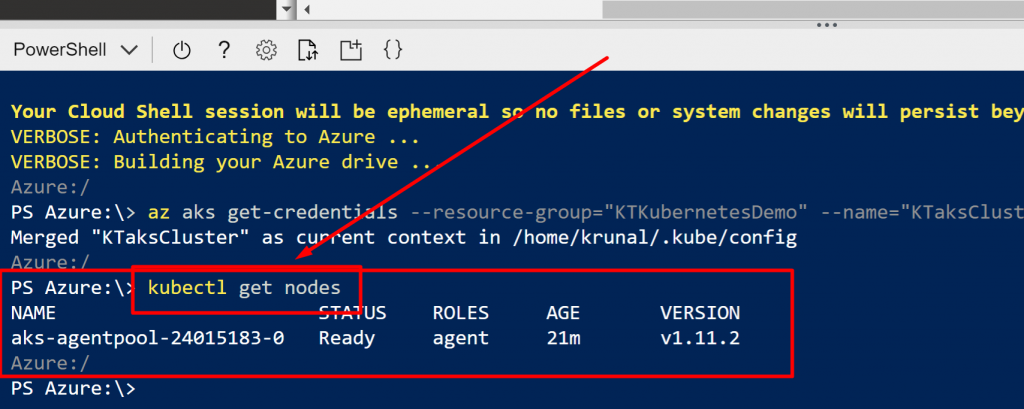
12) Run the following command to configure kubectl to connect to your AKS cluster.
az aks get-credentials –resource-group=“YourResourceGroupName” –name=“YourClusterName”

13) To view the cluster of nodes, run the command kubectl get nodes
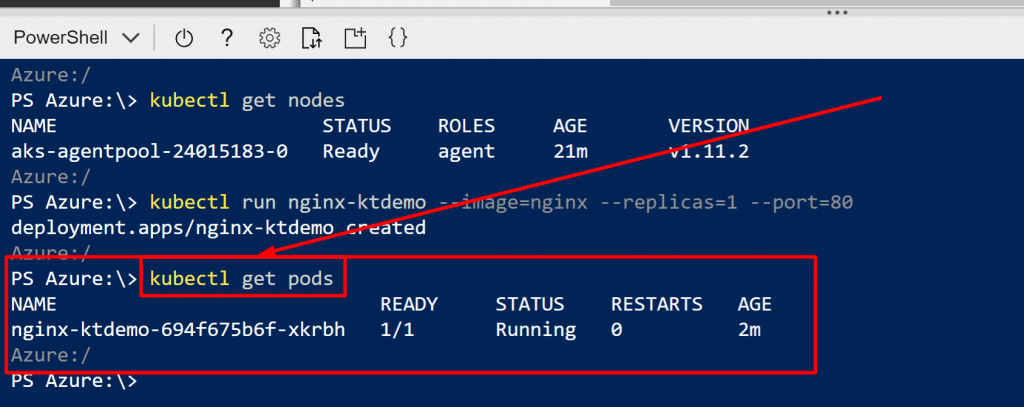
14) Now we will deploy an image of the application called nginx. For that, run the following command.
kubectl run nginx-ktdemo –image=nginx –replicas=1 –port=80

15) Run the command kubectl get pods and you will see that a pod of the application nginx would have been created
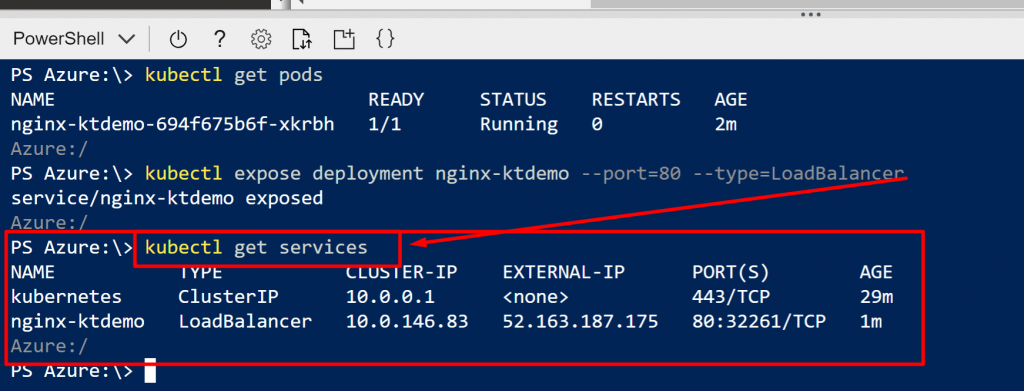
16) Now to make the pod available from the internet, run the following command.
kubectl expose deployment nginx-ktdemo –port=80 –type=LoadBalancer

17) Then to know the public IP address of the application, run the following command.
kubectl get services
You might have to run this command multiple times because it might take some time to generate a public IP address
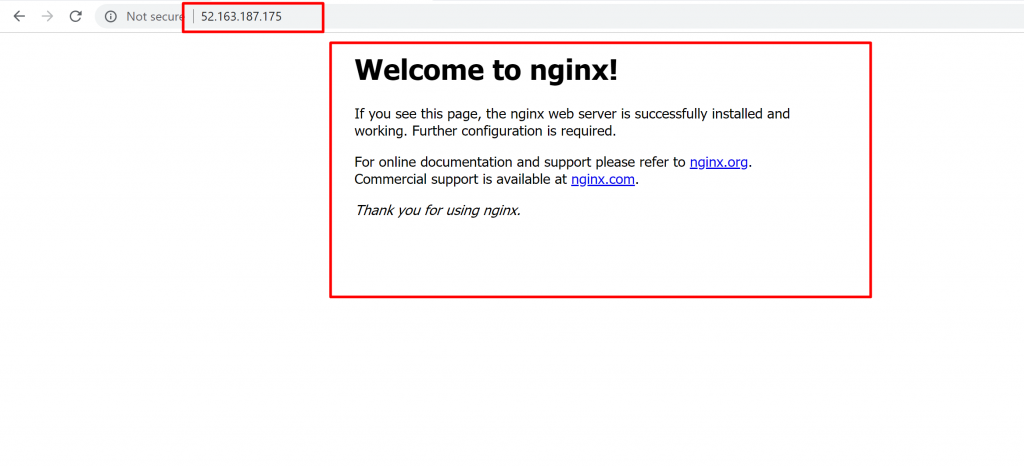
18) Then if you navigate to the external IP address of the nginx application, you will see something like this.
- So in this demo, we have created an AKS cluster using the Azure portal.
- We have connected to the AKS cluster by using Azure Cloud Shell.
- And then we ran the nginx application in the AKS cluster.