DEPLOYING AZURE WEB APPS USING GITHUB AS SOURCE REPOSITORY

- In this demo, I will show you how to create and deploy an Azure Web App using Github as source repository.
1) Login to your Azure portal and go to resource groups. Click on Add to create a new resource group.
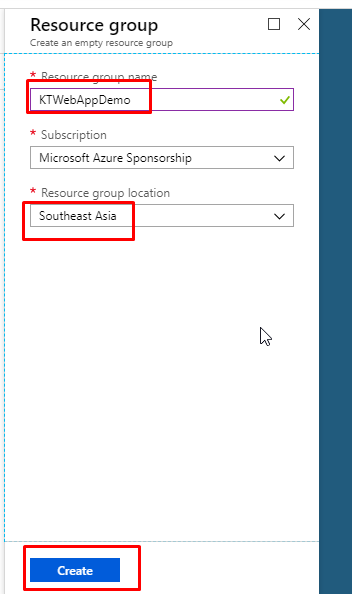
2) Give some name to the resource group, select an appropriate subscription. For location, select one that is closest to you or your client location. Click on create.
3) Once the resource group gets created, go to it and click on Add

4) Search for Web App and select Web App from the results

5) Click on Create

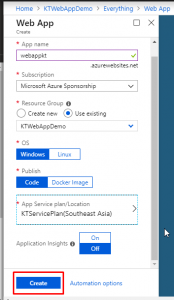
6) Give a unique name to your Web App, select an appropriate subscription, select the existing resource group that you just created, select Windows OS and click on App Service Plan/location to create a new app service plan.

7) Click on Create New to create a new app service plan.
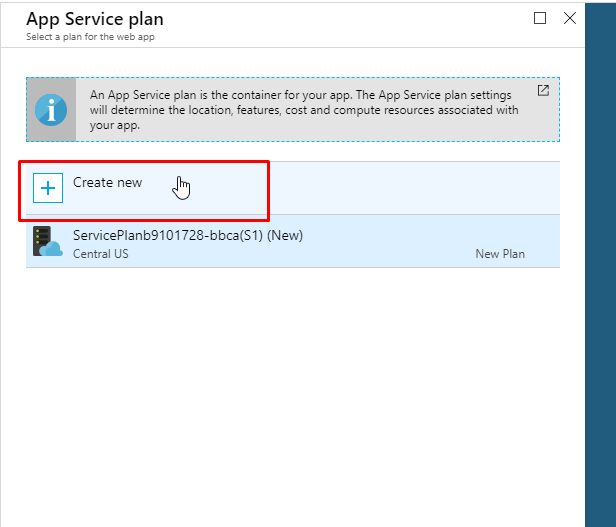
8) Give a unique name to your service plan, select the location same as your resource group and select S1 Standard pricing tier. Click on OK.

9) Keep application insights off and click on create
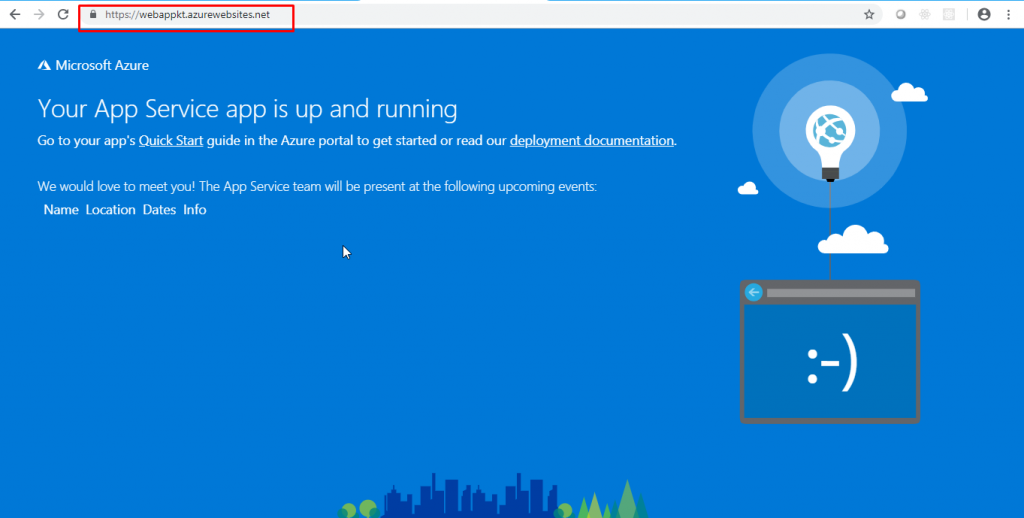
10) Once the web app gets created, go to it and copy the URL and paste it in another browser tab to see if it’s up and running.
 11) The browser would look something like this
- Now we need to configure a deployment option that uses an External Repository source that contains a GIT repository.
- So next, we will do that.
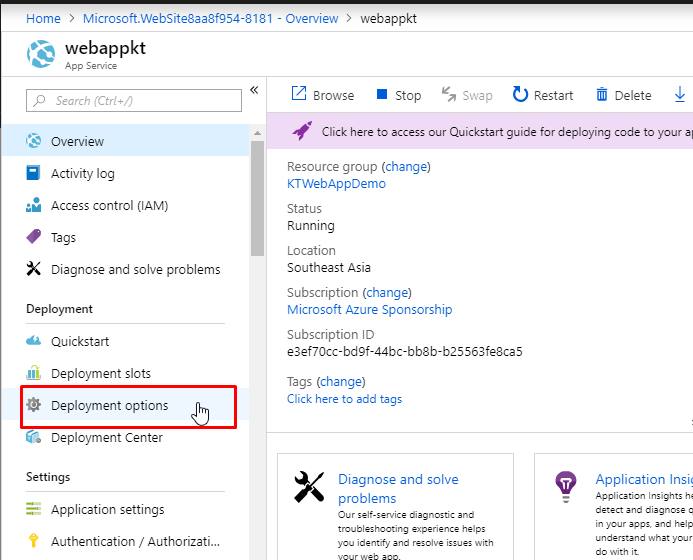
12) Inside your Web App, select Deployment Options.
13) Click on Choose Source and select External Repository.

14) We are not going to configure performance test for this. In the repository URL, paste this URL: https://github.com/azure-appservice-samples/aspnet-get-started
Select the master branch and keep repository type as Git. Then click on OK

15) Now if you go to your Web App URL, the browser would show something like this. This is your sample application from GitHub.

- Next, using the Azure portal, we will modify the web app to make the title dynamic using application settings.
16) In your Web app overview, click on Application Settings. Scroll down to find the application settings and click on add new setting.
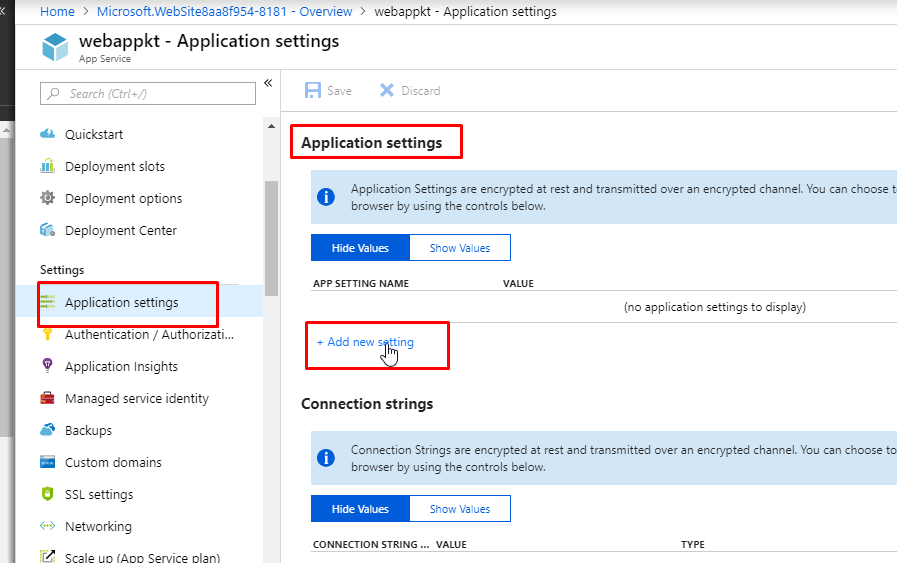
17) Give the name of the App setting as AppTitle and the value as ‘This is just a demo application’. Then click on save.
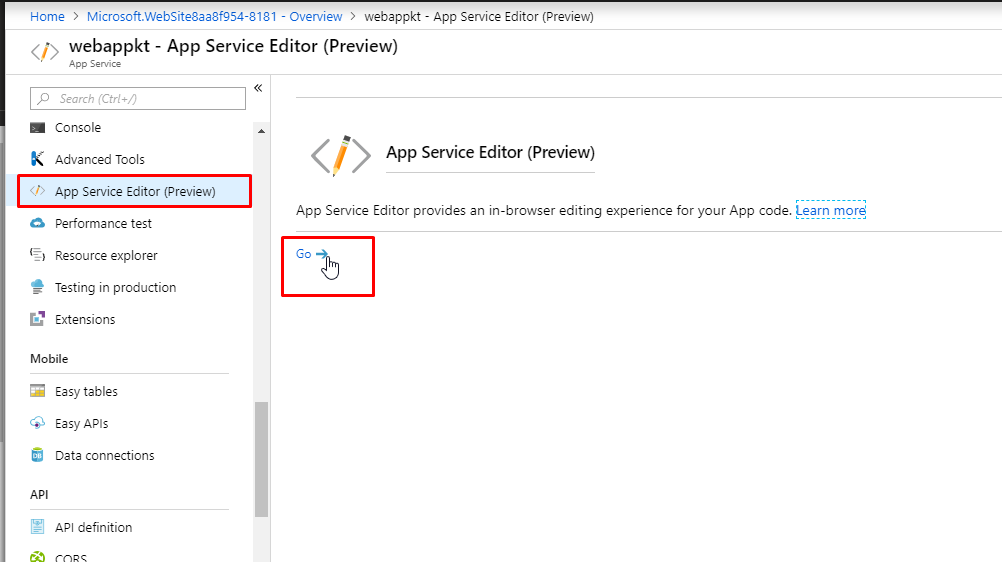
 18) Then click on App Service Editor and click on Go. It will launch an online file editor.
 19) Open the index.cshtml file. You will find it in the folder Views/Home
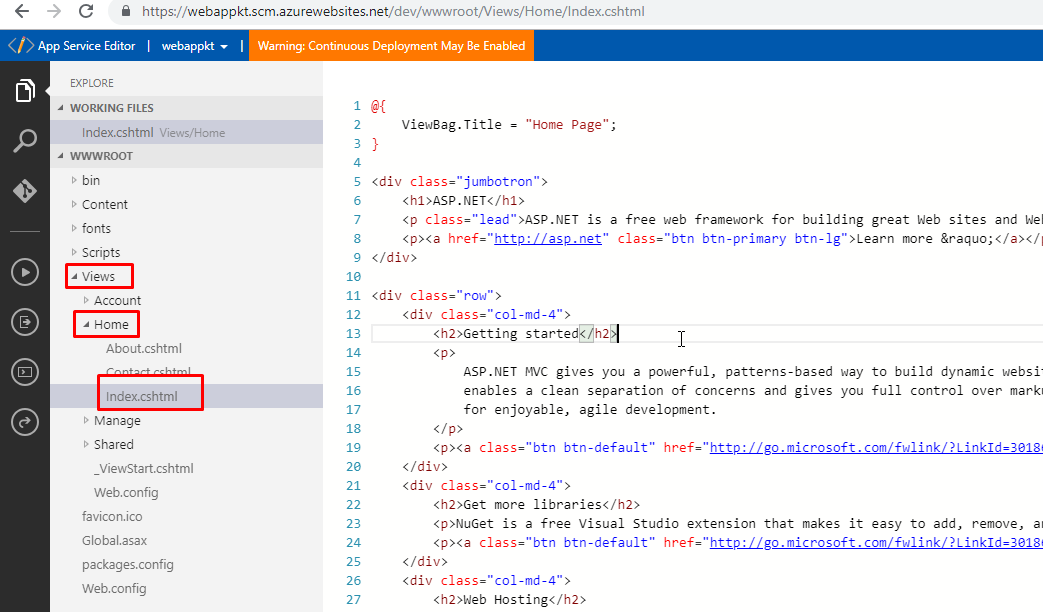 20) Add the following line in the
@System.Configuration.ConfigurationManager.AppSettings[“AppTitle“]

21) Autosave feature is already on in the online file editor. So if you go to your web app in browser and refresh, you will notice the changes.
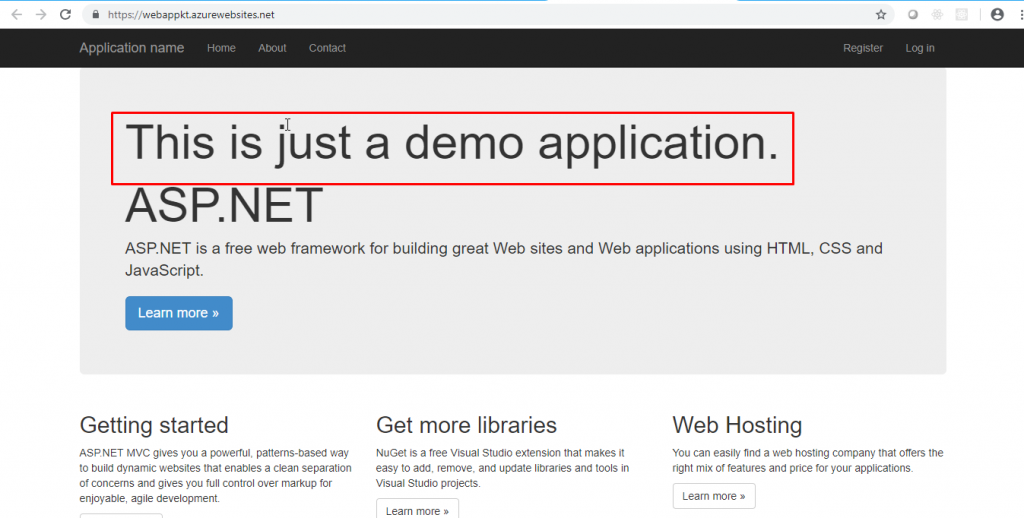 22) Now you don’t have to make changes to your code. You can just go to your application settings like this and change the value of your app setting name and then save it
 23) Refreshing the browser would reflect the changes.

- So in this demo, we have created an Azure web app.
- Then we deployed a code from a public GitHub repository.
- And at last, we modified and tested the web app.