DEEP DIVE INTO AN ARM TEMPLATE – UNDERSTANDING SCHEMA

In this article, we will go a little bit deeper into an ARM template and understand schema of an ARM template.
The schema shown in this example is taken from the following schema link: https://schema.management.azure.com/schemas/2015-08-01/Microsoft.Compute.json#/resourceDefinitions/virtualMachineScaleSets

This schema contains definitions for the ARM templates for Azure Virtual Machines, Azure compute environment as well as extensions. It contains all the definitions that should be presented inside a VM. You can find the definitions for specific items which may be present inside a VM if you search for specific keywords.
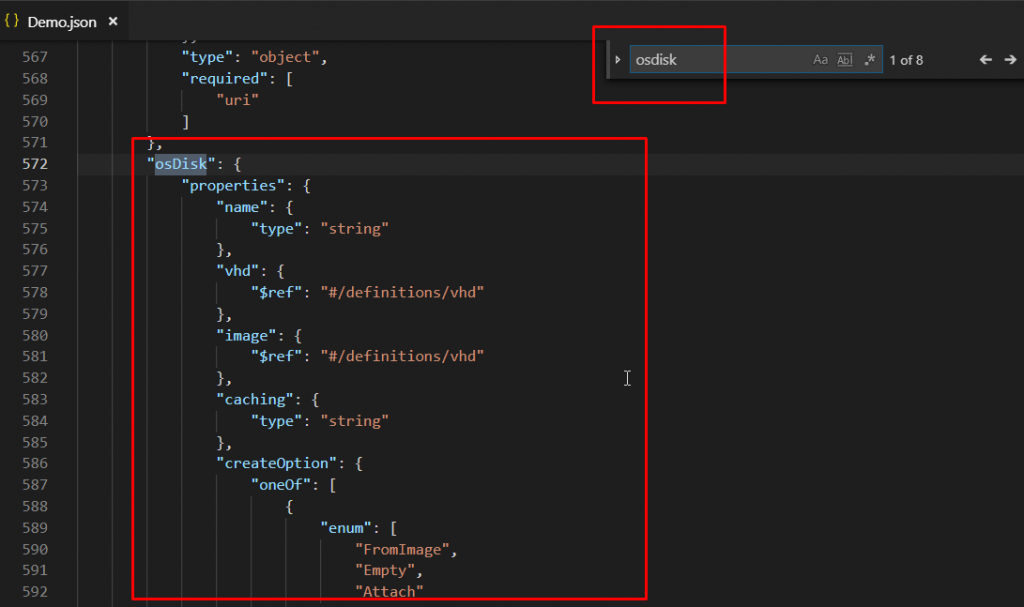
Search for keyword osdisk and let us take an example of that. OS disk has a number of properties defined such as name, VHD, image, caching, etc. Along with the property name, you also have specific data types for each property. Like the property name is of type string. Also, in JSON schema parlance, some of these properties are also using the ref pointer. The whole idea of this is to use a URL to specify a pointer to a given section of the JSON document.

Here it is saying that the data type of VHD is defined at a separate location within this document with the pointer value of definitions/vhd.

There is another property called createOption and it is defined as an enumeration. It can have a value of FromImage, Empty or Attach.
Like any other schema, all of this formalizes the contract for the final template document. This schema here can help us validate the target document and also provide some additional features.
So, you’ve seen that Azure portal is a great starting point for using the Azure ARM with just your browser. All you need to do to use the Azure ARM templates is to create resources using the portal. Even though the browser based code editor is very handy, it may not be scalable enough to meet all your requirements. At some point, you may need to write a deployment template that describes all the resources you want Azure ARM to provision and to be scalable, this deployment will need to be automated.
You can do that using many of available IDEs or tools that allows you to create and edit JSON template for ARM. You can use Notepad, Visual Studio, Visual Studio Code, Sublime Text, etc. Whichever suits you best.
Notepad: This is the famous basic tool that comes as a default program in Windows computers. It can easily be used to add JSON template but its functionality as we all know, is limited.
Visual Studio: Visual Studio along with Azure SDK provides an easy way to start the template creation. You can get started by creating a resource group and keep adding the resources that you need for the project. Visual Studio takes all of the resource groups that you create and automatically generates the JSON for you. And once that is done, you can easily customize it as you want. Along with its Intellisense that shows you the properties that you can use within the template, it becomes easier.
Visual Studio Code: It is easy to use. It is lightweight. It loads much faster than Visual Studio. It lacks in ARM authoring support but it has minimal auto completion support.
Sublime Text: It has an ARM package that gives a bunch of snippets that you can use for quick template authoring. However, even though it provides some level of property auto completion, it is still not entirely stable and it also doesn’t have many of the high-level features that you can find in other IDEs. And, it is also not directly supported by Microsoft.
I would personally recommend to use Visual Studio Code since it is simple to deploy, lightweight and easy to use.
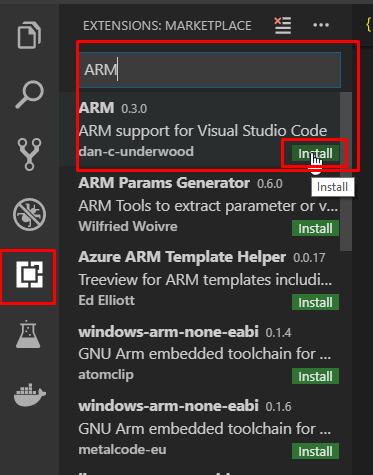
If you are using visual studio to follow along, go inside the Visual Studio Code, go to extensions and search for ARM. Install the ARM extension and reload VS Code. We are all set to move ahead now.
From the next article, we will see demos of Azure Resource Manager Templates.