CREATING AN AZURE KUBERNETES SERVICE CLUSTER AND CONNECTING IT WITH ACR

This is the third of the demo series for Azure Kubernetes Service.
You can find part two here.
In this part of the demo, we are going to do the following:
- Create Service Principal to implement RBAC
- Grant pull rights of your ACR to the AKS
- Implement the Roll Assignment
- Create Kubernetes Cluster
- Connect your AKS cluster from your local computer
- Deploy your local application to your Kubernetes Cluster using Kubectl
- Validate your running application in the cluster
Kubernetes provides a distributed platform for containerized applications. With AKS, you can quickly create a production ready Kubernetes cluster. To allow an AKS cluster to interact with other Azure resources, an Azure Active Directory service principal is used. This service principal can be automatically created by the Azure CLI or portal, or you can pre-create one and assign additional permissions.
Create a service principal using the az ad sp create-for-rbac command. The –skip-assignment parameter limits any additional permissions from being assigned. By default, this service prinicipal is valid for one year.
az ad sp create-for-rbac –skip-assignment
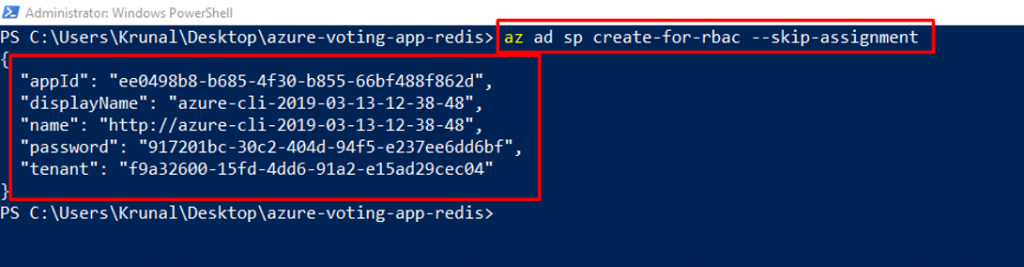
- Make a note of the appIdand password. These values are used in the following steps.
- To access images stored in ACR, you must grant the AKS service principal the correct rights to pull images from ACR.
First, get the ACR resource ID using az acr show.
az acr show –resource-group myResourceGroup –name ktACR1 –query “id” –output tsv

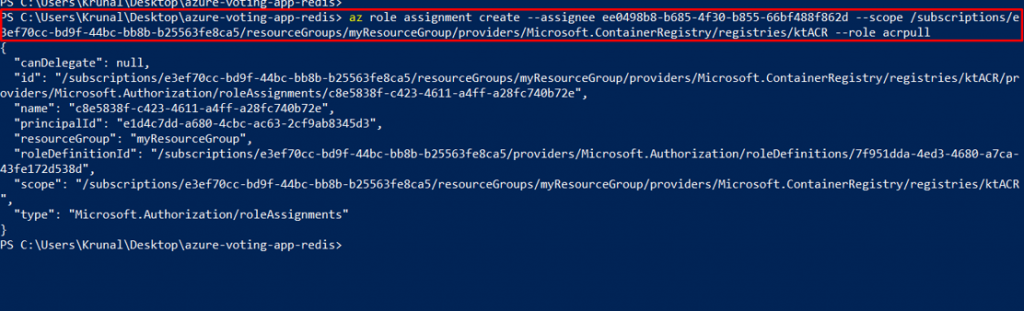
To grant the correct access for the AKS cluster to pull images stored in ACR, assign the AcrPull role using the az role assignment create command. Replace the and with the values gathered in the previous two steps.
az role assignment create –assignee –scope –role acrpull

Like this. This is the command that I ran with my appId and acrId.
- AKS clusters can use Kubernetes role-based access controls (RBAC).
- These controls let you define access to resources based on roles assigned to users.
- Permissions are combined if a user is assigned multiple roles, and permissions can be scoped to either a single namespace or across the whole cluster.
- By default, the Azure CLI automatically enables RBAC when you create an AKS cluster.
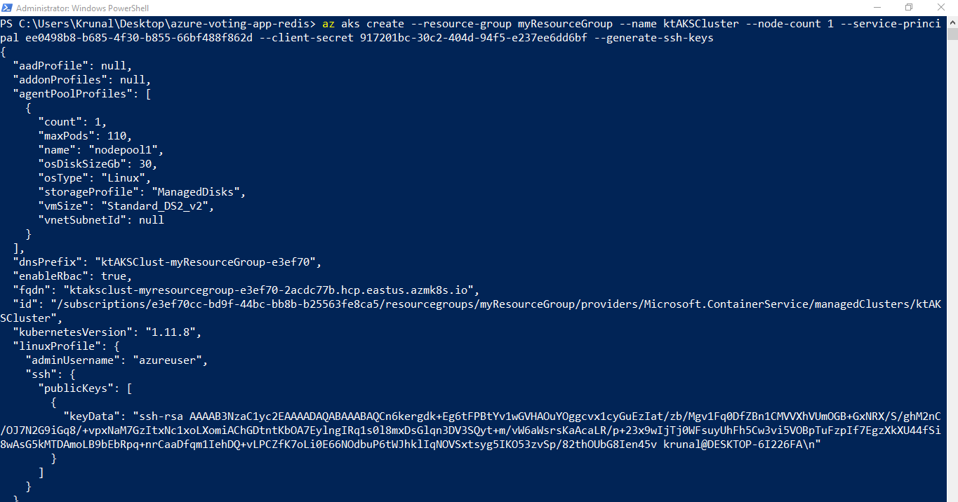
Create an AKS cluster using az aks create. The following example creates a cluster named myAKSCluster in the resource group named myResourceGroup. This resource group was created in the previous tutorial. Provide your own and from the previous step where the service principal was created.
az aks create –resource-group myResourceGroup –name myAKSCluster –node-count 1 –server-principal –client-secret –generate-ssh-keys

After a few minutes, the deployment completes, and returns JSON-formatted information about the AKS deployment.
To connect to the Kubernetes cluster from your local computer, you use kubectl, the Kubernetes command-line client. If you use Azure Cloud Shell, kubectl is already installed. You can also install it locally using the az aks install-cli command.

After installing kubectl, you need to set the environment variable for the same.

To configure kubectl to connect to your Kubernetes cluster, use the az aks get-credentials command. The following example gets credentials for the AKS cluster named ktAKSCluster in the myResourceGroup:
az aks get-credentials –resource-group myResourceGroup –name myAKSCluster

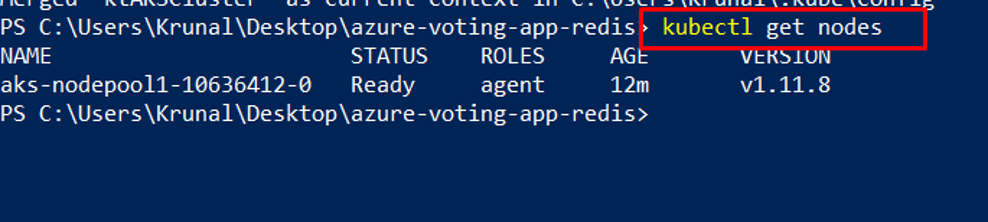
To verify the connection to your cluster, run the kubectl get nodes command:
- So far we have an application packaged into a container image, this image was uploaded to Azure Container Registry, and a Kubernetes cluster was created.
- Now, you need the pre-created azure-vote-all-in-one-redis.yaml Kubernetes manifest file.
- This file was downloaded with the application source code while cloning. Verify that you’ve cloned the repo, and that you have changed directories into the cloned repo.
- So, to deploy the application, you must update the image name in the Kubernetes manifest file to include the ACR login server name.
Get the ACR login server name using the az acr list command as follows:
az acr list –resource-group myResourceGroup –query “[].{acrLoginServer:loginServer}” –output table

The sample manifest file from the git repo cloned earlier uses the login server name of microsoft. Make sure that you’re in the cloned azure-voting-app-redis directory, then open the manifest file with Visual Studio Code.

Replace microsoft with your ACR login server name. The image name is found on line 47 of the manifest file. Provide your own ACR login server name so that your manifest file looks like the following example:
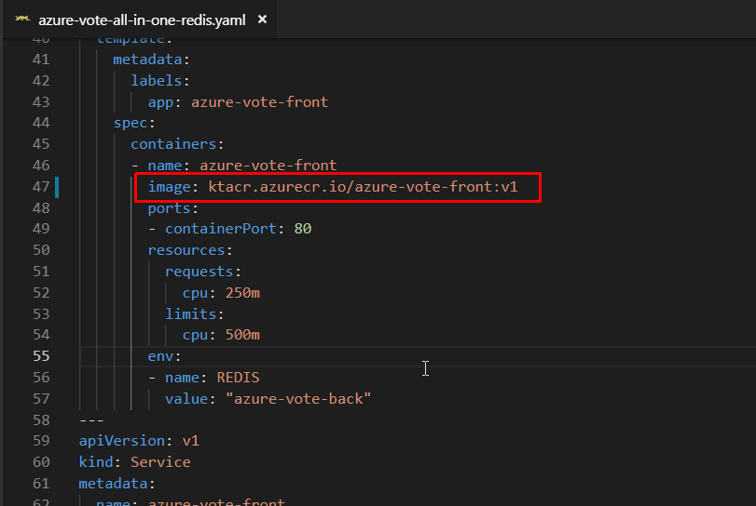
- Once done, save the file and go back to PowerShell.
To deploy your application, use the kubectl apply command. This command parses the manifest file and creates the defined Kubernetes objects. Specify the sample manifest file, as shown in the following example:
kubectl apply -f azure-vote-all-in-one-redis.yaml

- When the application runs, a Kubernetes service exposes the application front end to the internet.
- This process can take a few minutes to complete.
To monitor progress, use the kubectl get service command with the –watch argument. Initially the EXTERNAL-IP for the azure-vote-front service is shown as pending:
kubectl get service azure-vote-front –watch

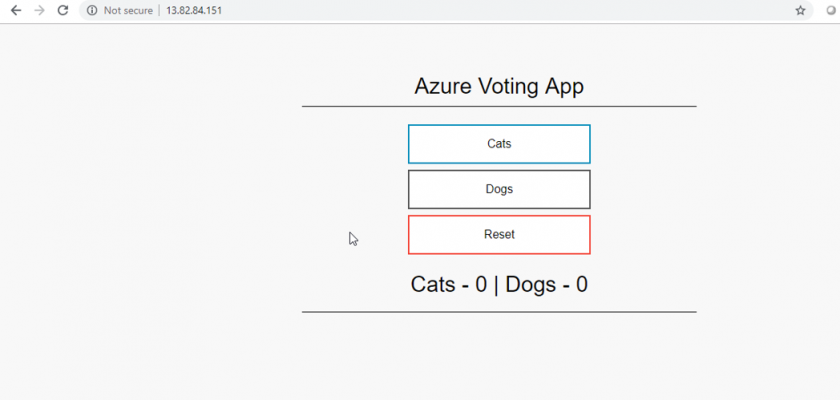
When the EXTERNAL-IP address changes from pending to an actual public IP address, use Ctrl-C to stop the kubectl watch process. The following example output shows a valid public IP address assigned to the service:
kubectl get service azure-vote-front –watch

To see the application in action, open a web browser to the external IP address of your service:
In the next part of the demo, we will see how we can scale the application.
You can go to part four by clicking this link.