CREATING A VIRTUAL MACHINE USING VS CODE USING THE ALL NEW AZURE VM EXTENSION

- Now we can easily manage the Virtual Machines in Azure using the all new Azure VM Extension that is available for VS Code.
Open an instance of VS Code. Go to extensions, search for Azure Virtual Machines and select this extension. Click Install.

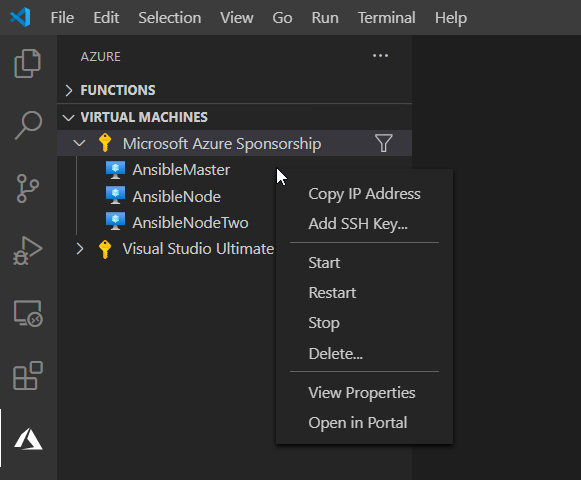
From the left side bar, choose the Azure Extension.

Under the Virtual Machines, you will find all your VMs and subscriptions. Notice how I have an extension for functions as well. The Virtual Machines extension is a new one while the function one was already there before. Sign in to Azure.

Once logged in, you will find your Azure Subscriptions there. Under your subscriptions, you will find your VMs as well. You can start, restart, stop and even delete your VMs from here. Along with that, you can also add a new SSH key from your local machine.
Let’s go ahead and create a new VM.

If you have multiple subscriptions, choose one under which you want to create the VM.

Enter a name for your VM.

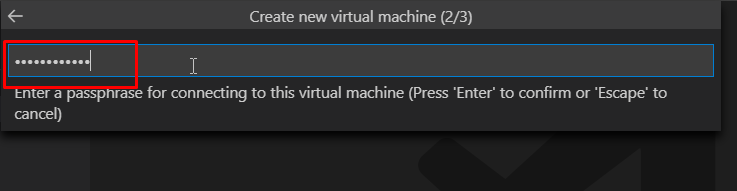
Next, enter a passphrase that you will use to connect to the VM. You will asked to re-enter the passphrase for confirmation.
Choose a location where you want to create the VM. And it is done.

- We can use another VS Code extension to connect to the VM using SSH.
Go to extensions and look for ssh. Select the Remote – SSH extension and install it.

Go to the remote explorer tab and under the SSH targets, you will find the VM that you created. Right click on it and connect to the host in a new window.

- Once you connect to it, you will have to enter the passphrase.
- And then you can run commands on the VM just like you do on any terminal.