USING AZURE PRIVATE LINKS TO SECURE A CONNECTION BETWEEN AN AZURE SQL SERVER AND A VIRTUAL MACHINE

- Azure Private Link enables you to access Azure PaaS services like Azure Storage, Azure Cosmos DB and Azure SQL Database.
- Azure Private Link can be used to create secure connections to the above mentioned Azure services or even your own services and applications that are behind an Azure Load Balancer.
Some of the major benefits of Azure Private Link are as follows:
- You can privately access services on the Azure platform without a public IP address at the source or destination.
- You can use it on on-premises and peered networks.
- It gives you protection against data leakage because while using Private link, you can only connect to the specific resource and not anything else. Access to any other resource in the service is blocked.
- It has global reach. You can connect to services running in other regions as well.
- Along with that, Azure Private Link has integration with Azure Monitor as well.
- Using that, you can see logs in the storage account, stream your events to your Event Hub and do Azure Monitor logging.
Let’s a demo of Azure Private Link. In this demo, we will secure a connection between an Azure SQL Server and a virtual machine.
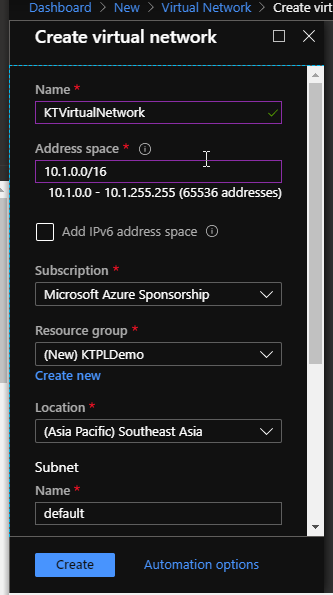
First of all, I am going to create a new Virtual Network with the following configuration.

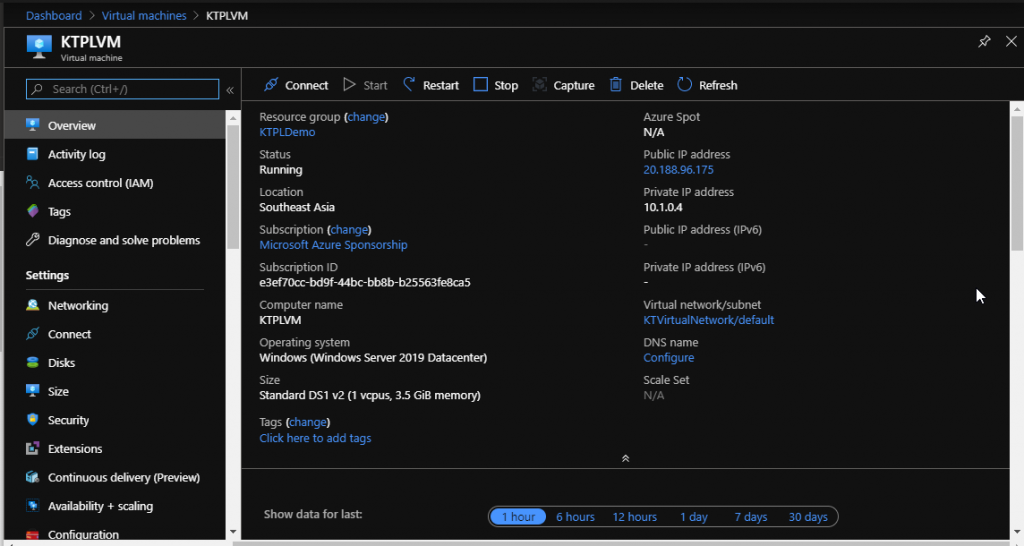
Next, I have created this Virtual Machine with the image Windows Server 2019 Datacenter. I have put it in the same resource group as my Virtual Network, so the virtual network and subnet would get automatically assigned. I have kept ports 80 and 3389 open to this.
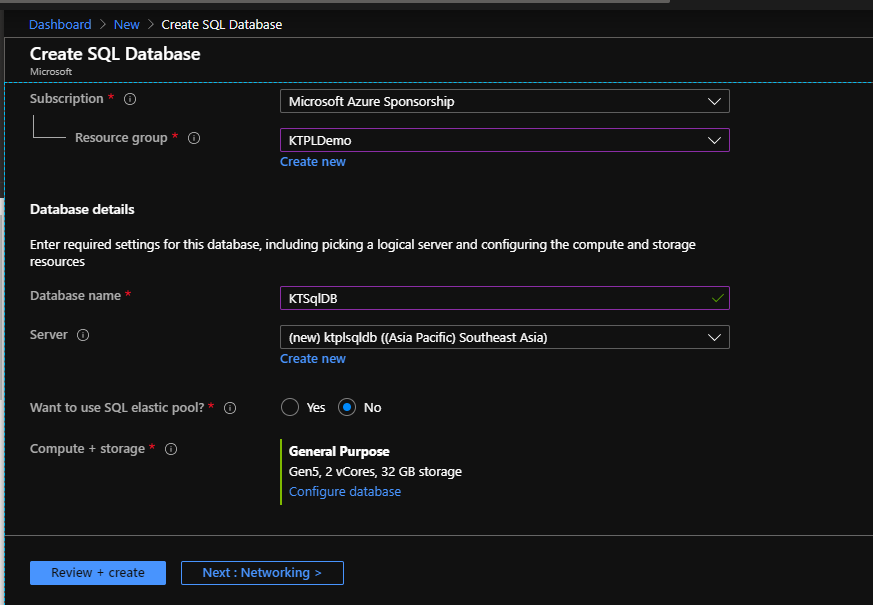
- Now, we need an SQL Database to connect to.
So next, I have created an SQL Database with the following details.
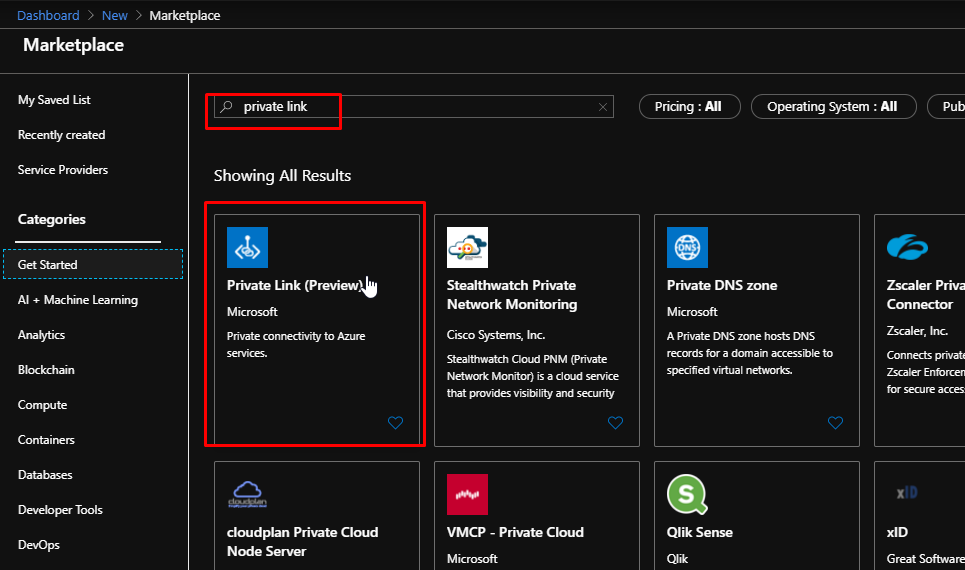
- Next up, we need to create a private endpoint.
Upon searching for Private Link, it gives me this result. Notice how at the time of performing this demo, the private link feature is still in preview.
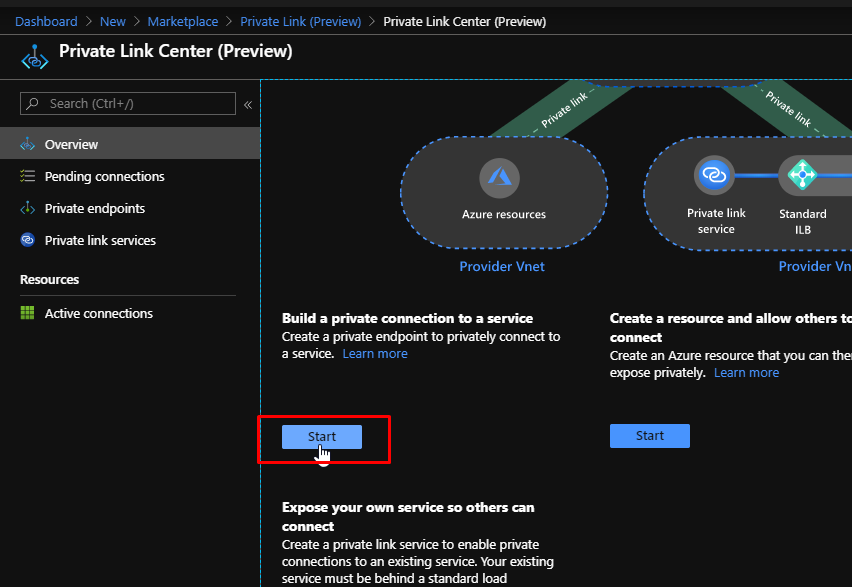
Upon clicking create, you’d land up on this which is the Private Link centre from where you can create private endpoints for services like an SQL Server.

Scroll down and click Start.
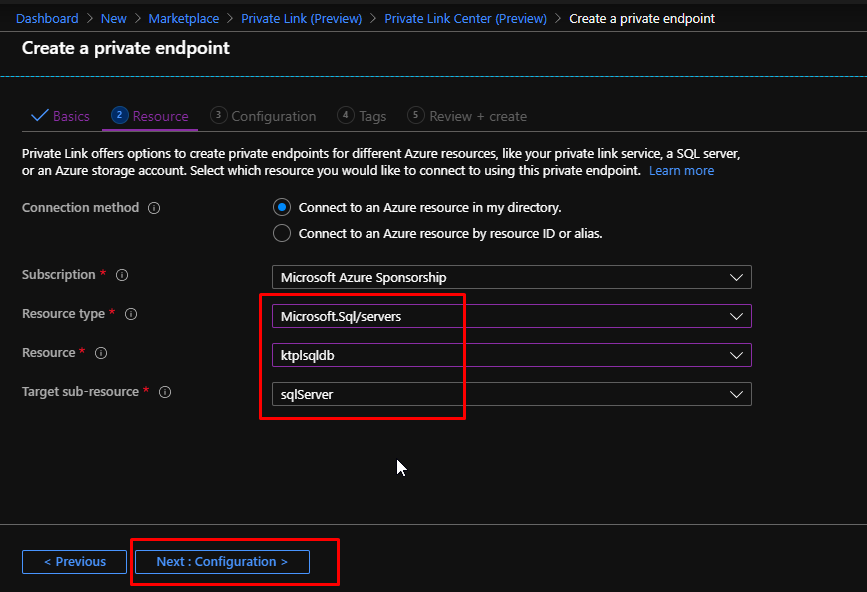
Choose the resource group. Give the private endpoint a name and choose the location. Click next to choose the resource.

Choose the resource type as Sql Server and choose the resource and sub-resource. Click Next.
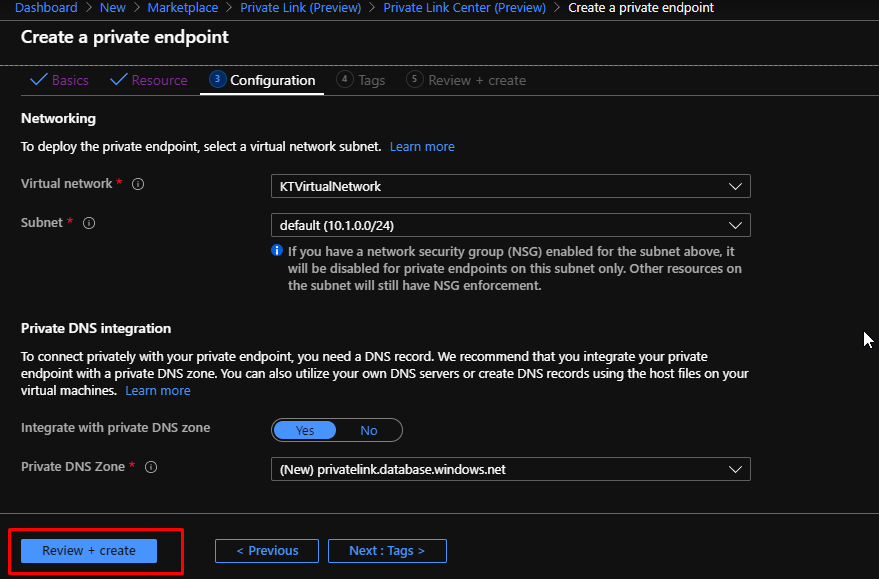
You can see that it chooses the virtual network and subnet by default. So, we don’t need to configure anything on this page. Click Review + Create and then create.
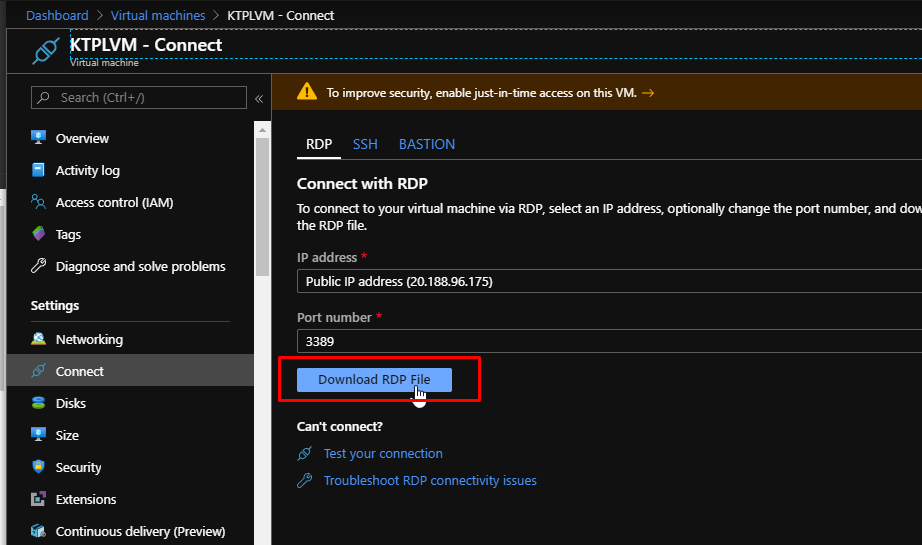
To test this out, connect to the created VM via RDP.
Inside the VM, open up a command prompt and try nslookup for the SQL Server that you have created. You will get this output. It tells you that the private endpoint is working because it augments the address with the private link moniker.

I have also downloaded SQL Server Management Studio on my VM.

I will enter my server name, choose SQL Server Authentication as the authentication method. Enter credentials and click connect.

And that’s it, it will get connected. I have been connected to the Azure SQL server and database from the VM, and as you have noticed, I didn’t have to enter my IP address to the SQL Server Firewall to connect. That is because I am using a private link connection that travels over the backbone of Azure instead of travelling over the public internet.