AZURE FRONT DOOR SERVICE – STEP BY STEP DEMO

- Azure Front Door Service is Microsoft’s highly available and scalable web application acceleration platform and global HTTP(s) load balancer. It provides built-in DDoS protection and application layer security and caching. Front Door enables you to build applications that maximize and automate high-availability and performance for your end-users. Use Front Door with Azure services including Web/Mobile Apps, Cloud Services and Virtual Machines – or combine it with on-premises services for hybrid deployments and smooth cloud migration.
- In this demo, I am going to show you a basic step by step demo of Azure Front Door Service.
- Here I have already created two web apps. Both are placed in different regions.
 .
.
The first web app is in Central US

- The second web app is in Southeast Asia.

- Next, I am going to create the front door. You can search for front door or find it in the Networking category. Selecting Front Door would open up a new blade and from there, we can click on Create.

- On the Front Door Basics tab, you will find the basic settings. Your subscription, resource group and the resource group location.

- Then on the configuration tab is where we configure the front door. Step 1 would be to add frontend hosts.

- The frontend host specifies a desired subdomain on Front Door’s default domain i.e. azurefd.net to route traffic from that host via Front Door. You can optionally onboard custom domains as well.
- Here I have kept the host name as ktdemofrontend.azurefd.net. I have disabled session affinity.

- Once the Frontend host is configured, the next step would be to create backend pools.

- After giving it a name, we need to add backends.

- The first backend would be my first web app. You need to define Backend host type. Then you can select the subscription where your backend lies and then select the backend. Then you define HTTP and HTTPs ports. The priority and weight would be used for load balancing.

- Similarly, I have added my second web app as one more backend.

- Then I have set the protocol as HTTPS and interval as 5 seconds. This interval should be very less because front door would easily know that a backend is down and would redirect to the other backend. I have kept the load balancing settings as default.

- Then after the backend pool has
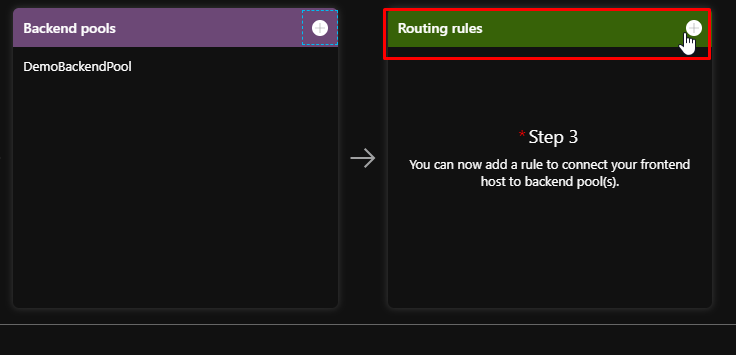 been configured, we need to configure routing rules.
- I have given the name DemoRoutingRule and have select basic default settings to add the routing rule.

- Once the configuration has been done, you can click on Review + Create. Here I am not adding any tags to this resource so I will go ahead with review and create.

- Click on create.

- Once the front door gets created, you can still make changes to the configuration in the front door designer tab.

- Next, I will go to the front end host URL.

- And it has redirected me to the App Service based in Southeast Asia because of my current geographical location.

- So next, I will just stop my web app which is in the Southeast Asia location.

- So then, it redirects me to the Web App based in Central US.

- That is it for the Azure Front Door demo.
- You can head over to the Azure portal to try it on your own.