AZURE FILE SYNC

- The purpose of Azure File Sync is to provide on-premises users and applications with quicker access to cloud files.
- Powered by local caches, Azure File Sync continually synchronizes with Windows Server.
- The service provides a consolidated location for cloud-based files with local access to multiple sites.
- The Azure file storage tool helps organizations with multiple sites like retail stores, life sciences labs, regional offices and hospitals to centralize their files onto a single shared server or VM.
- Before the General Availability (GA) of Azure File Sync, organizations had to sacrifice either manageability or accessibility of cloud-based files.
- Users across multiple sites would typically access their files from a local file store. Consequently, managing, backing up and recovering each shared file server was incredibly complicated and cumbersome.
- Organizations could have centralized files in Azure, but that had made it more difficult for users to access.
- Fortunately, Azure File Sync provides the perfect balance of accessibility and manageability by providing sites with a local file share that continuously syncs with Azure.
- Use Azure File Sync to centralize your organization’s file shares in Azure Files, while keeping the flexibility, performance, and compatibility of an on-premises file server.
- Azure File Sync transforms Windows Server into a quick cache of your Azure file share.
- You can use any protocol that’s available on Windows Server to access your data locally, including SMB, NFS, and FTPS.
- You can have as many caches as you need across the world.
Let us go ahead and see a demo of it.
First of all, create a new VM with Windows Server 2016 Datacenter image. Create a new resource group for this. Choose DS2v2 as the size.

Give username and password. Allow port 3389 and click Review + Create. Once the validation gets completed, click create.

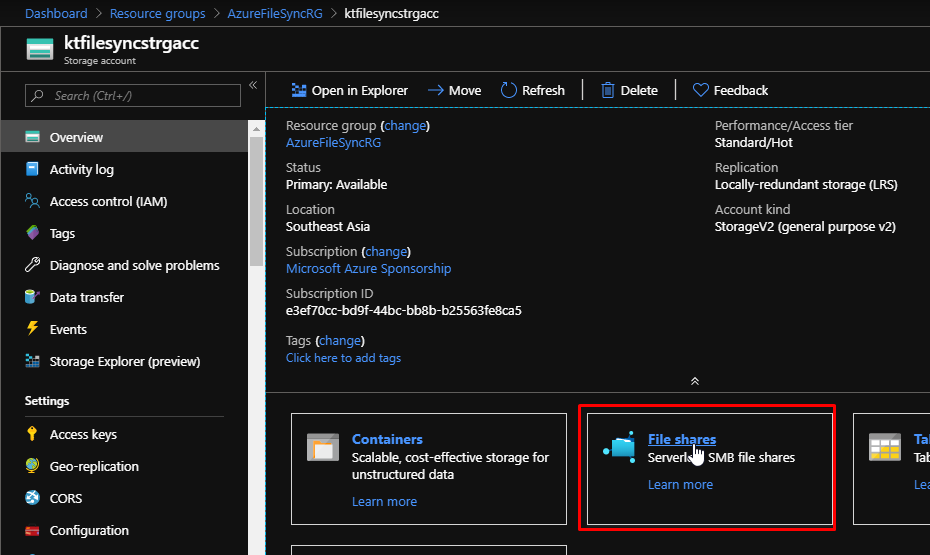
- Next, we need to create a storage account.
Put the storage account in the same resource group as earlier. Give it a name and keep the location same as well. Choose Standard Performance. StorageV2 and LRS. Hot Access tier.

Once the storage account gets created, go to it and select File Shares.
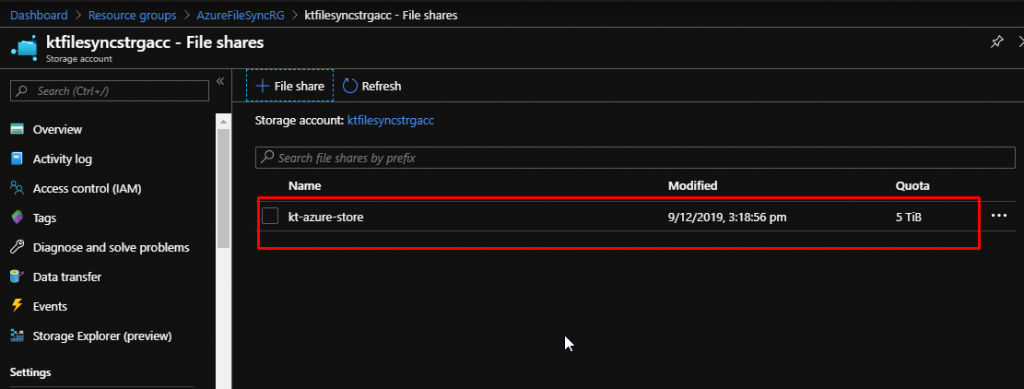
Click here to create a new file share.

Give a name to your file share and don’t give a quota.

It will get created. And since we didn’t give a quota to it, it automatically assigned itself a quota of 5TB.
Click on the context menu (three dots) and click connect.

Now if we were working with normal file share, we would simply choose a drive letter and copy this script and run it in the PowerShell and then the file share would be available on the machine. But we are not going to do that here.
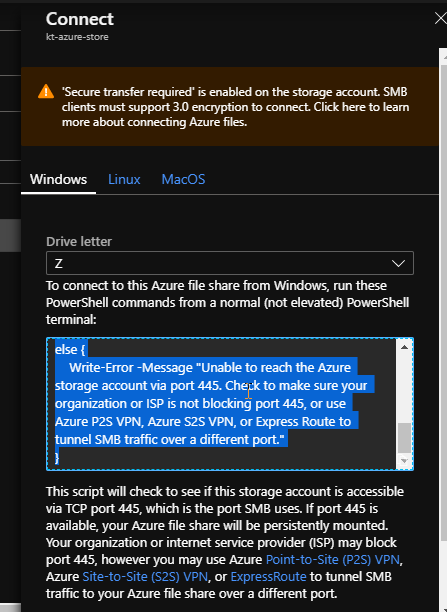
- Instead, we are going to work with Azure File Sync.
- So let’s go ahead and create a sync.
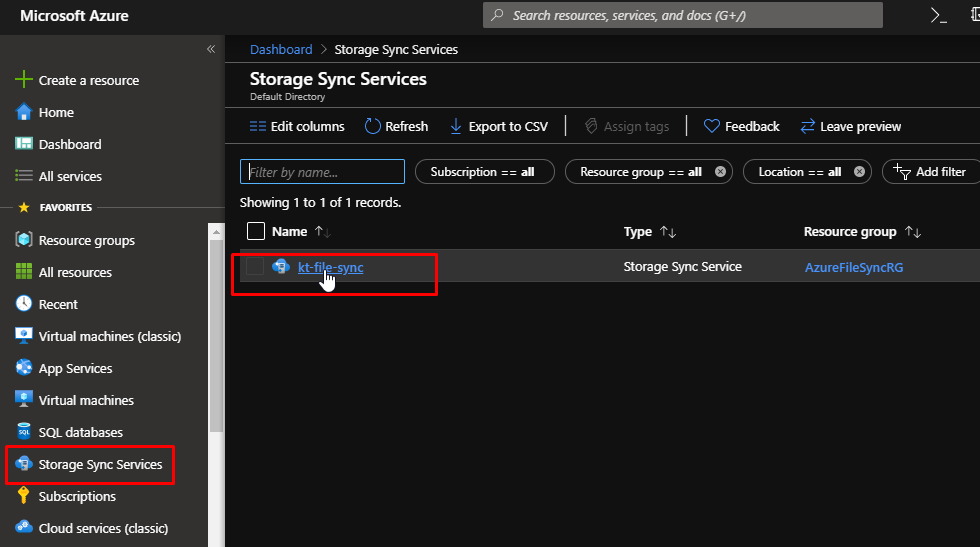
First of all, go to All Services and search for Storage Sync Services. Click on the Star to add it to the favourites.
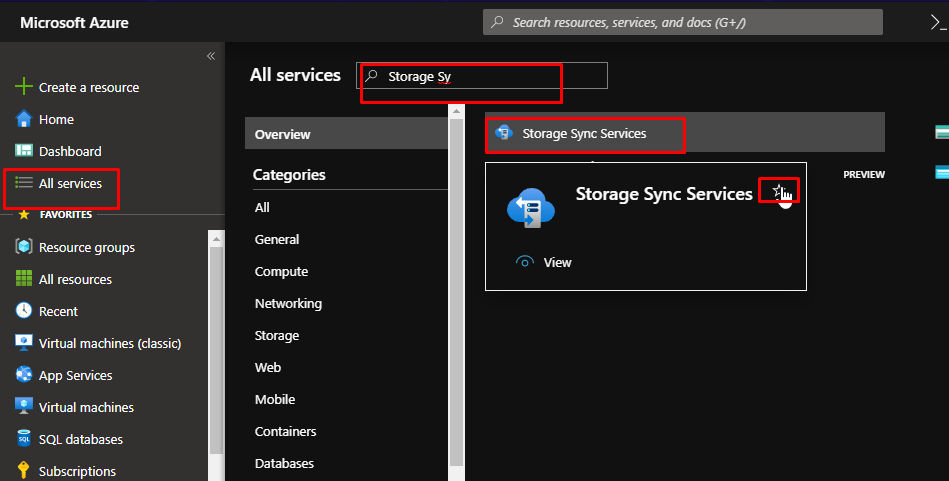
It will now be added to your portal menu.

Create a resource and search for Azure File Sync. When the blade pops up, click create.

Put it in the same resource group as the other resources. Give it a name and put it in the same location as well. Click Review + Create and then click Create.

Go to Storage Sync Services and select the file sync that you created.
Next, add a sync group. Sync groups are what determines the sync topology for a set of files, and the endpoints within each group synchronize with each other.

Give the sync group a name. Select the storage account that you created and then select the file share that you created in it. Click Create.

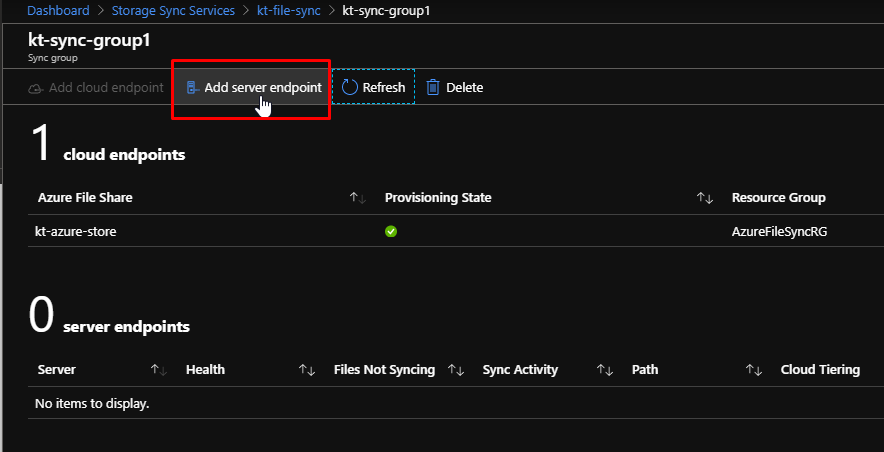
Once it gets created, you will see it in the list. Click on it.

You will see something like this. It will show that there is 1 cloud endpoint and 0 server endpoints. The Server Endpoint is the location on a file server to which Azure syncs. The Cloud Endpoint is essentially the Azure file share.

Go to the VM that you created and download the RDP file to connect it. Connect to the VM.


- We need to download a tool on the VM in order to establish the file sync.
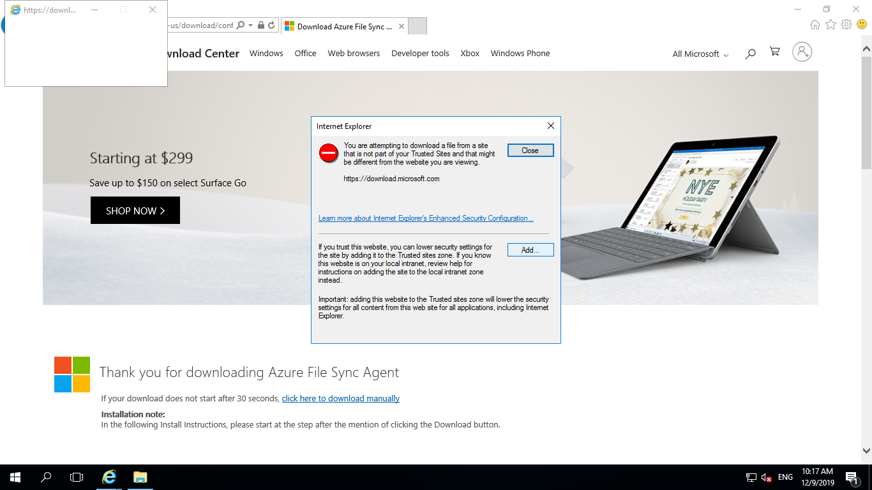
Once you get logged into the VM, open IE and search for Azure File Sync Agent download and click this link.
NOTE: You might have to add the website every time URL loads.

Click Add and add the page. You might have to do this several times.
Click Download on the page.
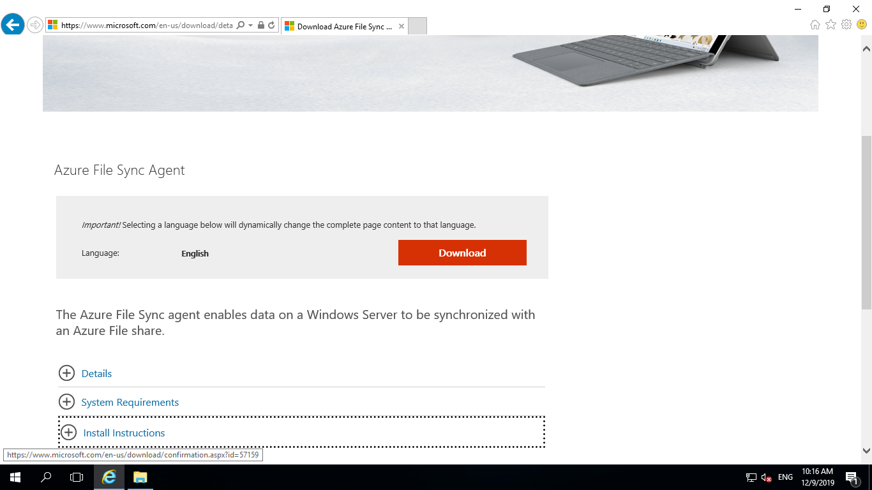
Choose the file for Server 2016 and click next.

Click Add and add the page. You might have to do this several times.

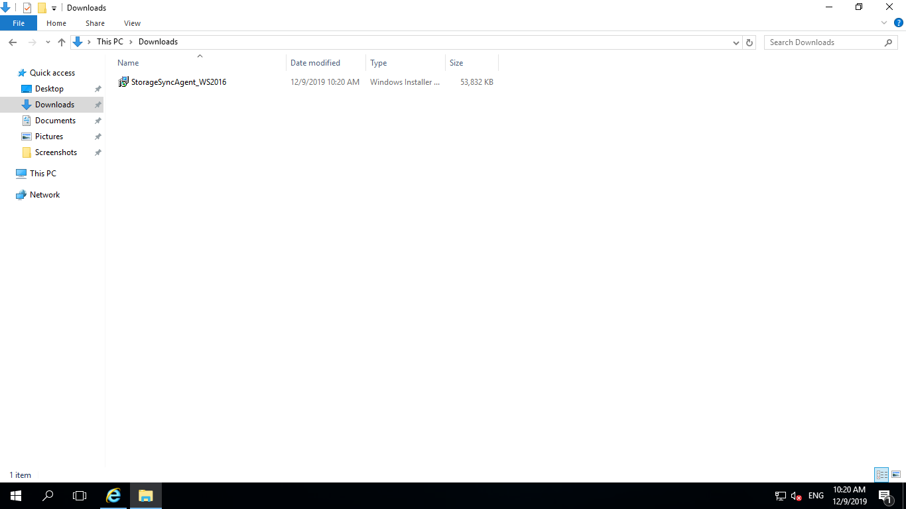
Once it gets downloaded, you will find it in the downloads folder. Double click and install it with all the default settings.
Once it gets installed, it will first check for an update. Click OK.

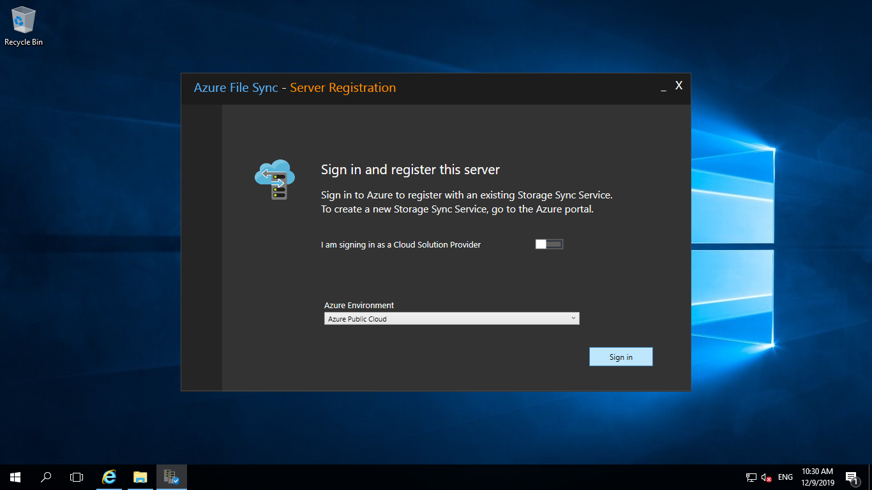
Next, it will ask you for server registration. Choose Azure Public Cloud and click sign in. Provide your credentials and sign in.
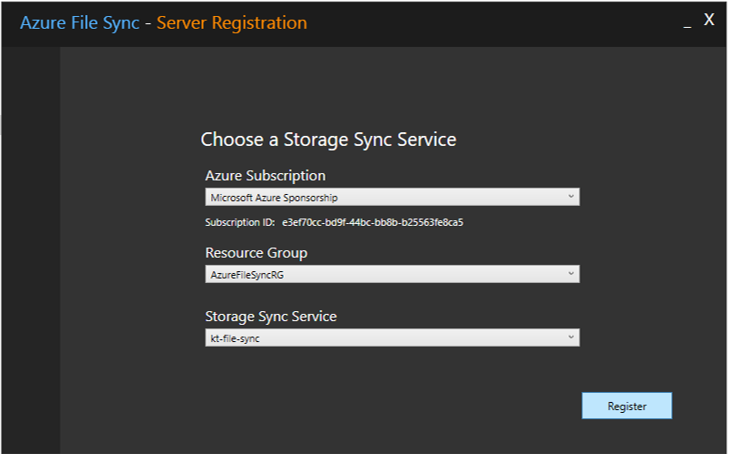
Select your Azure Subscription. Choose the resource group in which the storage sync service is and select the sync service. Click Register.
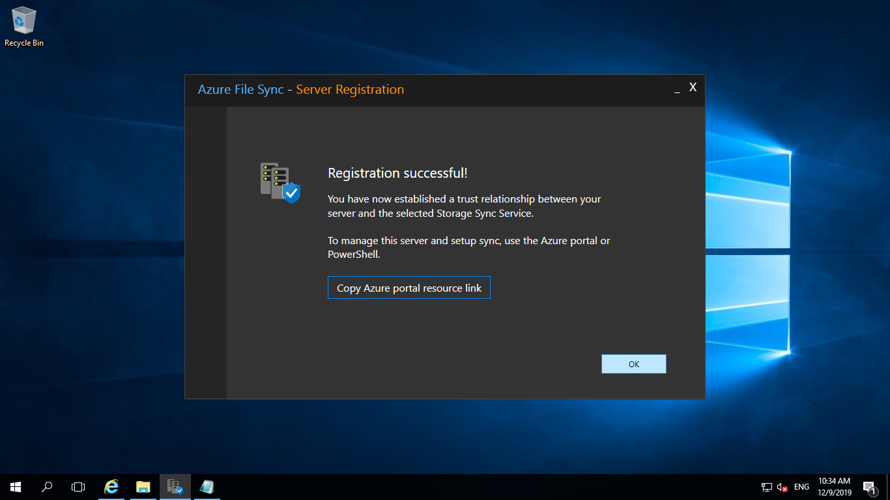
Once the registration is successful, you would see this. Click OK.
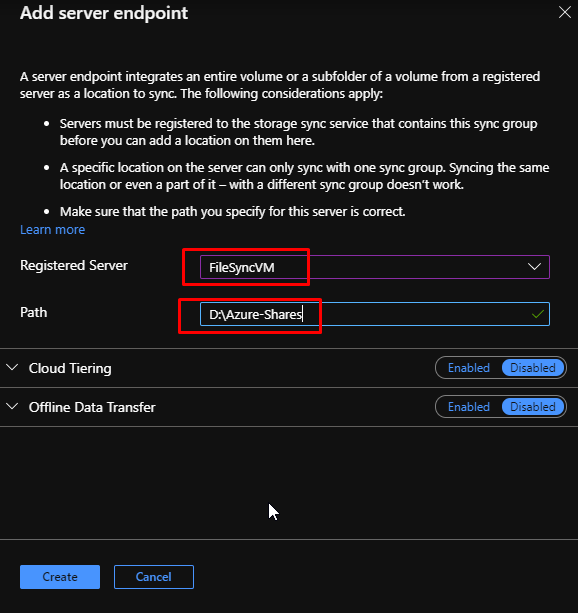
Go back to the file sync and click Add Server endpoint.
Add the registered server and for the path, give a path to the D drive.
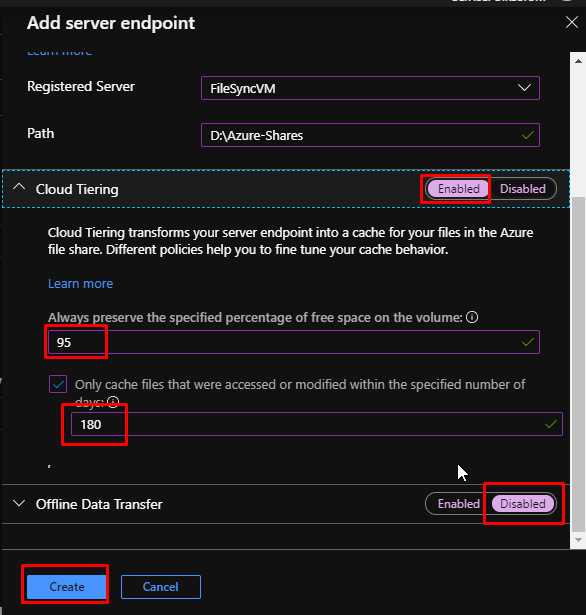
Enable cloud tiering and set the % to 95. Set the number of days for the cache files to 180. Cloud tiering is a feature of Azure File Sync in which frequently accessed files are cached locally on the server while all other files are tiered to Azure Files based on policy settings.
Now there would be 1 Server endpoint. Initially, it would show as pending but after a while, it would be healthy.

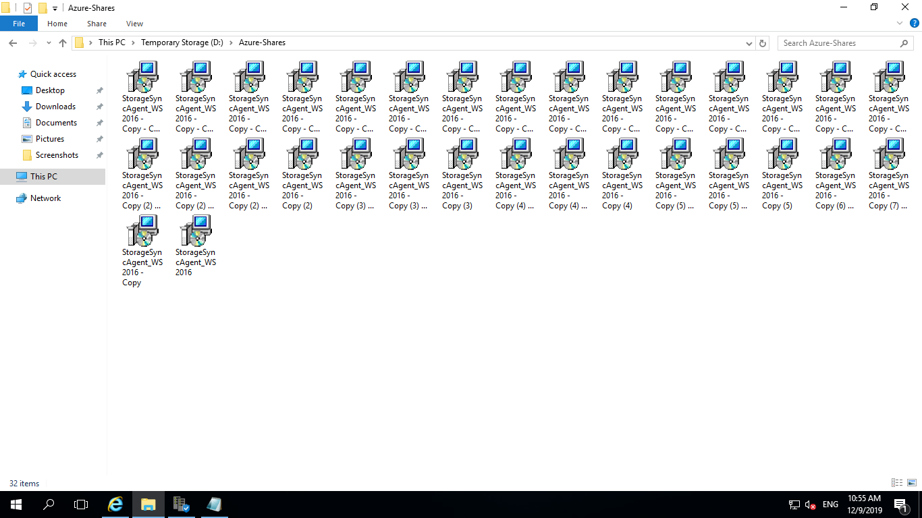
Back in the VM, you will now see a folder in the selected drive.

Inside the folder, copy the executable that you had downloaded earlier. Copy it several times.
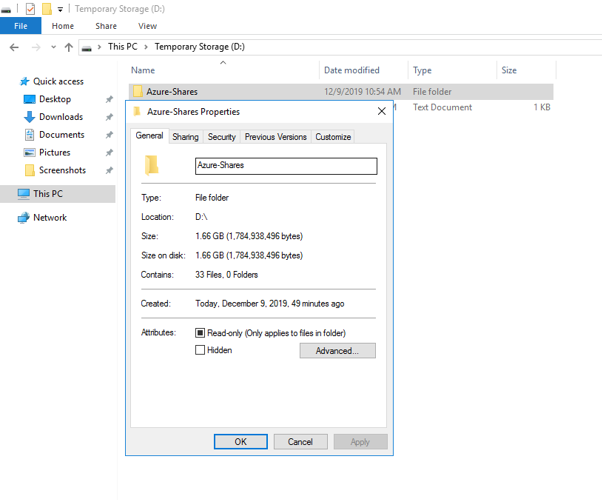
View the properties of the folder in which you have copied the files. Right now it would be in gigabytes. So far the sync has not been started. But if you check this after a few hours, the size would be reduced because the sync would have happened.
Once the sync gets completed, you will see that the size on disk has been reduced to just megabytes.
