HASSLE-FREE AND AUTOMATIC MANAGING THE LIFECYCLES OF YOUR AZURE BLOBS

- In this short and simple step by step demonstration, we are going to learn how you can automatically manage the lifecycle of an Azure Blog.
- Azure Blob Storage offers different access tiers to reduce your storage costs.
- A blob in the hot tier costs the most and can be accessed very fast, while a blob in the cool tier is cheaper and is slower. Let’s use a Lifecycle Management to automatically move blobs between access tiers.
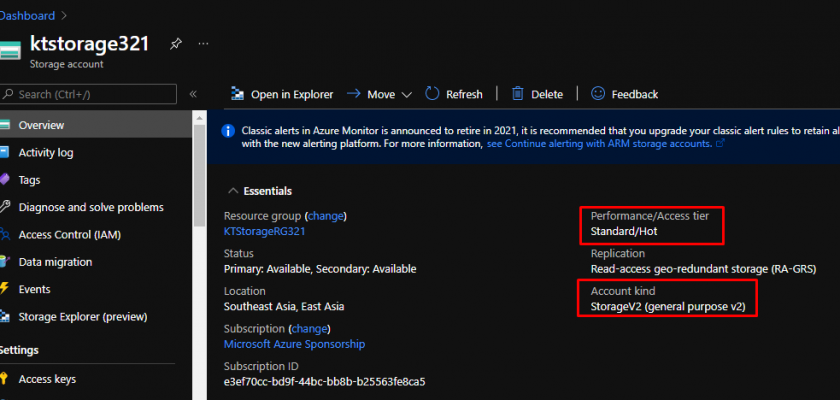
In the Azure Portal, I have got a storage account with StorageV2 kind. The access tier is Hot. You can create one for yourself under these settings.
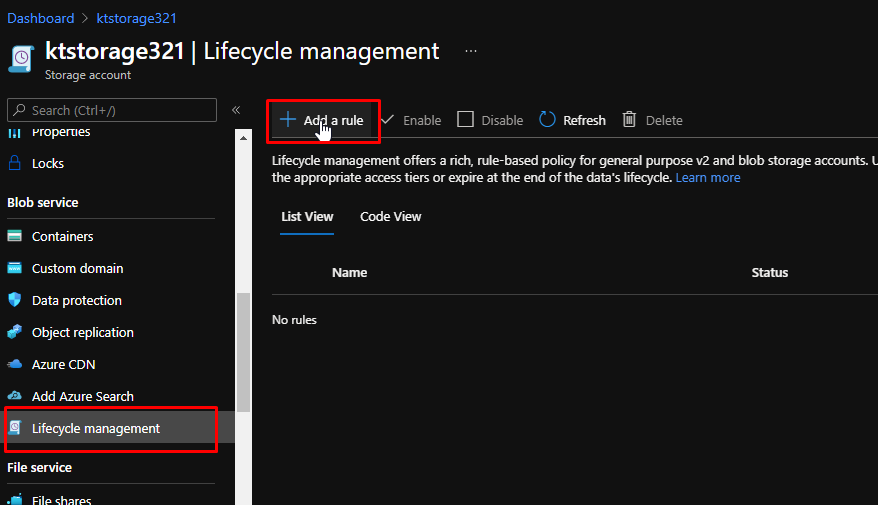
Go to Lifecycle Management and Click Add a rule.
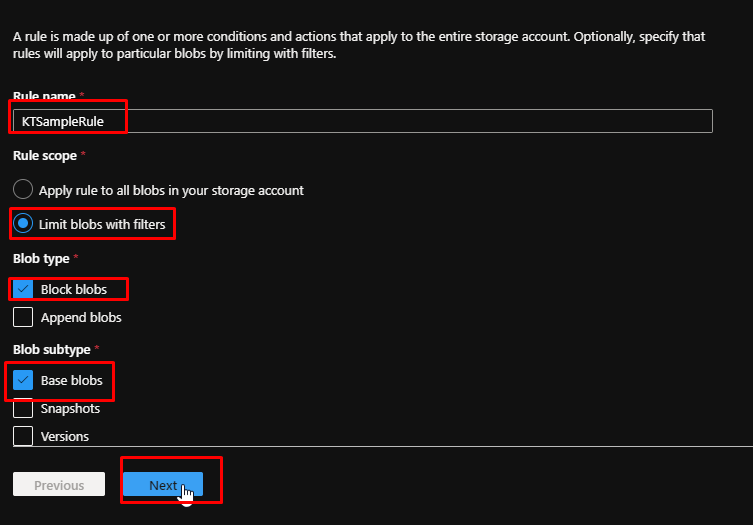
Give the rule a name. For the scope of it, we are going to limit blobs with filters, which we are going to define in the third step. For the type, we will be sticking to block blobs. For the blob subtype, we are going to choose base blobs. You can see how we can also use snapshots and versions of blobs. Click Next.
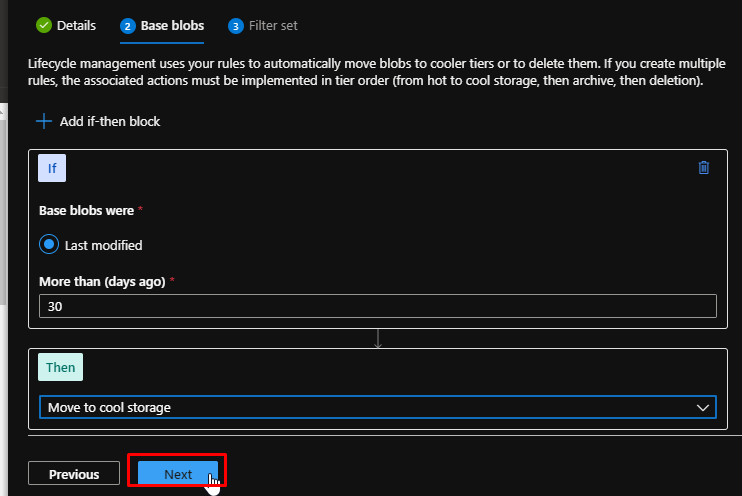
Here we will be setting a condition. Say that the base blobs were older than 30 days.

We are going to move that to the cool storage. Notice how you can delete the blob and also move the blob to an archive storage.
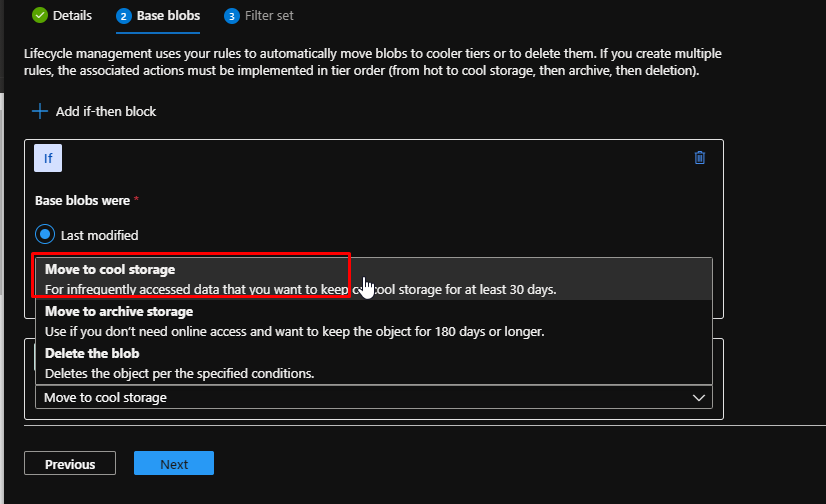
Click Next.
I only want to apply this to the mentioned container, which is /samplecontainer. That is it. We are done. Click Add.
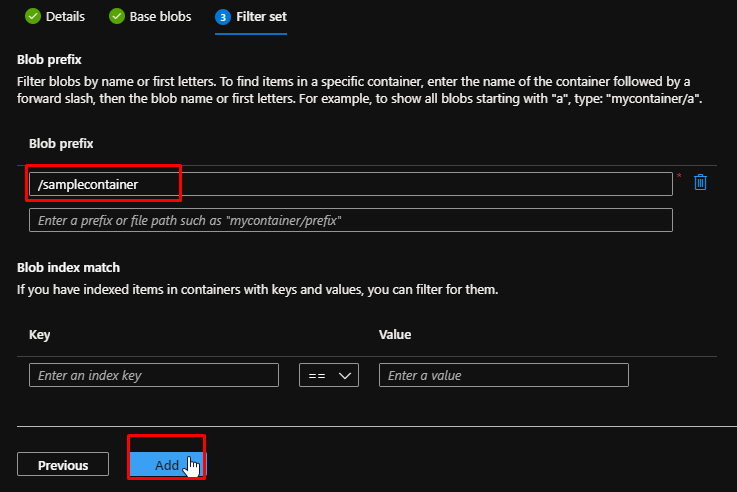
The rule will be instantly created for you.
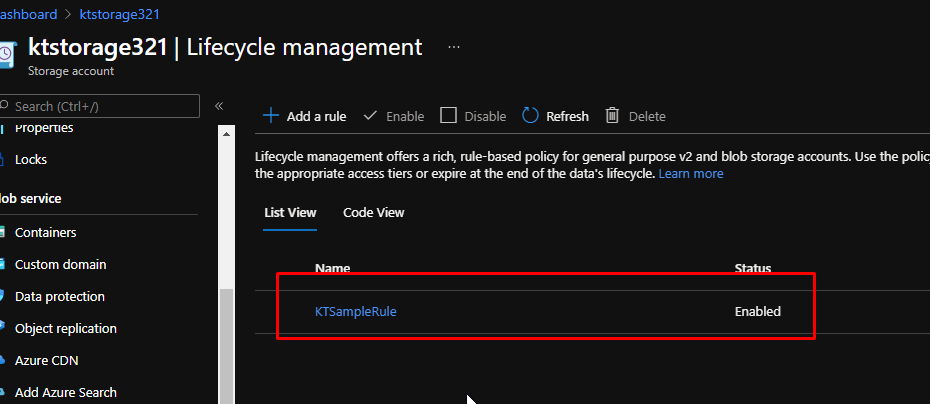
Notice how you can disable a rule and enable the disabled rules by a single click.

Azure Blob Storage access tiers are great to reduce your storage costs. You now know how easy it is to use Azure Blob Storage Lifecycle Management to automatically move blobs to their appropriate access tiers based on their usage. Go ahead and try this for yourself.