AZURE BASTION

What is the meaning of a Bastion?
- The dictionary definition of Bastion would be – something that keeps or defends a belief or a way of life that is disappearing or threatened.
- Or – a part of the wall of a castle that sticks out from it in order to protect it.
Now, what is Azure Bastion?
The Azure Bastion service is a new fully platform-managed PaaS service that you provision inside your virtual network. It provides secure and seamless RDP/SSH connectivity to your virtual machines directly in the Azure portal over SSL. When you connect via Azure Bastion, your virtual machines do not need a public IP address. You can get a secure RDP and SSH connectivity to all of your VMs in the virtual network in which your Bastion is provisioned.
You can protect your VMs from the outside world i.e. from exposing them to Public IPs by using Azure Bastion. You don’t need any kind of additional client or an agent or any sort of software while working with Azure Bastion. You can connect to your VM directly from the Azure portal itself.
Why should you use Azure Bastion?
In so many cases, users access their VMs by exposing their VMs to public IPs either by RDP or by SSH. This method is quite threating to the security of your VMs.
The other case is that users provision jump boxes – that way, they have to first get an RDP into the jump box and then another RDP to the target VM. This makes double RDP connection. Also, maintaining the jump boxes constantly also becomes a responsibility. Azure Bastion is a fully managed service where you don’t have to worry about creating these jump boxes.
Azure Bastion Architecture
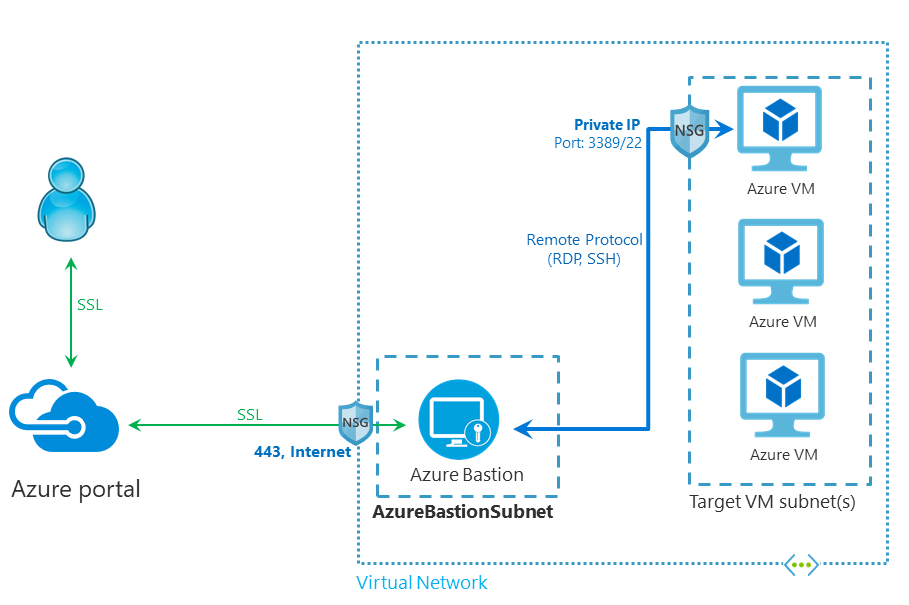
In the architecture, you can see that Azure Bastion is provisioned inside the Virtual Network. There could many VMs inside one VNet. Keep in mind that you need to have a separate Azure Bastion for each of your VNets. So the user first connects to the Azure portal via SSL. The portal then connects to the Bastion service via SSL and then the Bastion connects to your VM using either RDP or SSH.
Basically, the RDP or SSH is contained within the Virtual Network when you are using Azure Bastion. This means that RDP packets do not go to any sort of public network. Azure Bastion takes the session packets, then it transforms them into a custom protocol, put it in HTTPS and then send it over the public internet.
Using Azure Bastion can help limit threats such as port scanning and other types of malware targeting your VMs. Azure Bastion is designed in a way that it can be provisioned at the edge of your network and that way, it can guard your VMs inside your VNets. Once you provision Azure Bastion inside your Virtual Network, you can use RDP and SSH to your VMs without exposing your VMs to public IPs.
The biggest advantage of all this is that you can easily set up Azure Bastion in the Azure portal and you can access your VMs using it in the Azure portal itself. Internally, Azure Bastion is a VM scale set and it has the capability to resize itself as more number of sessions come in. One more advantage of Azure Bastion is that it always connects to your VM using its private IP address and not the public IP address.
Just in case if your VM has a public IP address, it won’t connect to it via that.
Now, let’s go ahead and see a step by step demonstration of Azure Bastion.
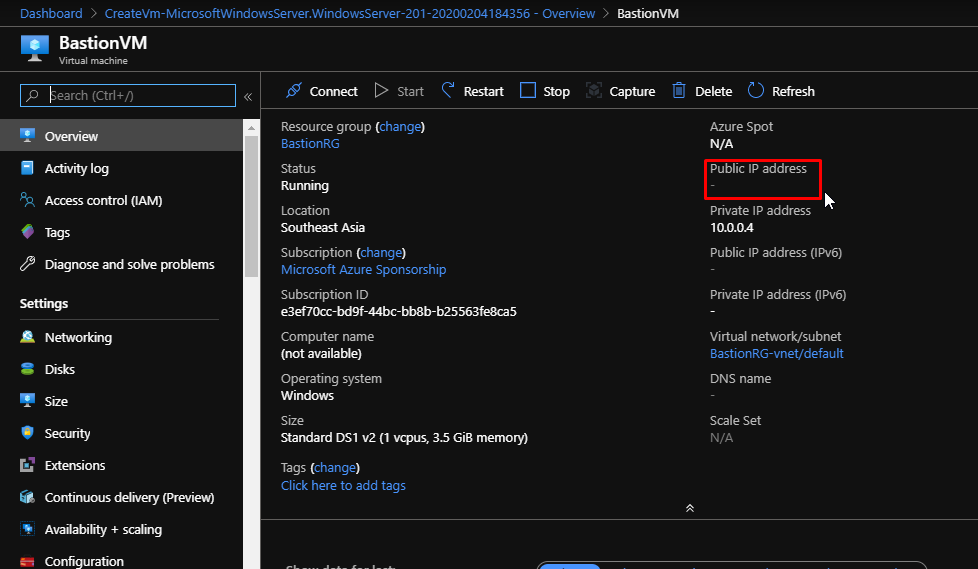
Here I already have a Windows VM created. With it is associated a VNet as well. Notice how my VM doesn’t have any public IP address.
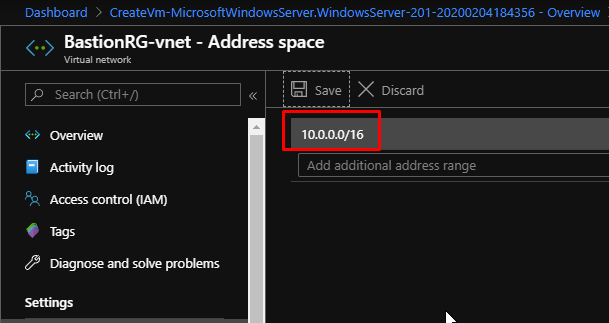
This is the VNet in which I am going to provision my Bastion service.

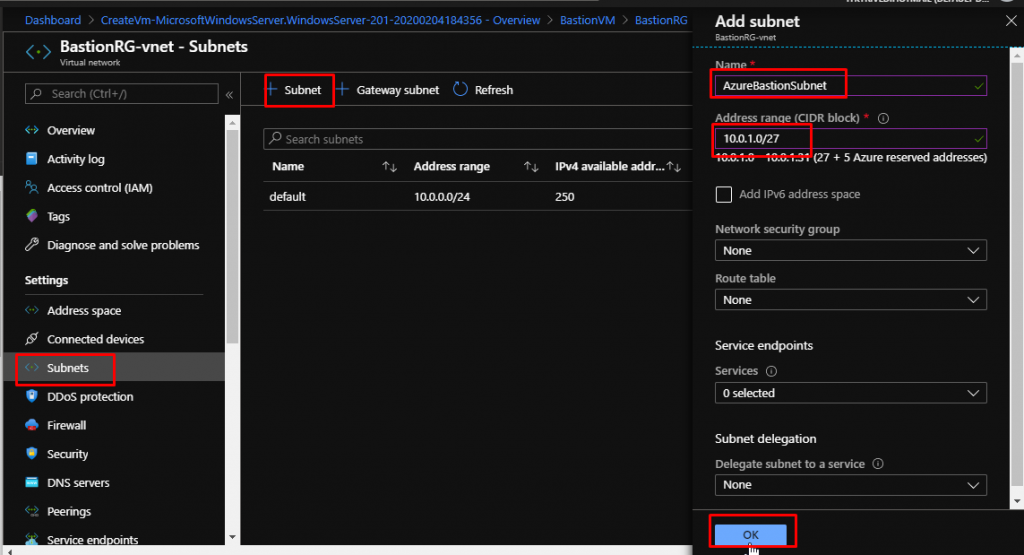
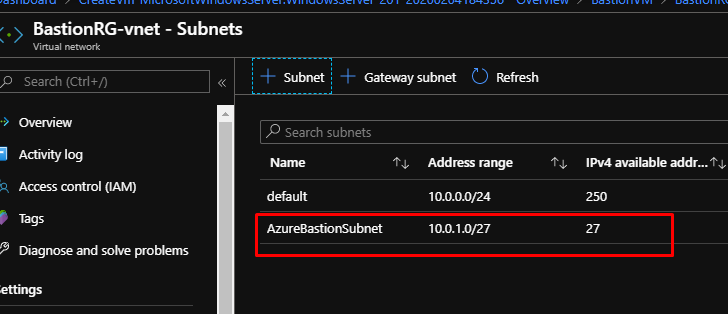
Notice how right now, I have only the default subnet in my VNet. Now for the Bastion service to work, it is compulsory to have a subnet called AzureBastionSubnet that has the address space with /27 or higher i.e. /26, /25 and so on.

But right now, the address space of my VNet is this and all of it is being used by the default subnet.

So what I have done is, I have changed the address space that now has the CIDR range of /16.
So now back in the subnets, I have created a new subnet with the address range as 10.0.1.0/27 with the name AzureBastionSubnet. Nothing else is needed for the configuration. We don’t need Route Tables or NSGs or anything.
Once the subnet gets created, we are good to go with Bastion.
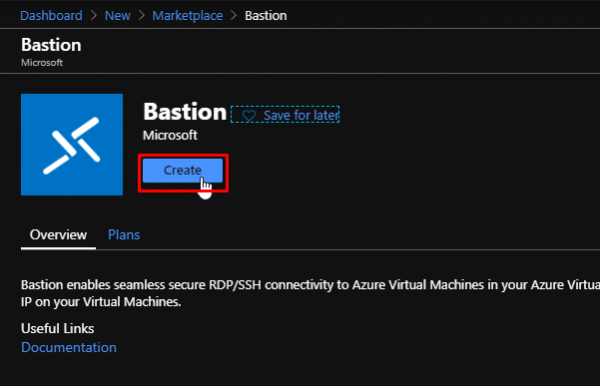
Search for Bastion in the marketplace and you would find it easily. Click create.
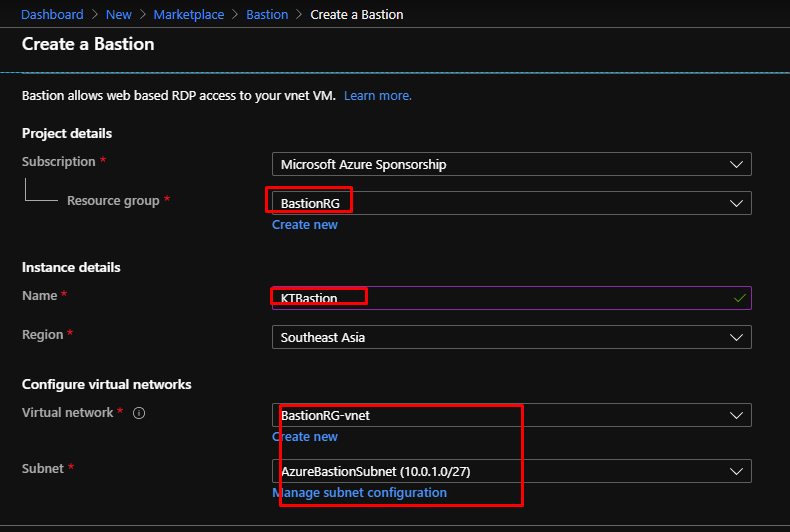
I have given a name to the service. I have selected my existing resource group in which my VNet has been provisioned. After selecting the VNet, it automatically picks up the subnet that has been created. Now if you didn’t create the AzureBastionSubnet before creating the Bastion service, you would find an error that would ask you to create one.
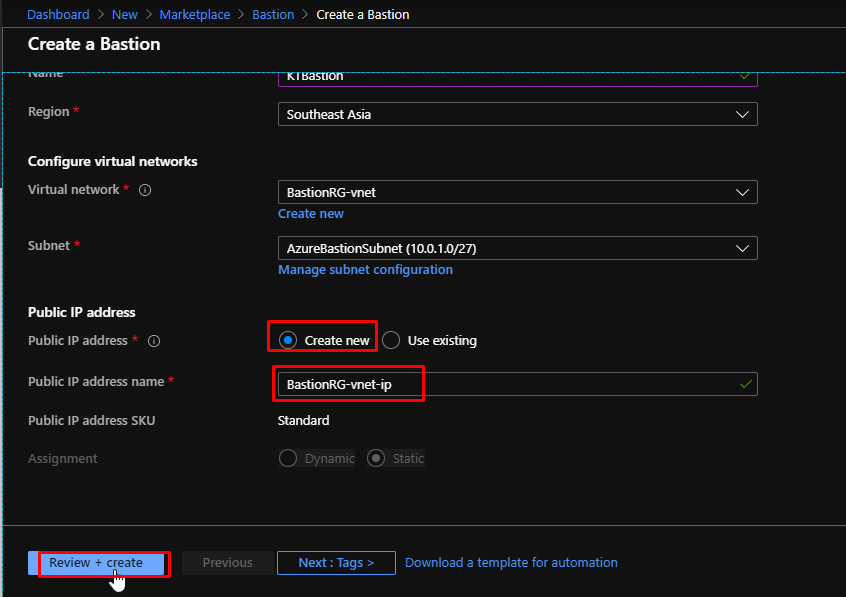
Here I am creating a new Public IP address that the Bastion would use. And finally, clicking the create button.
When everything is ready, all you have to do is Connect to your VM and instead of choosing RDP, you have to choose Bastion. Then you have to put in the credentials that you had setup while creating the VM and click Connect.

If all goes all well, you will connect to your VM in browser, in a separate tab. You can open the VM inside the same tab in Azure portal but this is more convenient.

- One thing you can’t do while accessing a VM via Bastion is that you cannot copy/paste any kind of files to and from the VM.
- You can however, copy and paste text to and from the VM.
- This gives the security to your VM.
- Also, you can view the audit logs to view who logged in to the VM and did what over a time period.
- Azure is planning to record the VM sessions so that they can take the security provision to the next level.
Here I have a Linux VM and notice how this one doesn’t have a Public IP address as well.
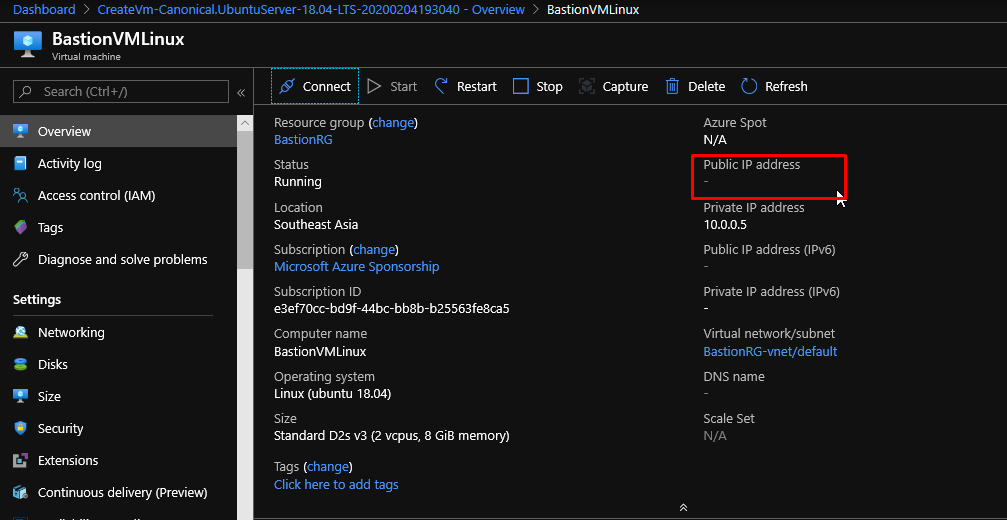
The process to connect to this one would be same as well. Notice how in the Linux VM, we get an option to connect via SSH key as well.

And just like the Windows VM, this will get opened in another tab.

You can verify the IP address of the VM by running the ifconfig command and you will see that it will show the private IP of the VM.

- I hope you liked this one and I hope that you will inculcate the use of Azure Bastion in real time scenarios because it is a very dependable service and there is a lot more to come in this service.
- So, next time before going for RDP or SSH, give yourself a thought and consider Azure Bastion.