AZURE APPLICATION SECURITY GROUPS

- Azure Security Groups allow us to define fine-grained network security policies based on workloads, centralized on applications, instead of explicit IP addresses.
- ASGs provide the capability of grouping the VMs with monikers and secure our applications by filtering traffic.
- By implementing granular security traffic controls, we can improve isolation of workloads and can protect them individually.
- If a breach occurs, this method limits the potential impact of lateral exploration of our networks from hackers.
- The security definition is simplified when using the ASGs.
- We can define application groups by providing a moniker descriptive name that fits our architecture.
- We can use it the way we want i.e. for applications, systems, environments, workload types, tiers or even any kind of roles.
- We can define a single collection of rules using ASGs and NSGs. We just have to apply a single NSG to our entire virtual network on all subnets.
- This way by defining a single NSG gives us the full visibility on all traffic policies and a single place for management. Hence, it reduces the tedious job.
Benefits of using ASGs:
We can scale at our own pace. While deploying the VMs, we can make them members of the appropriate ASGs.
If the VM is running more than one workloads, we can simply assign multiple ASGs.
The access is always granted based on workloads.
We don’t have to worry about security definition ever again.
The most important point to be noted is that we can implement a zero-trust model. Meaning, we can limit access to the application flows that are explicitly permitted.
ASGs introduce the ability to deploy multiple applications within the same subnet and also isolate traffic based on ASGs.
With the use of Azure Security Groups, you can reduce the number of Network Security Groups in our subscription.
In some cases, it gets so helpful that you can use a single NSG for multiple subnets of your virtual network.
The above inputs have been taken from the blog by Mario Lopez.
Let us go ahead and perform a demo to understand the Application Security Groups in a better way.
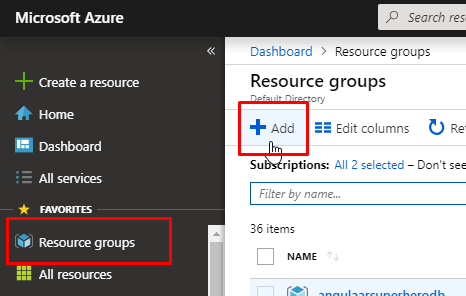
For this demo purpose, you will require an active Azure subscription. Go to Azure portal and click on Resource Groups and click on Add to create a new resource group.
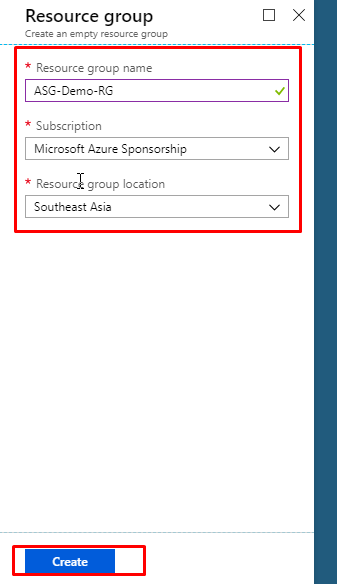
- Give the resource group a name. Select an appropriate subscription and choose the location nearest to you. Click on create.
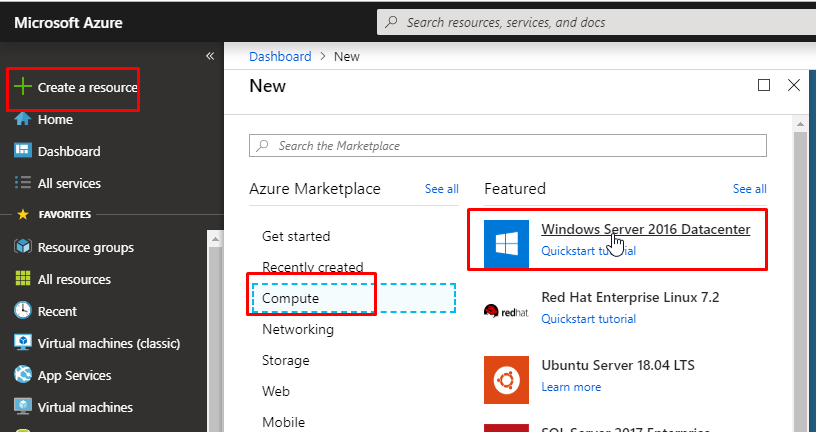
- Once the resource group gets created, click on Create a resource, go to Compute category. Find Windows Server 2016 Datacenter and select it.
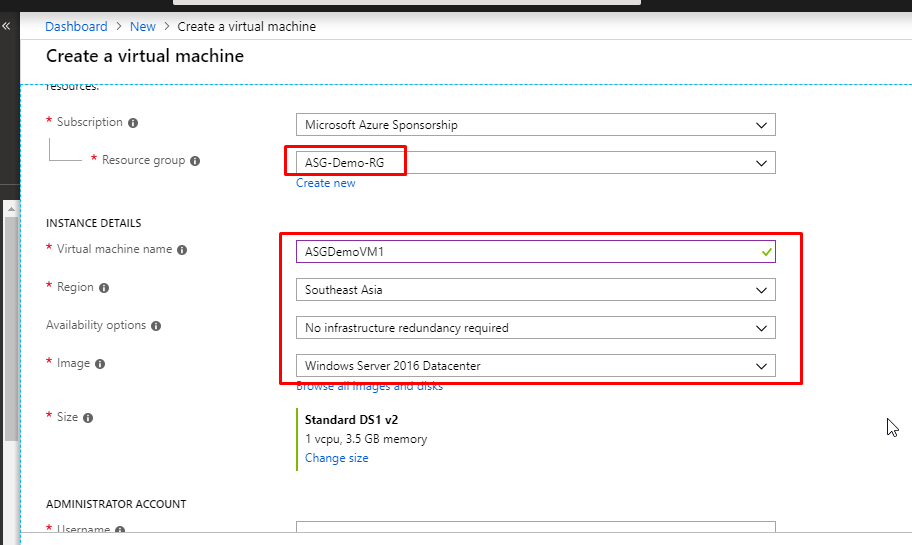
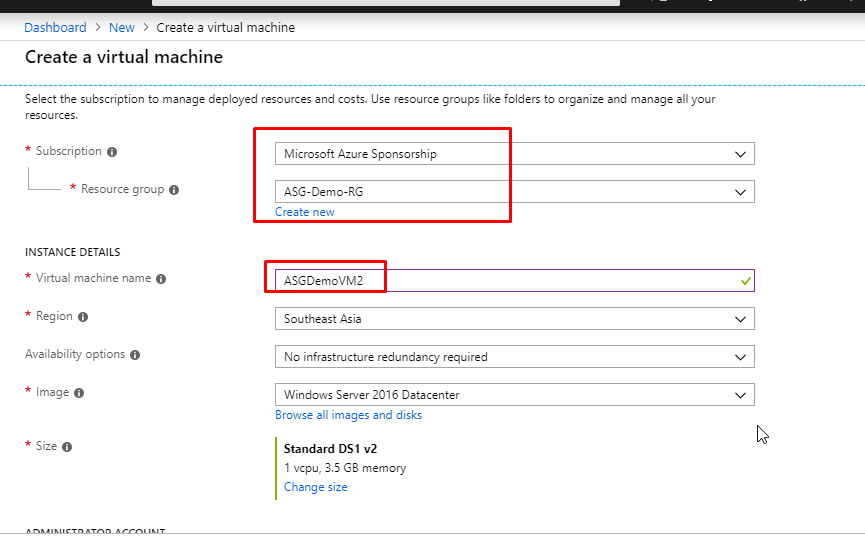
- Select an appropriate subscription, select the resource group that you just created. Give name ASGDemoVM1 to the VM and give the required details as shown in the image below.
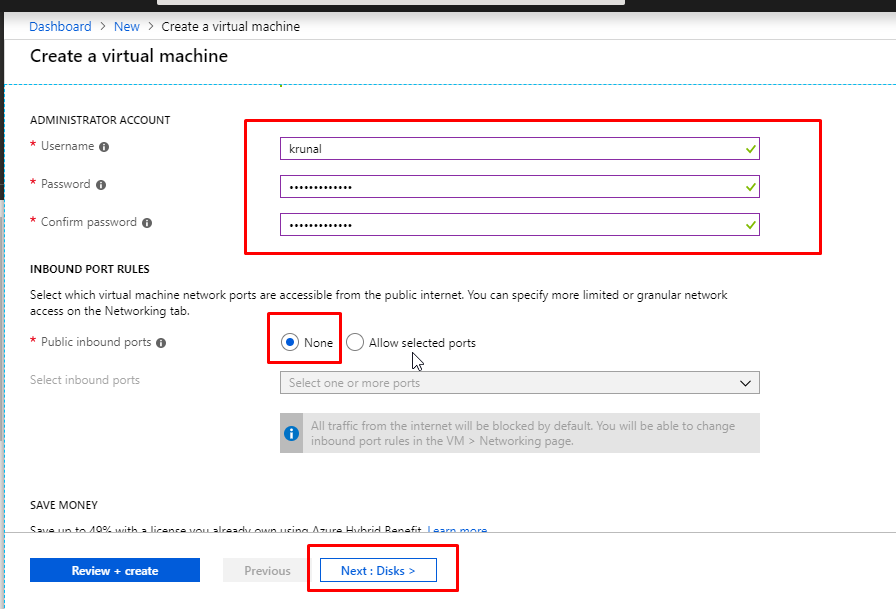
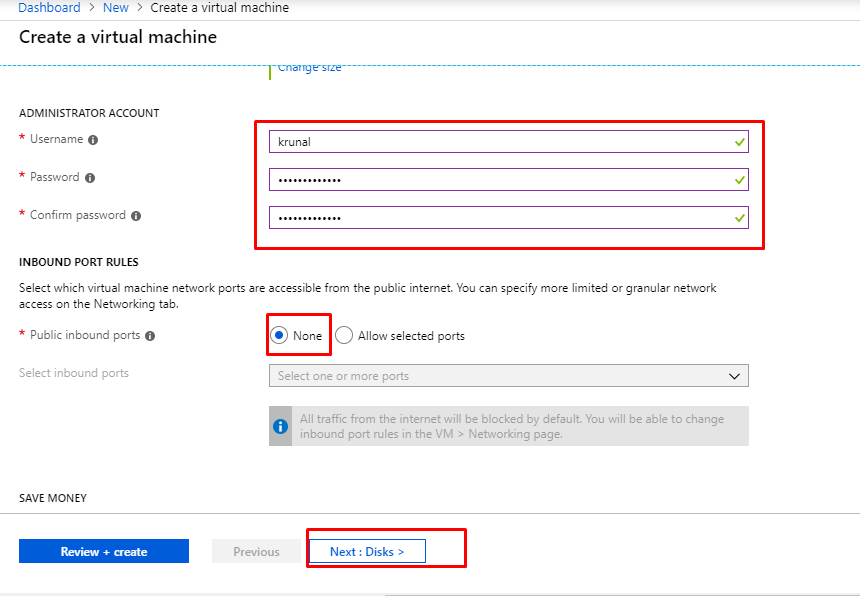
- Give a username and password. In the Public inbound ports option, choose None. Click on Next.
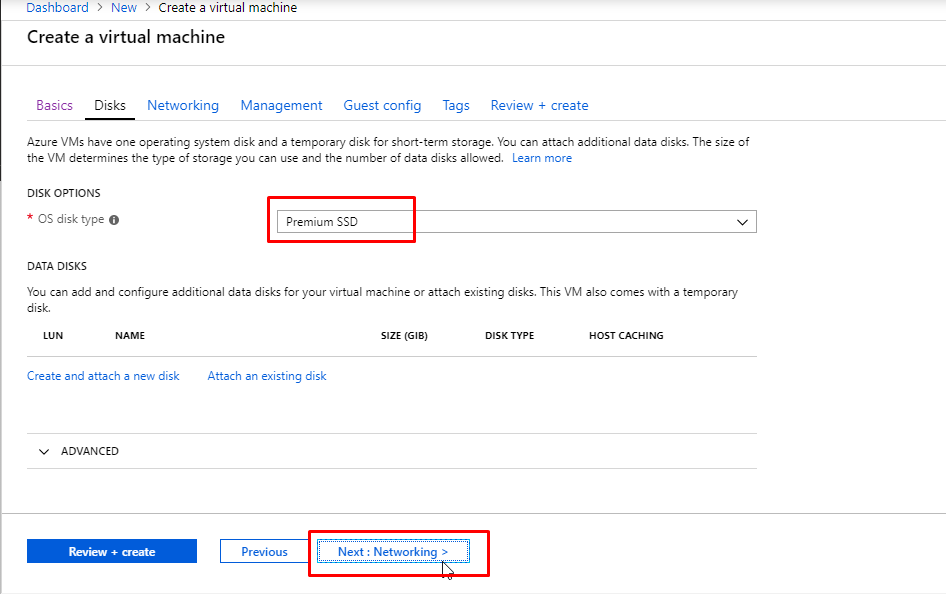
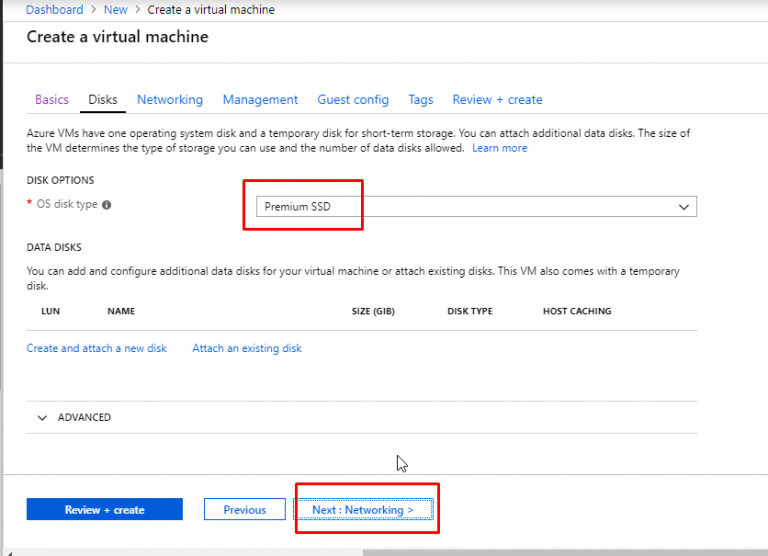
- We are going to keep the OS disk type as Premium SSD. Click on Next to go to the Networking tab.
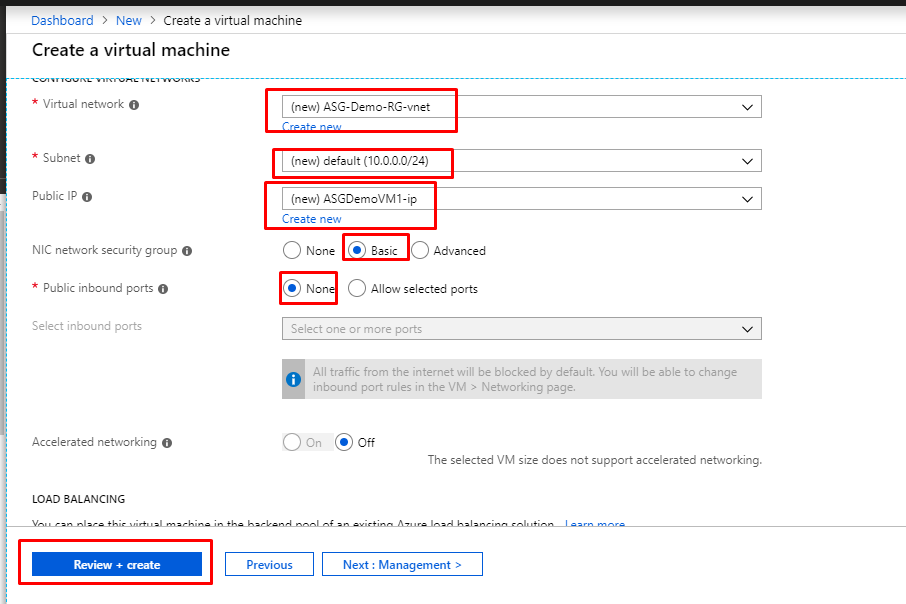
- In the networking tab, you will see that it is creating a new Virtual Network by default. Along with that, it is creating a default subnet and a Public IP as well. Select Basic in the Network Security Group. This will create a new NSG by default. Select None in the Public Inbound Ports. Click on Review + Create.
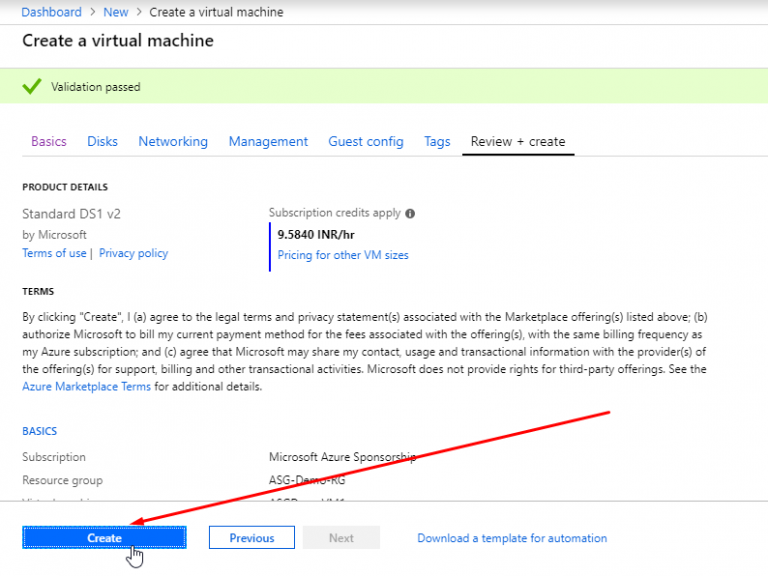
- Once the validation gets passed, click on Create.
- Once the first VM gets created, create one more VM with the same image. Put it in the same resource group. Give name ASGDemoVM2.
- Give username and password and keep None in the public inbound ports.
- Here again, we are going to keep the OS disk type as Premium SSD. Click on Next to go to the Networking tab.
- You can see that it will choose the existing Virtual Network that was created earlier during VM1 creation. For the subnet part, it will choose the default subnet as well. It will create a new public IP. However, in the NSG part, select Advanced and select the NSG that was created earlier during the creation of VM1. This way, we are associating the same VNet, Subnet and NSG to two different VMs. Click on Review + Create.

- Once the validation gets passed, click on Create.
- Now, we don’t have any inbound rules defined. So, if we try to connect to the VM via RDP, we won’t be able to do it.
- Let’s go ahead and create RDP rules for both the VMs.
- For that, we will first grab the private IP addresses of both the VMs.
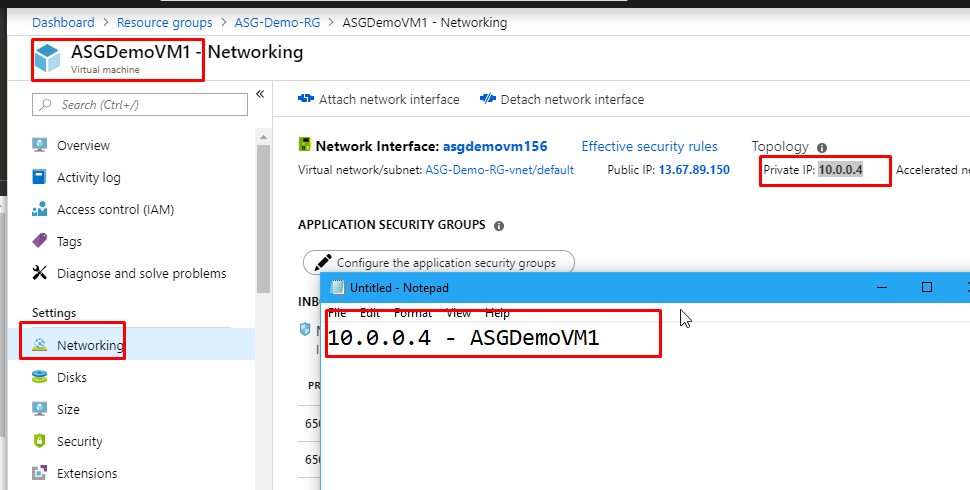
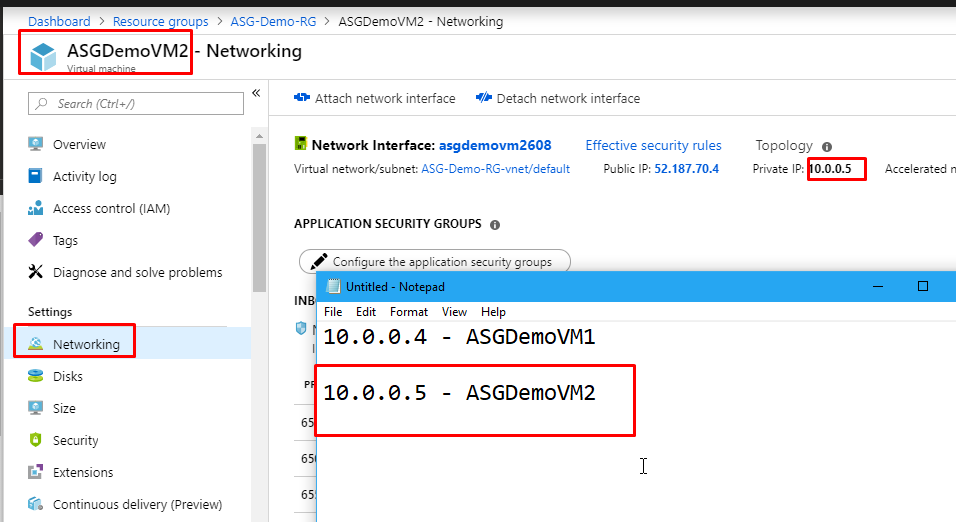
- Go to ASGDemoVM1. Go to its Networking tab and copy the Private IP address. Keep it aside for a while.
- Then do the same for ASGDemoVM2‘s private IP as well.
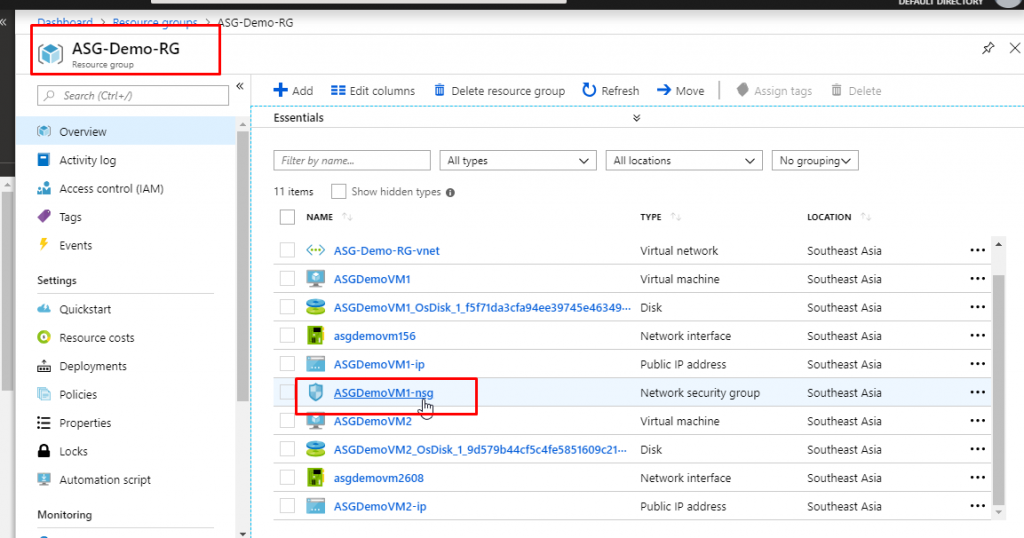
- Now go to the resource group, find the Network Security Group that was created and click on it.
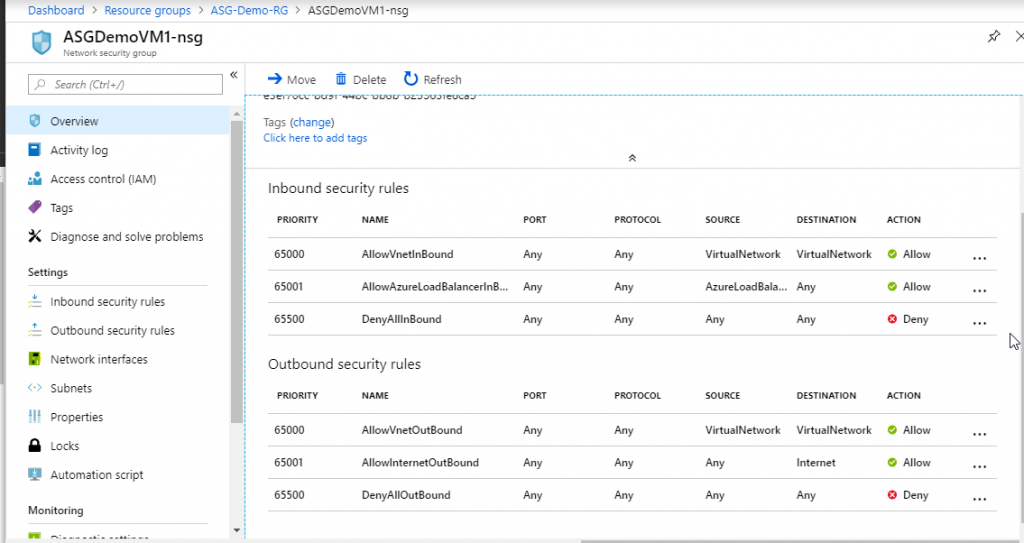
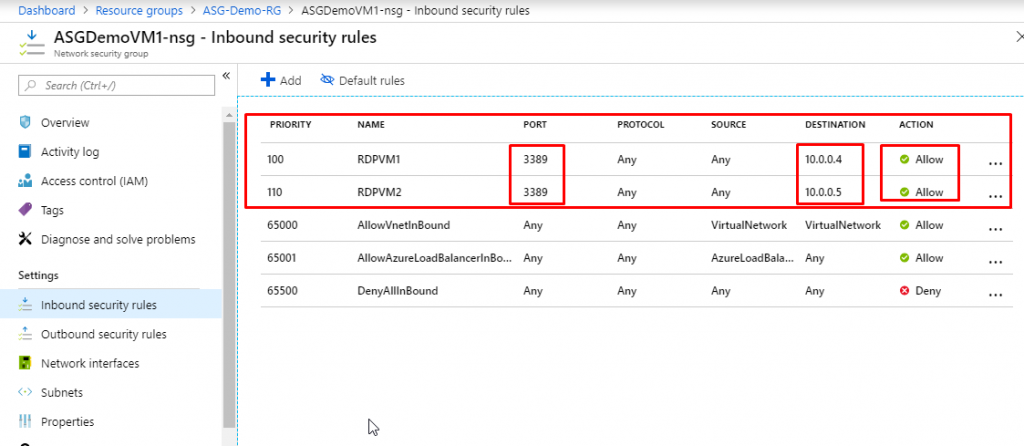
- In the overview of NSG, you will see that we have 3 inbound and 3 outbound security rules which have been created by default.
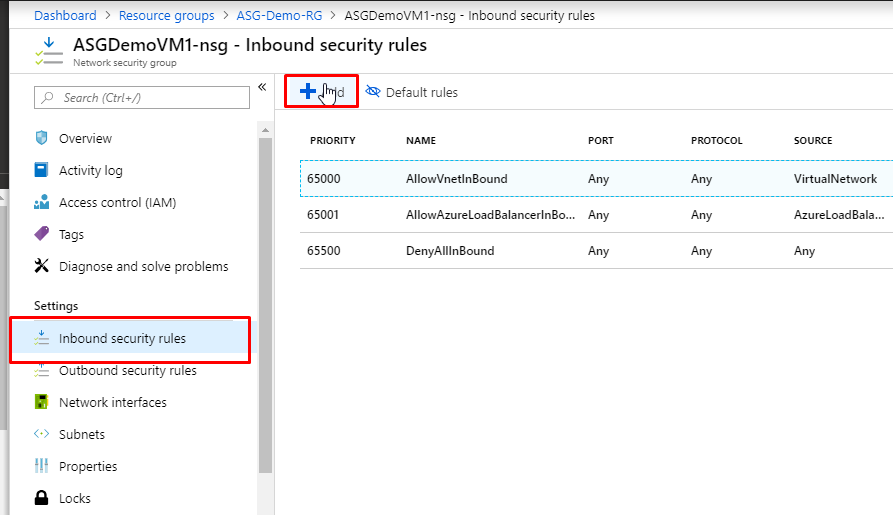
- Go to Inbound security rules and click on Add.
- Keep Source as Any and source port ranges as all (*). Keep destination as IP Addresses and in the destination IP address, paste in the private IP address of ASGDemoVM1. Keep protocol as any and action as allow.
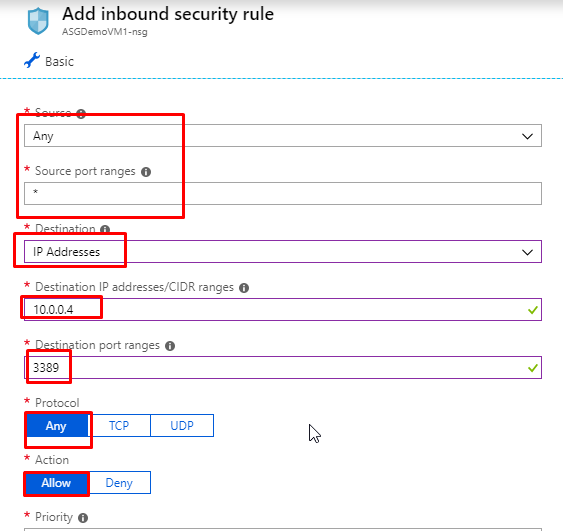
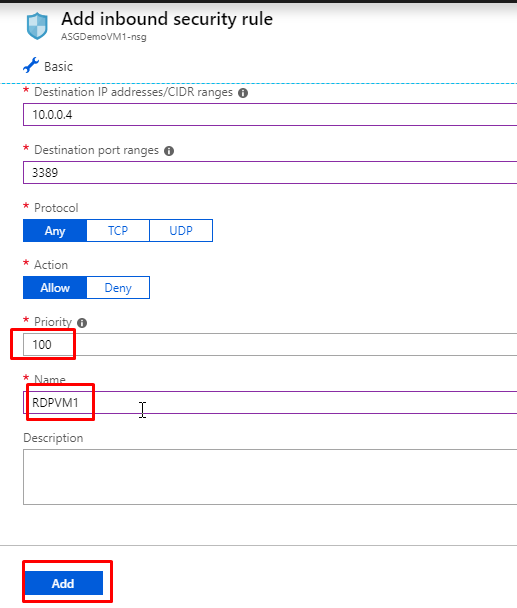
- Give priority as 100 and give name as RDPVM1. Click on Add.
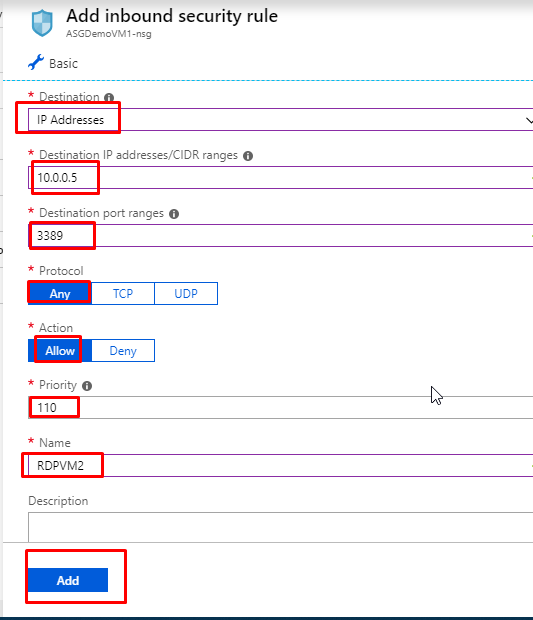
- Add one more rule. Keep the source as any and source port ranges as (*). Destination IP Address and in the destination IP address, paste in the private IP address of ASGDemoVM2. Protocol any and action allow. Priority 110 and name as RDPVM2. Click on Add.
- You will see that the rules have been created.
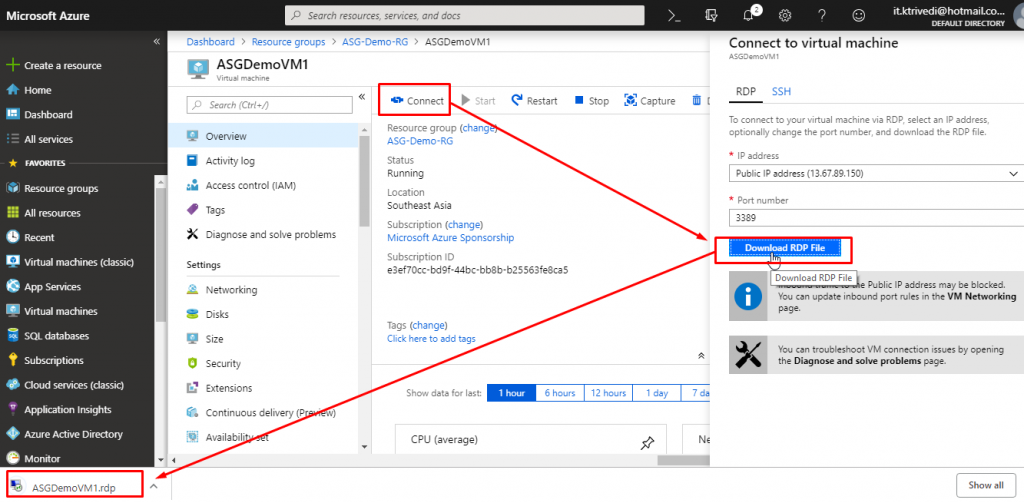
- Go to ASGDemoVM1 and click on Connect. Download the RDP file and open it.
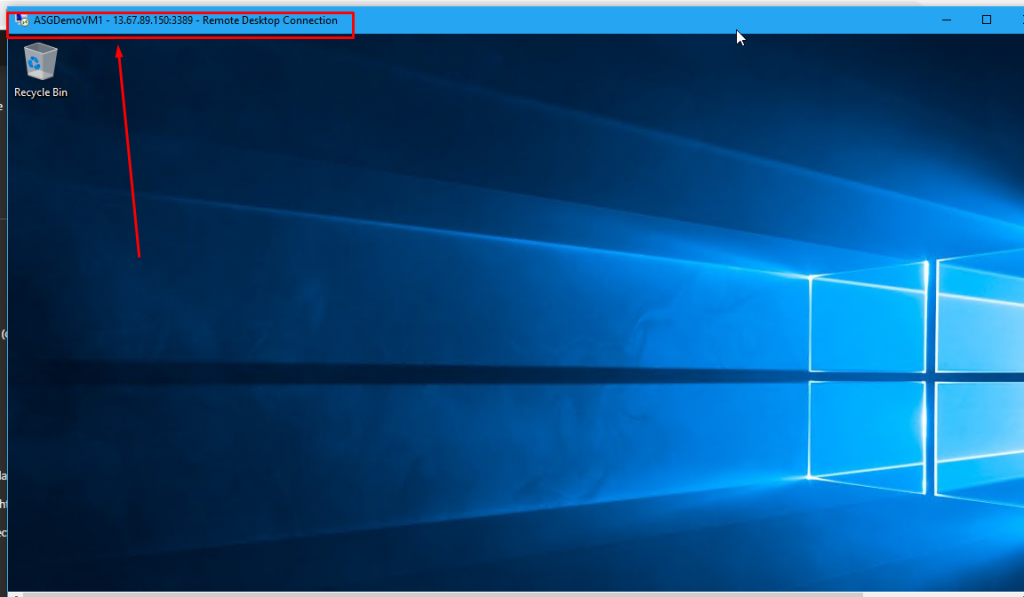
- You will be able to successfully connect to ASGDemoVM1.
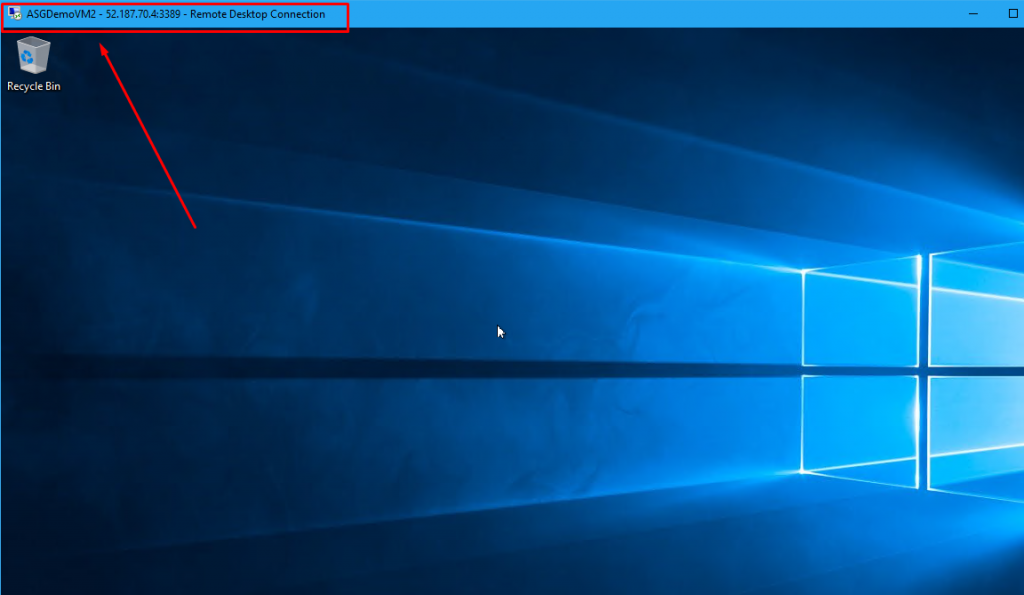
- Similarly, you will be able to connect to ASGDemoVM2 as well.
- So what we have done here is that we have created two separate rules for two separate VMs.
- Imagine that we have 50 VMs in the resource group and we want to create the same rule, say allow RDP, for all those VMs.
- How tedious would it get to create and maintain those rules.
- Here comes the role of Application Security Group.
- We are going to create an Application Security Group and we are going to associate that ASG with both the VMs.
- Then instead of creating two separate RDP rules, we will create just one rule that will be applied to the Application Security Group that we create.
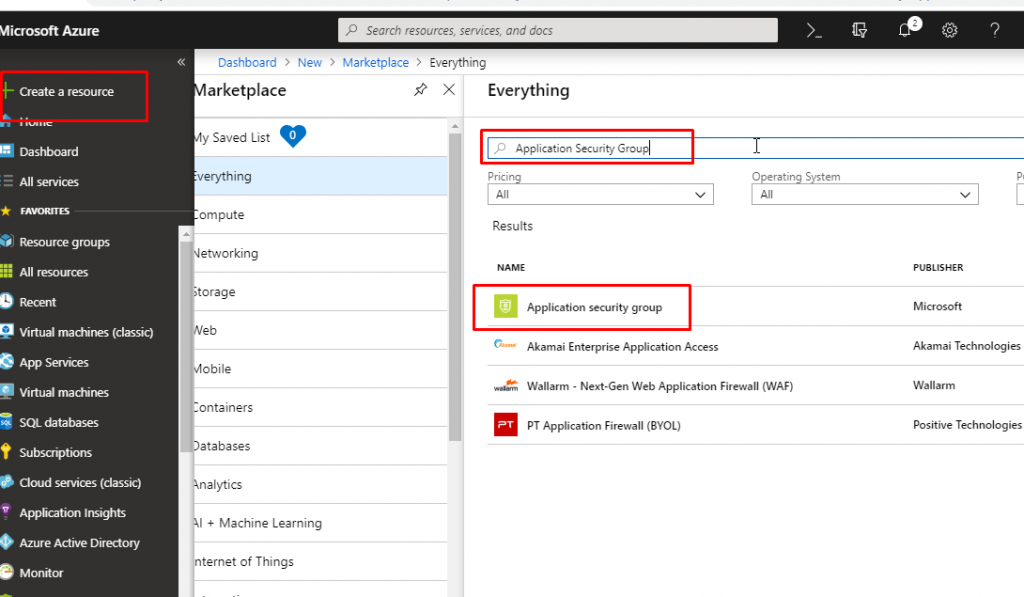
- Click on Create a resource and search for Application Security Group. Select Application security group from the results.
- Select the appropriate subscription and choose the resource group that we have created for this demo. Give name ‘Our Demo ASG’ and select the region as the same as you have kept in previous resources.

- Once the Application Security Group gets created, go to ASGDemoVM1 and go to its Networking tab. Click on ‘Configure the application security groups’.
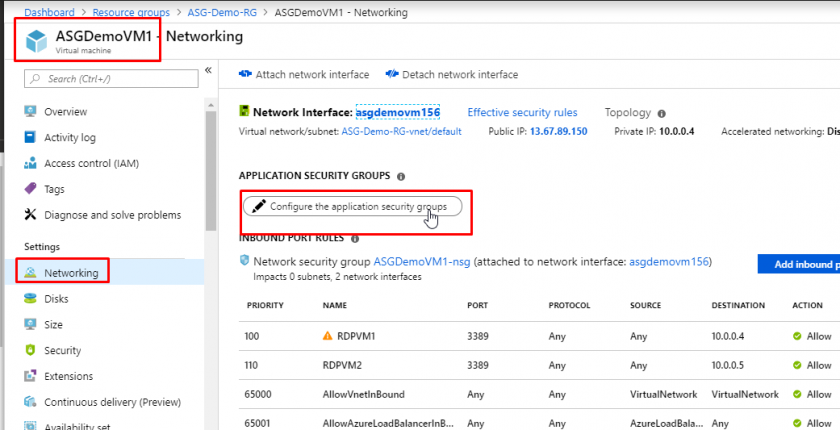
- Select ‘Our Demo ASG’ which would be under the resource group ASG-Demo-RG and click on Save.
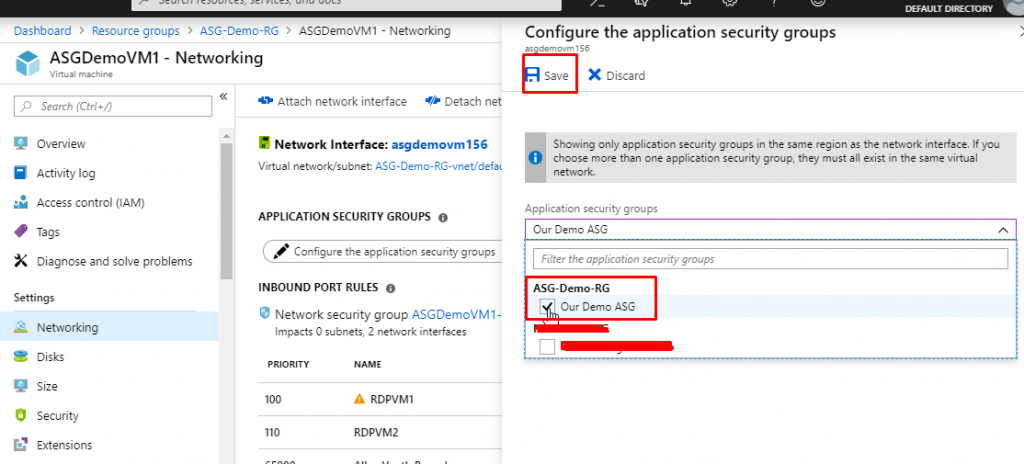
- You will see that the ASG would now be associated to the VM. You can also associate multiple ASGs with one single VM if that falls under your requirements. Right now, we are not going to do that.
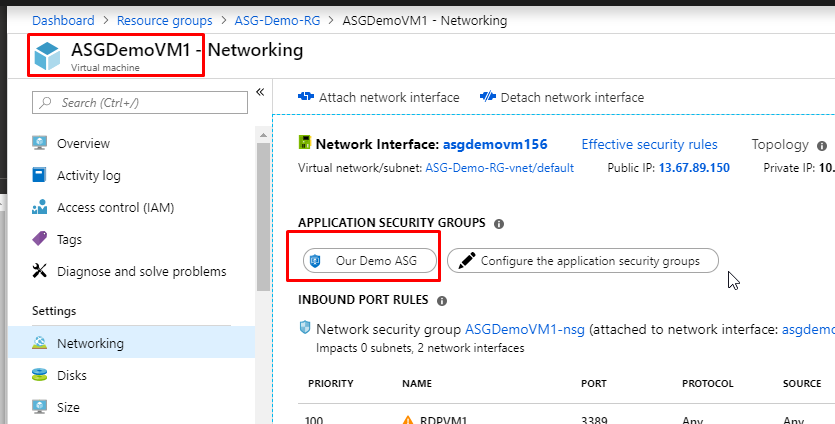
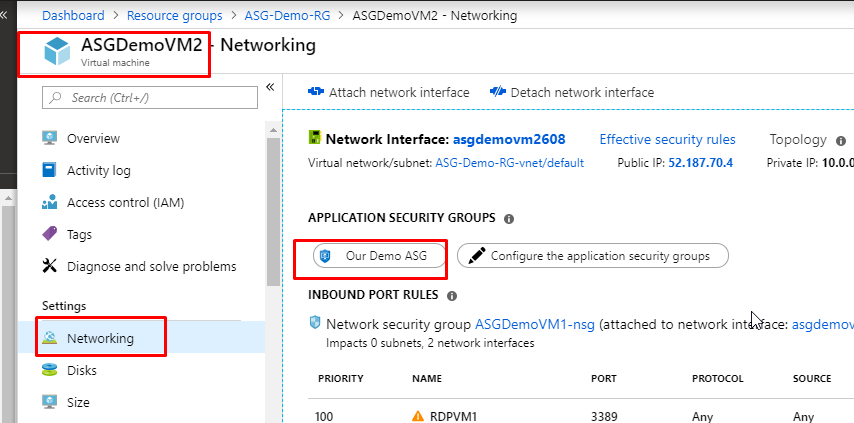
- Do the same for ASGDemoVM2.
- Now, go to the NSG and delete the existing rule RDPVM1.
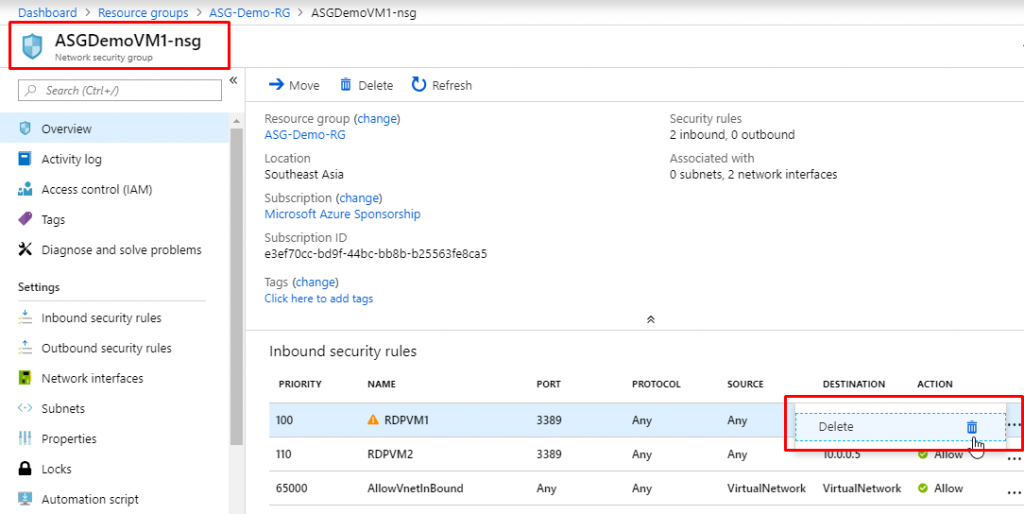
- Do the same for rule RDPVM2 as well.
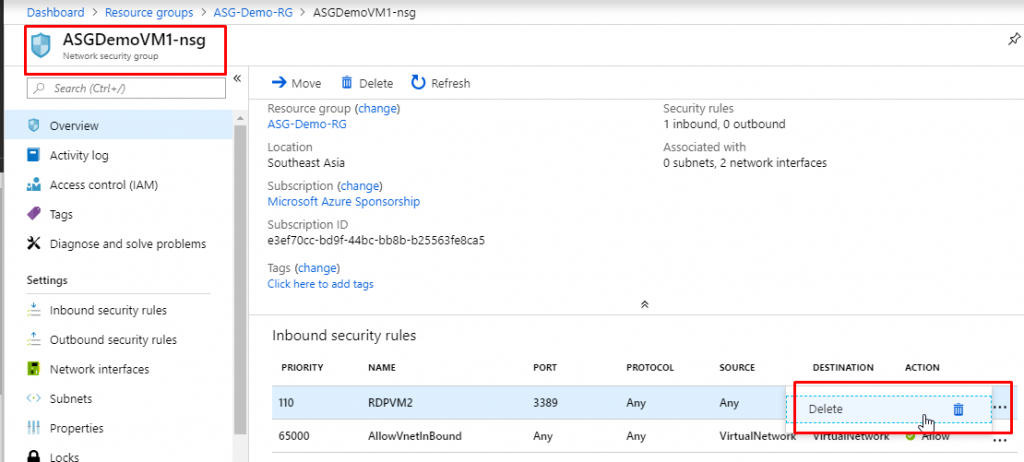
- Now we don’t have any RDP rules that would allow us to establish an RDP connection to the VMs.
- So we won’t be able to connect to the VMs now. You can go and check if you want to.
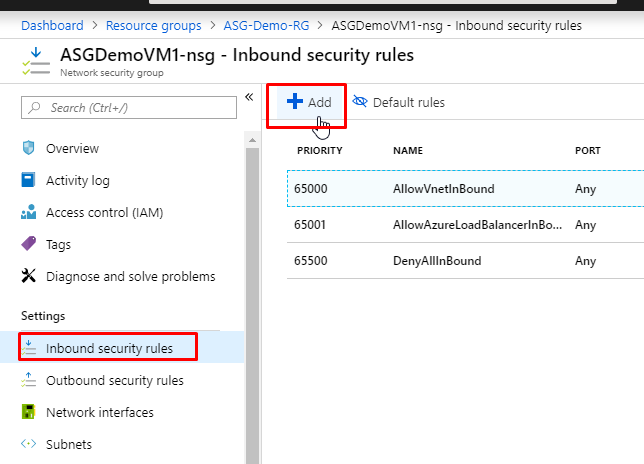
- Now we will create a single rule for both the VMs that fall under the Application Security Group that we have created.
- Go to Inbound security rules and click on Add.
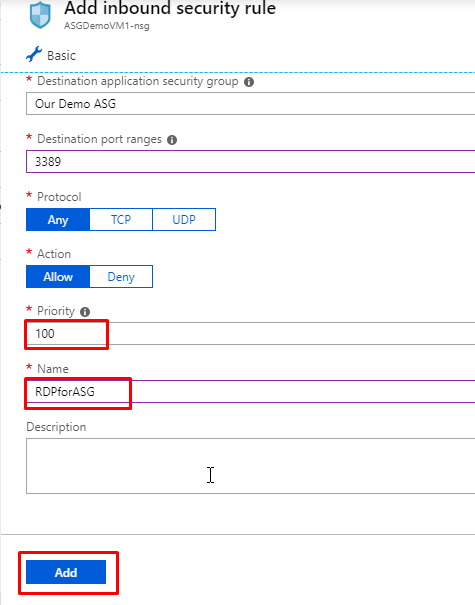
- Keep the source, sort port ranges default. In the Destination, choose ‘Application Security Group’. And in the destination application security group, choose the one that we have created, which is ‘Our Demo ASG’. Keep protocol as any and action as allow.
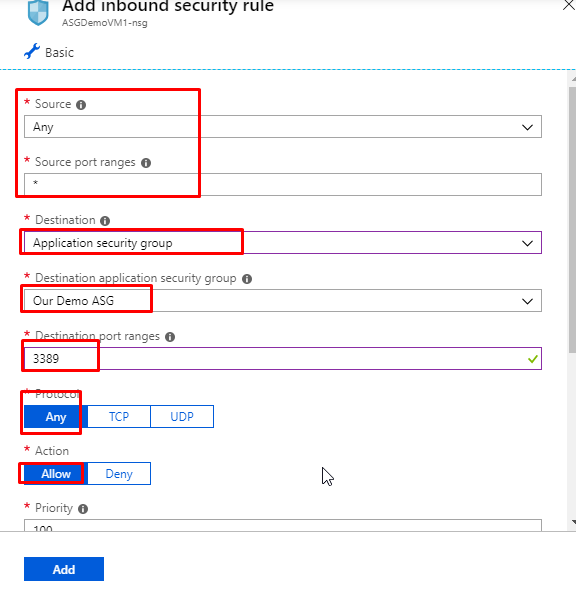
- Give priority as 100 and name as RDPforASG and click on Add.
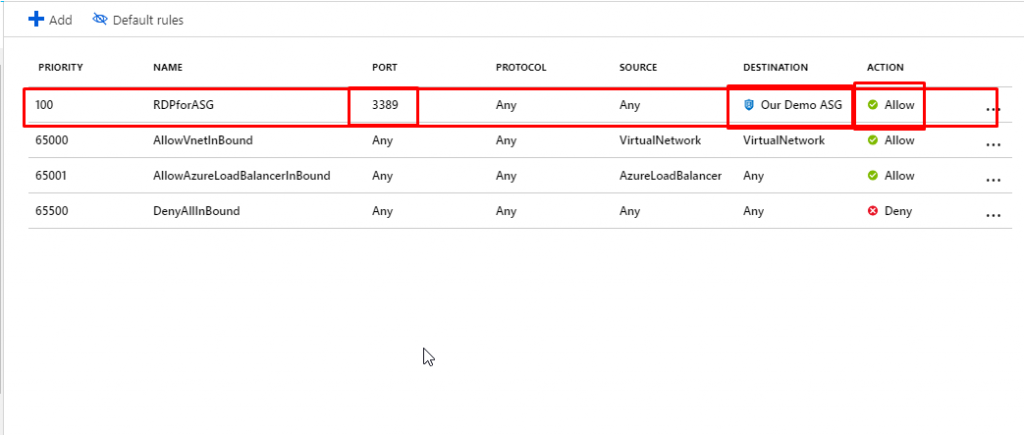
- You will see that we have now only one RDP rule that applies to the destination Our Demo ASG. Right now we have just 2 VMs. In real time, we could have more than that.
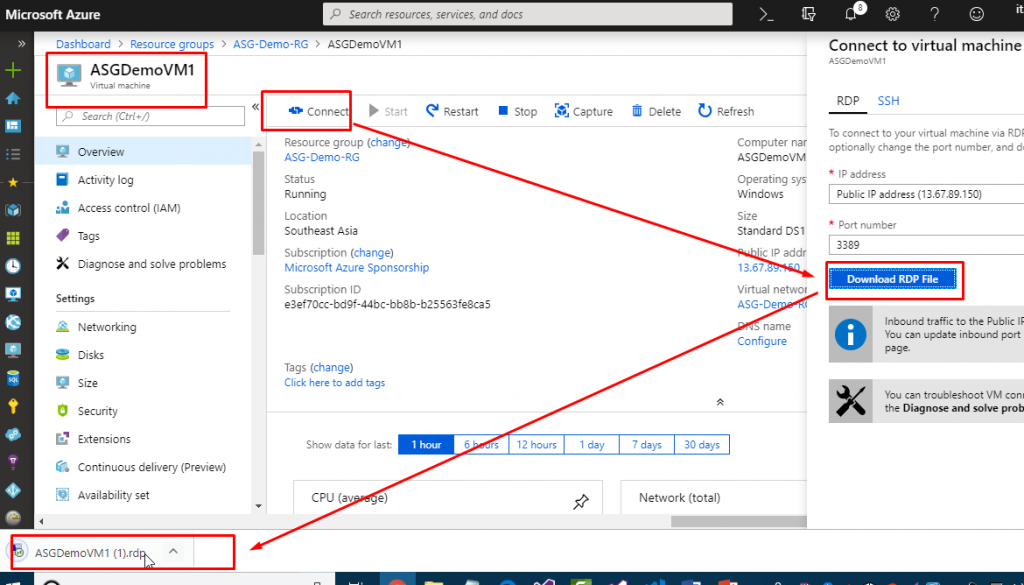
- Go to ASGDemoVM1 and download the RDP file to connect.
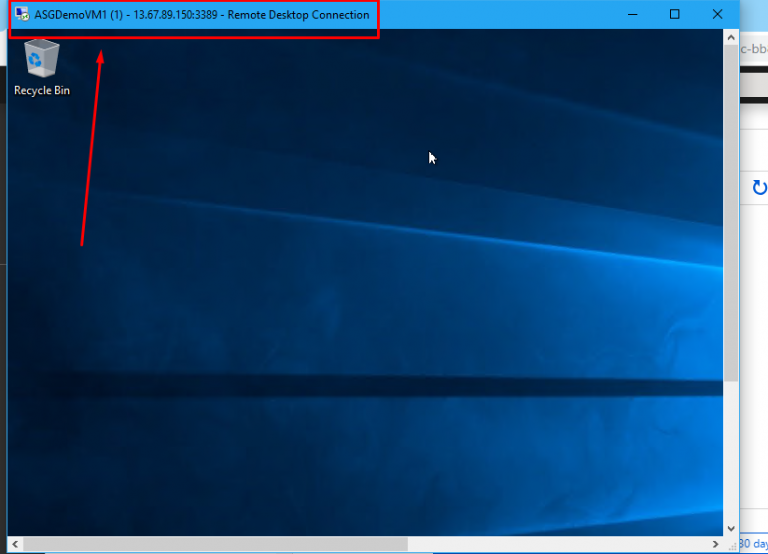
- You will be able to connect to the VM. Similarly, you can go and try to connect to VM2 and you would be able to connect to that one as well.
- This was just a basic example of Application Security Group.
- The real time use of this would be much more detailed and helpful.